Document Metadata
Format: PDF 1.4
Title: Configure and Troubleshoot PLAR for Analog Phone (ATA 190)
Producer: iText® 5.5.7 ©2000-2015 iText Group NV (AGPL-version)
Creation Date: D:20170807020044-05'00'
Mod Date: D:20170807001505-07'00'
Page 1
Configure and Troubleshoot PLAR for Analog
Phone (ATA 190)
Contents
Introduction
Prerequisites
Requirements
Components Used
Background Information
Configure
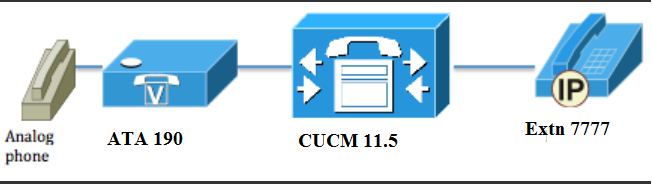
Network Diagram
Configurations
Verify
Troubleshoot
Introduction
This document describes how to configure and Troubleshoot Public Line Automatic Ringdown
(PLAR) for Cisco Analog Telephone Adapter (ATA) 190 in Cisco Unified Communication Manager
Solution (CUCM).
Contributed by Sachin Kalekar, Cisco TAC Engineer.
Prerequisites
Requirements
Cisco recommends that you have knowledge of these topics:
ATA basic configuration
G
CUCM basic configuration
G
Components Used
Cisco Unified Communications Manager 11.5.1.12018-1
G
ATA 190 version ATA190.1-2-2-003
G
The information in this document was created from the devices in a specific lab environment. All of
the devices used in this document started with a cleared (default) configuration. If your network is
live, make sure that you understand the potential impact of any command.
Background Information
The Cisco ATA 190 Series Analog Telephone Adapters are standards-based communications
Page 2
devices that turn traditional telephone and fax communications devices into IP devices. The
adaptors are managed from your network and addresses the need of users that connect to
enterprise networks, small offices, or voice-over-IP (VoIP) services from the cloud.
ATA 190 is a Session Initiation Protocol (SIP) device. PLAR is common feature for ATA devices.
PLAR is a feature which sends a call to one preconfigured extension once off-hook, known as hot-
dial configuration.
Configure
Network Diagram
Configurations
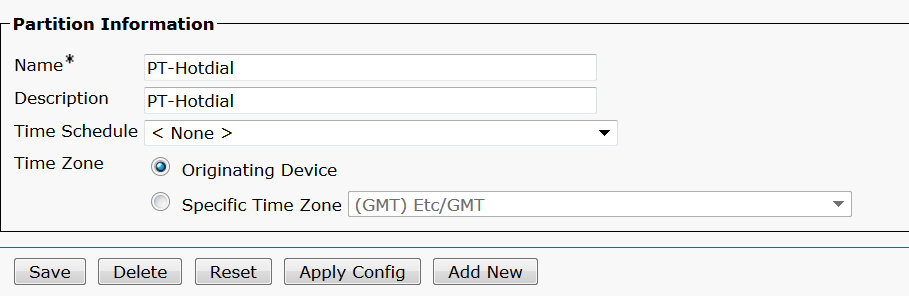
Step 1. Enter the value PT-Hotdial in order to create a new partition.
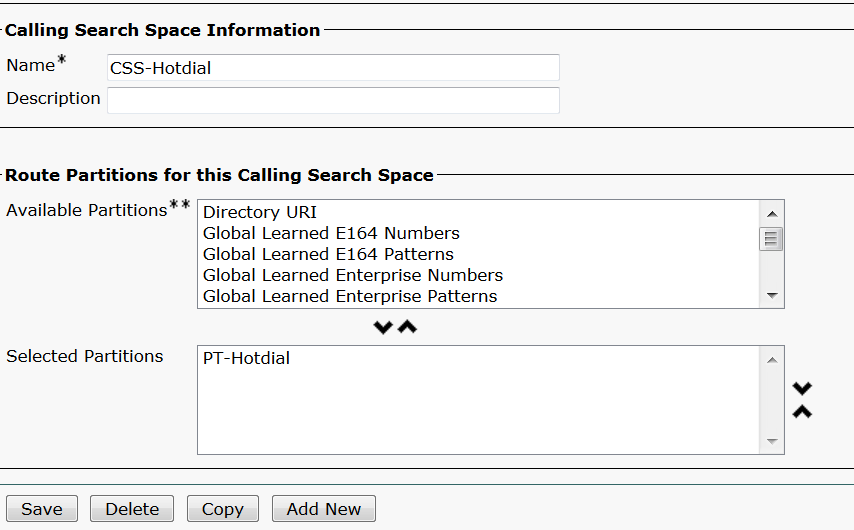
Step 2. Enter the new Calling Search Space (CSS) value CSS-Hotdial and add Partition PT-
Hotdial in CSS-Hotdial, as shown in the image:
Page 3
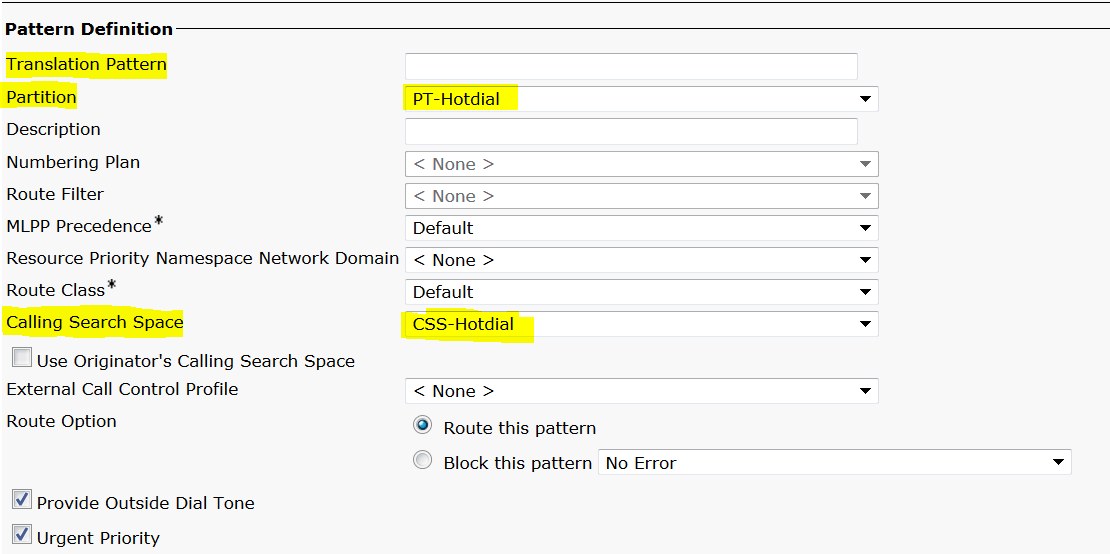
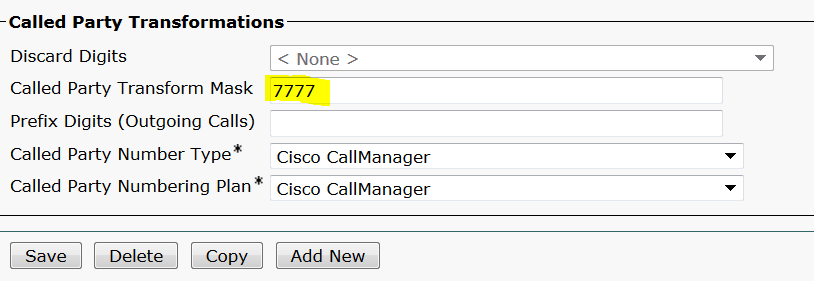
Step 3. Create new Translation pattern with blank pattern.
As shown in the image, keep the Called Party Transform Mask as the destination number.
Page 4
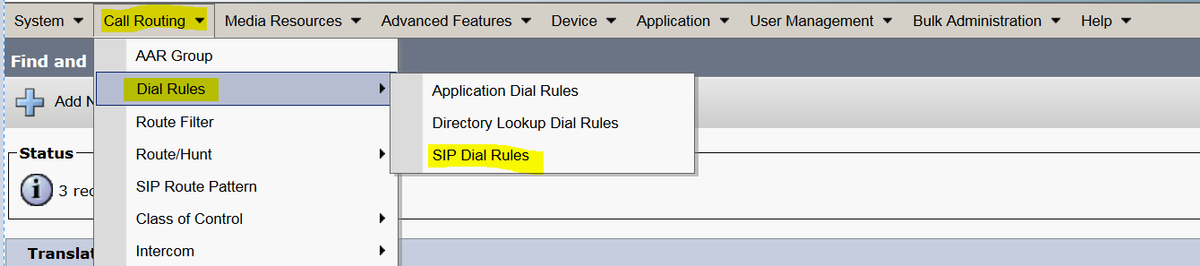
Step 4.To work PLAR/Hotdial configuration you have to create the SIP dial rule.
In Cisco Unified Communications Manager Administration, navigate to Call Routing > Dial Rules
SIP Dial Rules.
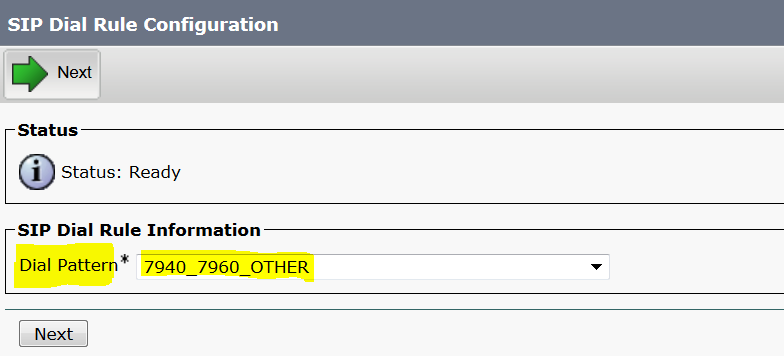
Now Add New, under Dial Pattern select 7940_7960_OTHER and click Next, as shown in the
image:
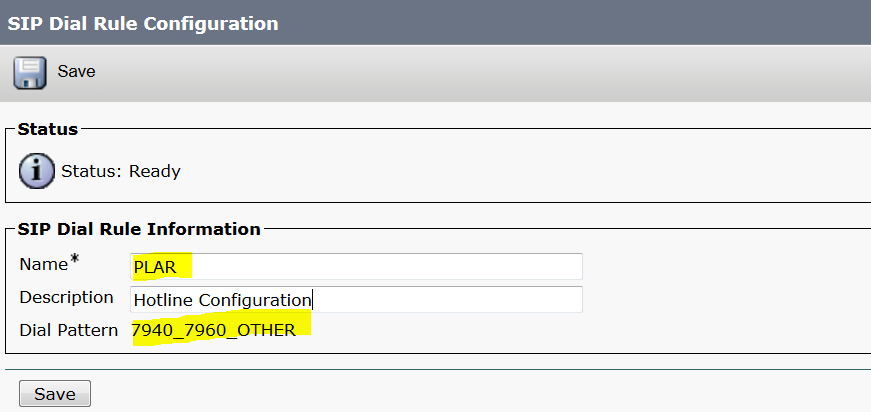
Enter a name for the pattern and click save. For example, PLAR, as shown in the image:
Page 5
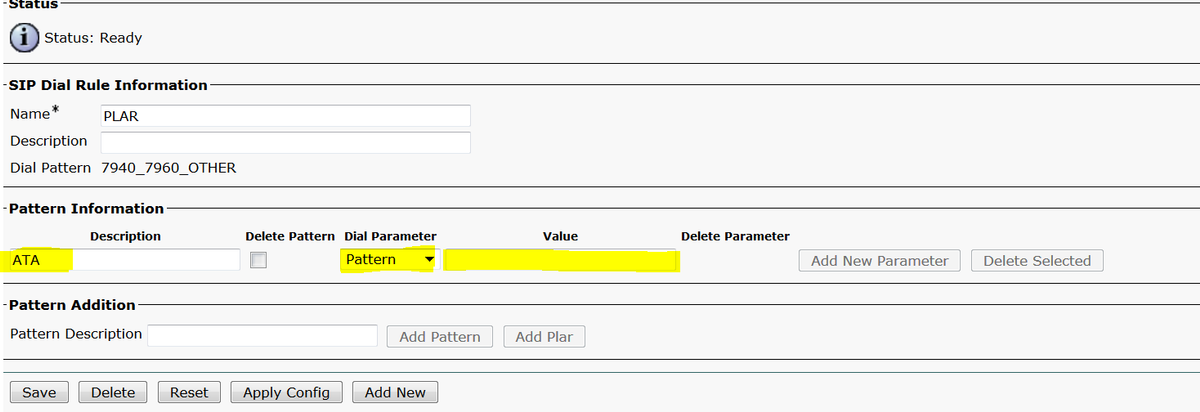
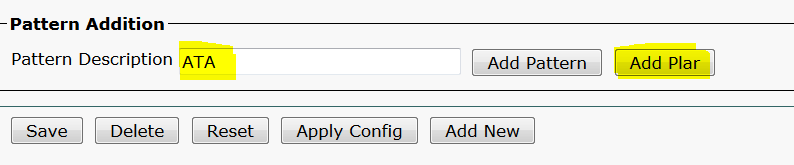
As shown in the image, type a description and click on Add Plar and click Save.
Note: Ensure you do not type anything under Value. It has to be empty and under Dial
Parameter it has to be Pattern
Step 5. Assign the SIP Dial Rules and CSS on the ATA device.
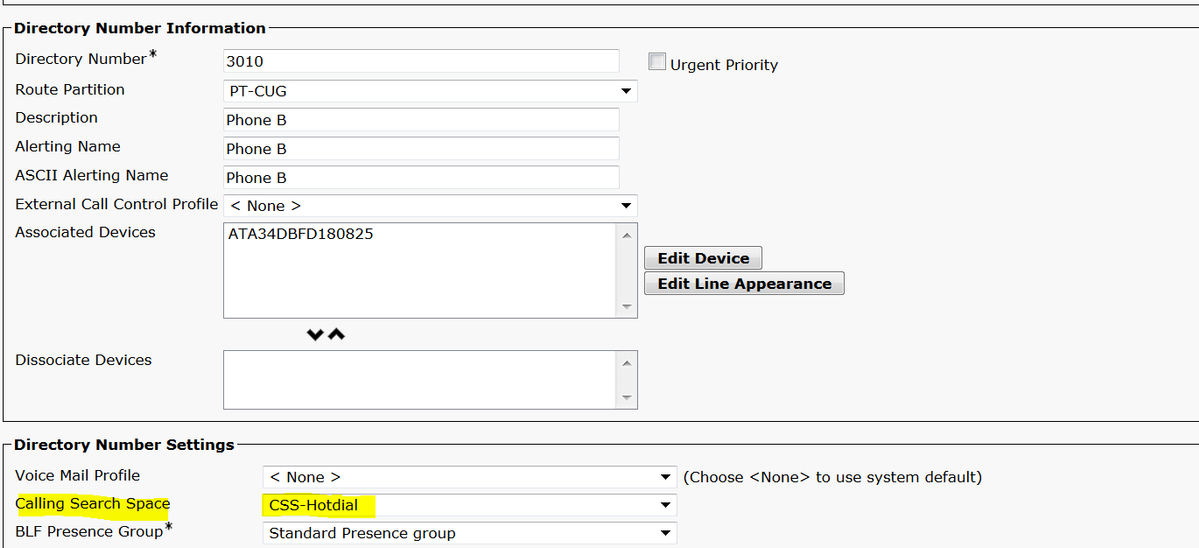
Assign the CSS on the ATA device (DN - Line CSS)
G
Page 6
Assign the SP dial Rule on the device configuration page.
G
Verify
Go off hook on the analog phone connected to the ATA and you should be able to see the
destination phone ringing. You should also hear ring back tone on the analog phone.
Troubleshoot
Check the ATA firmware supported for the PLAR configuration.
G
Check the ATA device registered and DN send/receive the call.
G
If still PLAR not working, remove the SIP dial rule from phone configuration page and re-
assign the same.
G