Document Metadata
Format: PDF 1.4
Title: Cisco Emergency Responder Command Line Interface Guide for Release 15
Author: Jayasree N
Creator: DITA Open Toolkit
Producer: XEP 4.30.961; modified using iText 2.1.7 by 1T3XT
Creation Date: D:20231218174902Z
Mod Date: D:20231218095008-08'00'
Page 1
CiscoEmergencyResponderCommandLineInterfaceGuideforRelease
15
First Published: 2023-12-18
Americas Headquarters
Cisco Systems, Inc.
170 West Tasman Drive
San Jose, CA 95134-1706
USA
http://www.cisco.com
Tel: 408 526-4000
800 553-NETS (6387)
Fax: 408 527-0883

Page 2
© 2023 Cisco Systems, Inc. All rights reserved.
Page 3
C O N T E N T S
New and Changed Information
1
C H A P T E R 1
New and Changed Information
1
CLI Basics
3
C H A P T E R 2
CLI Overview
3
Start CLI Session
3
Command Completion
4
Obtain Command Help
5
End CLI Session
6
Unsupported VMware Commands
6
CLI Commands
7
C H A P T E R 3
Delete Commands
7
delete account
7
delete dns
7
delete dscp
8
delete ipsec
9
delete process
9
delete smtp
10
File Commands
10
file check
10
file delete
11
file dump
11
file get
12
file list
13
file search
14
Cisco Emergency Responder Command Line Interface Guide for Release 15
iii

Page 4
file tail
15
file view
16
License Manager Commands
17
license smart deregister
17
license smart register idtoken
17
license smart register idtoken (force)
18
license smart renew auth
18
license smart renew ID
18
license smart call-home destination address default
18
license smart call-home destination address TransportGateway GatewayURL
19
license smart call-home proxy ProxyIP ProxyPort
19
license smart reservation enable
19
license smart reservation disable
20
license smart reservation cancel
20
license smart reservation request
20
license smart reservation install "<authorization-code>"
20
license smart reservation return
21
license smart reservation return-authorization "<authorization-code>"
21
license smart reservation set license_count
21
Run and Set commands
22
run sql
22
set account
22
set account enable
23
show accountlocking
24
set accountlocking disable
24
set accountlocking enable
24
set accountlocking unlocktime
25
set cert delete
25
set cert import
26
set cert regen
26
set cli pagination
27
set cli session timeout
27
set commandcount
28
set csr gen
29
Cisco Emergency Responder Command Line Interface Guide for Release 15
iv
Contents
Page 5
set date
29
set dscp
30
set dscp defaults
30
set dscp marking
31
set ipsec
32
set logging
32
set network cluster publisher hostname
33
set network cluster publisher ip
33
set network dhcp
33
set network dns
34
set network dns options
35
set network domain
35
set network failover
36
set network gateway
36
set network hostname
37
set network ip
39
set network max_ip_contrack
40
set network mtu
40
set network nic
41
set network ntp option
41
set network pmtud
41
set network restore
42
set network status
43
set password
44
set password age minimum
45
set password age maximum
45
set password complexity character disable
45
set password complexity character enable
46
set password complexity minimum-length
46
set password expiry maximum-age
47
set password expiry minimum-age enable
47
set password expiry minimum-age disable
47
set password expiry user maximum-age disable
48
set password expiry user maximum-age enable
48
Cisco Emergency Responder Command Line Interface Guide for Release 15
v
Contents
Page 6
set password expiry user minimum-age disable
48
set password expiry minimum-age enable
48
set password history
49
set password inactivity disable
49
set password inactivity enable
49
set password inactivity period
50
set password user admin
50
set password user security
50
set session maxlimit
51
set smtp
51
set timezone
52
set tls min-version
53
set tls resumption-timeout
54
set tls trace
54
set tls trace disable
54
set tls trace enable
55
set trace
55
set web-security
56
set webapp session maxlimit
57
set webapp session timeout
58
set workingdir
59
Show Commands
60
show account
60
show cert
60
show cli pagination
61
show cli session timeout
61
show csr list
62
show ctl
62
show date
62
show diskusage
62
show dscp all
63
show dscp defaults
63
show dscp marking
64
show dscp status
65
Cisco Emergency Responder Command Line Interface Guide for Release 15
vi
Contents
Page 7
show environment
65
show hardware
66
show ipsec
66
show license all
67
show license status
67
show license summary
67
show license tech support
68
show license trace
68
show license udi
68
show license usage
69
show logins
69
show memory
69
show myself
70
show network
70
show network cluster
72
show network ipprefs
72
set network ntp option
73
show open
73
show packages
74
show password expiry maximum-age
74
show password expiry minimum-age
74
show password expiry user maximum-age
74
show password expiry user minimum-age
75
show password history
75
show password inactivity
75
show process
75
show session maxlimit
77
show smtp
78
show stats io
78
show status
79
show tech all
79
show tech database
80
show tech database dump
80
show tech dbintegrity
80
Cisco Emergency Responder Command Line Interface Guide for Release 15
vii
Contents
Page 8
show tech dbinuse
80
show tech dbschema
81
show tech dbstateinfo
81
show tech network
81
show tech prefs
82
show tech runtime
83
show tech systables
83
show tech system
84
show tech table
84
show tech version
85
show timezone
85
show tls trace
86
show tls min-version
86
show tls resumption-timeout
87
show trace
87
show ups status
88
show version
88
show webapp session timeout
88
show web-security
89
show workingdir
89
Unset Commands
89
unset ipsec
89
unset network
90
unset network domain
90
Utils Commands
91
utils auditd
91
utils core list
92
utils core analyze
92
utils create report
92
utils create report database
93
utils configapisecurehttp
93
utils dbreplication dropadmindb
94
utils dbreplication status
94
utils dbreplication stop
94
Cisco Emergency Responder Command Line Interface Guide for Release 15
viii
Contents
Page 9
utils dbreplication repair
95
utils dbreplication reset
95
utils diagnose
95
utils diagnose test
96
utils disaster_recovery backup network
96
utils disaster_recovery cancel_backup
97
utils disaster_recovery device add network
97
utils disaster_recovery device delete
98
utils disaster_recovery device list
98
utils disaster_recovery estimate_tar_size
99
utils disaster_recovery history
99
utils disaster_recovery jschLogs
99
utils disaster_recovery schedule add
100
utils disaster_recovery schedule delete
100
utils disaster_recovery schedule disable
101
utils disaster_recovery schedule enable
101
utils disaster_recovery schedule list
102
utils disaster_recovery restore network
102
utils disaster_recovery show_backupfiles tape
103
utils disaster_recovery show_backupfiles network
103
utils disaster_recovery show_registration
104
utils disaster_recovery status
104
utils EnhancedSecurityMode
105
utils fior
106
utils fips
107
utils firewall
109
utils firewall ipv4
110
utils firewall ipv4 debug
110
utils firewall ipv4 list
111
utils firewall ipv4 status
111
utils filebeat
112
utils filebeat tls
113
utils import config
113
utils iostat
113
Cisco Emergency Responder Command Line Interface Guide for Release 15
ix
Contents
Page 10
utils iothrottle enable
114
utils iothrottle disable
114
utils iothrottle status
114
utils network arp
114
utils network capture eth0
115
utils network connectivity
116
utils network connectivity output
117
utils network host
117
utils network ping
117
utils network traceroute
118
utils ntp
118
utils ntp restart
118
utils ntp server add
119
utils ntp server delete
121
utils ntp server list
122
utils ntp start
123
utils os kerneldump
123
utils os kerneldump ssh
124
utils os secure
125
utils remote_account
125
utils reset_application_ui_administrator_name
126
utils reset_application_ui_administrator_password
126
utils service
127
utils service list
128
utils snmp
128
utils snmp config 1/2c community-string
129
utils snmp config 3 user
130
utils snmp config mib2
130
utils snmp walk 3
131
utils snmp get 3
132
utils system
132
utils system boot
133
utils system upgrade
134
utils sso
134
Cisco Emergency Responder Command Line Interface Guide for Release 15
x
Contents
Page 11
utils sso recovery-url
135
utils vmtools status
135
utils vmtools upgrade
135
Cisco Emergency Responder Command Line Interface Guide for Release 15
xi
Contents
Page 12
Cisco Emergency Responder Command Line Interface Guide for Release 15
xii
Contents
Page 13
C H A P T E R 1
New and Changed Information
• New and Changed Information, on page 1
New and Changed Information
The following table provides an overview of the significant changes to the features in this guide up to this
current release. The table does not provide an exhaustive list of all changes made to the guide or of the new
features up to this release.
Table 1: New Features and Changed Behavior in Emergency Responder
See
Description
Date
set account, on page 22
Updated the set account command
December 18, 2023
show open, on page 73
Updated the show open command
December 18, 2023
Cisco Emergency Responder Command Line Interface Guide for Release 15
1

Page 14
Cisco Emergency Responder Command Line Interface Guide for Release 15
2
New and Changed Information
New and Changed Information
Page 15
C H A P T E R 2
CLI Basics
• CLI Overview , on page 3
• Start CLI Session , on page 3
• Command Completion, on page 4
• Obtain Command Help , on page 5
• End CLI Session , on page 6
• Unsupported VMware Commands , on page 6
CLI Overview
This guide describes CiscoUnifiedOperating System (OS) commands that you can use on the Cisco Emergency
Responder (Emergency Responder) platform to perform basic operating system functions. The CiscoUnifiedOS
Administration web interface also makes these functions available. Typically, you would use the CLI only
when a problem occurs while you are using the CiscoUnifiedOS Administration web interface.
The File I/O Reporting Service (FIOR) provides a kernel-based daemon for collecting file I/O per process. It
must be enabled from the CLI; it is disabled by default.
Note
Start CLI Session
You can access the CLI remotely or locally using the following methods:
• You can access the CLI remotely from a web client workstation, such as the workstation that you use
for Emergency Responder administration, by using secure shell (SSH) to connect securely to the
Emergency Responder.
• You can access the CLI locally by using the monitor and keyboard that you used during installation or
by using a terminal server that is connected to the serial port. Use this method if a problem exists with
the IP address.
Before you begin
Ensure that you have the following information, which is defined during installation:
• A primary IP address and hostname
Cisco Emergency Responder Command Line Interface Guide for Release 15
3


Page 16
• An administrator ID
• An administrator password
You need this information to log in to the Emergency Responder platform.
Procedure
Step 1
Depending on your method of access, do one of the following actions:
• From a remote system, use SSH to connect securely to the Emergency Responder platform. In your SSH
client, enter:
ssh adminname@hostname
adminnam specifies the administrator ID and hostname specifies the hostname that was defined during
installation.
For example, ssh admin@cer-1
• From a direct connection, you receive this prompt automatically:
cer-1 login:
cer-1 represents the host name of the system.
Enter the administrator ID that was defined during installation.
Step 2
Enter the password that was defined at installation.
The CLI prompt appears. The prompt represents the administrator ID; for example:
admin:
You can now use any CLI command.
Command Completion
To complete commands, use Tab:
Procedure
• Enter the start of a command and press Tab to complete the command. For example, if you enter se and
press Tab, se is expanded to the set command.
• Enter a full command name and press Tab to display all the commands or subcommands that are available.
For example, if you enter set and press Tab, you see all of the set subcommands. An asterisk (*) identifies
the commands that have subcommands.
• PressTab to continue. The current command line repeats; no additional expansion is available.
Cisco Emergency Responder Command Line Interface Guide for Release 15
4
CLI Basics
Command Completion
Page 17
Obtain Command Help
You can obtain two kinds of help on any command:
• Detailed help that includes a definition of the command and an example of its use
• Short query help that includes only command syntax
Procedure
Step 1
To get detailed help, at the CLI prompt enter the help command which specifies the command name or the
command and parameter.
Example:
admin:help file list activelog
activelog help:
This will list active logging files
options are:
page - pause output
detail - show detailed listing
reverse - reverse sort order
date - sort by date
size - sort by size
file-spec can contain '*' as wildcards
Example:
admin:file list activelog platform detail
02 Dec,2004 12:00:59 <dir> drf
02 Dec,2004 12:00:59 <dir> log
16 Nov,2004 21:45:43 8,557 enGui.log
27 Oct,2004 11:54:33 47,916 startup.log
dir count = 2, file count = 2
Step 2
To query only command syntax, at the CLI prompt enter ?, which represents the command name or the
command and parameter.
If you enter a question mark (?) after a menu command, such as set, the question mark functions
like the Tab key and lists the commands that are available.
Note
Example:
admin:file list activelog?Syntax:
file list activelog file-spec [options]
file-spec mandatory file to view
options optional page|detail|reverse|[date|size]
Cisco Emergency Responder Command Line Interface Guide for Release 15
5
CLI Basics
Obtain Command Help
Page 18
End CLI Session
Procedure
To end a CLI session, enter quit at the CLI prompt.
If you are logged in remotely, you are logged off and the SSH session is drops. If you are logged in locally,
you are logged off and the login prompt returns.
Unsupported VMware Commands
The following list shows the VMware commands currently not supported.
• show environment fans
• show environment power-supply
• show environment temperatures
• show memory size
• show memory count
• show memory modules all
• utils create report hardware
• utils snmp hardware-agents restart
• utils snmp hardware-agents start
• utils snmp hardware-agents status
• utils snmp hardware-agents stop
Cisco Emergency Responder Command Line Interface Guide for Release 15
6
CLI Basics
End CLI Session
Page 19
C H A P T E R 3
CLI Commands
• Delete Commands, on page 7
• File Commands, on page 10
• License Manager Commands, on page 17
• Run and Set commands, on page 22
• Show Commands, on page 60
• Unset Commands, on page 89
• Utils Commands, on page 91
Delete Commands
delete account
This command allows you to delete an administrator account.
Command Syntax
delete account account-name
Syntax Description
Description
Parameters
The name of an administrator account
account-name
Requirements
Command privilege level: 4
Allowed during upgrade: No
delete dns
This command allows you to delete the IP address for a DNS server.
Cisco Emergency Responder Command Line Interface Guide for Release 15
7

Page 20
Command Syntax
delete dns ip-address
Syntax Description
Description
Parameters
The IP address of the DNS server that you want to delete.
ip-address
Usage Guidelines
The system asks whether you want to continue to execute this command.
If you continue, this command causes a temporary loss of network connectivity.
Caution
Requirements
Command privilege level: 1
Allowed during upgrade: No
delete dscp
This command deletes a DSCP port tag.
Command Syntax
delete dscp [port-tag]
Syntax Description
Description
Parameters
Represents a DSCP port tag, which is a string that is mapped to
a TCP or UDP port to identify the application that uses the port.
This value is for the portTag field displayed when you use the
command show dscp defaults. The set of port tags is predefined.
[port-tag]
Useage Guideline
After you delete an enabled port tag, DSCP marking on that port tag stops. You can recreate a deleted port
tag when you use the set dscp marking command; enter the name of the port tag that you previously deleted.
Use the command show dscp defaults to list the configured port tags
Tip
Command Mode
Administrator (admin:)
Cisco Emergency Responder Command Line Interface Guide for Release 15
8
CLI Commands
delete dscp


Page 21
delete ipsec
This command allows you to delete IPsec policies and associations.
Command Syntax
delete ipsec policy{ALL| policy-name}
association policy-name {ALL| association-name}
Syntax Description
Description
Parameters
An IPsec policy.
policy-name
An IPsec association
association-name
Requirements
Command privilege level: 1
Allowed during upgrade: No
delete process
This command allows you to delete a particular process.
Command Syntax
delete process process-id [force | terminate | crash]
Syntax Description
Description
Parameters
The process ID number.
process-id
(Optional) Tells the process to stop.
force
(Optional) Tells the operating system to terminate the process.
terminate
(Optional) Crashes the process and produces a crash dump.
crash
Usage Guidelines
Use the force option only if the command alone does not delete the process and use the terminate option
only if force does not delete the process.
Requirements
Command privilege level: 1
Allowed during upgrade: Yes
Cisco Emergency Responder Command Line Interface Guide for Release 15
9
CLI Commands
delete ipsec
Page 22
delete smtp
This command allows you to delete the SMTP host.
Command Syntax
delete smtp
Requirements
Command privilege level: 1
Allowed during
File Commands
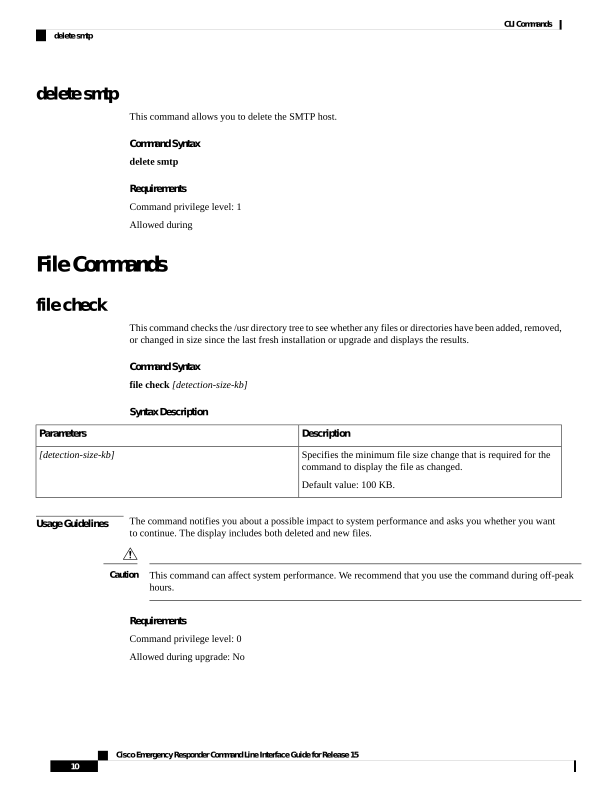
file check
This command checks the /usr directory tree to see whether any files or directories have been added, removed,
or changed in size since the last fresh installation or upgrade and displays the results.
Command Syntax
file check [detection-size-kb]
Syntax Description
Description
Parameters
Specifies the minimum file size change that is required for the
command to display the file as changed.
Default value: 100 KB.
[detection-size-kb]
Usage Guidelines
The command notifies you about a possible impact to system performance and asks you whether you want
to continue. The display includes both deleted and new files.
This command can affect system performance. We recommend that you use the command during off-peak
hours.
Caution
Requirements
Command privilege level: 0
Allowed during upgrade: No
Cisco Emergency Responder Command Line Interface Guide for Release 15
10
CLI Commands
delete smtp

Page 23
file delete
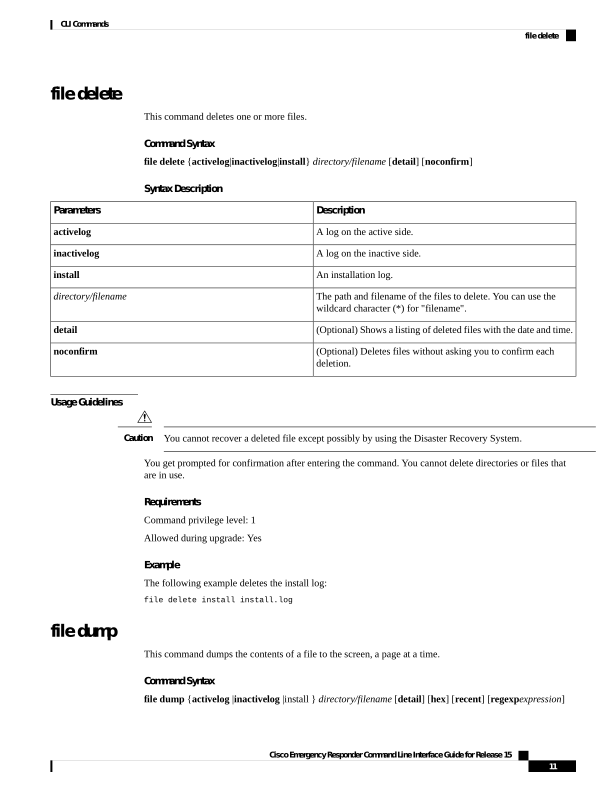
This command deletes one or more files.
Command Syntax
file delete {activelog|inactivelog|install} directory/filename [detail] [noconfirm]
Syntax Description
Description
Parameters
A log on the active side.
activelog
A log on the inactive side.
inactivelog
An installation log.
install
The path and filename of the files to delete. You can use the
wildcard character (*) for "filename".
directory/filename
(Optional) Shows a listing of deleted files with the date and time.
detail
(Optional) Deletes files without asking you to confirm each
deletion.
noconfirm
Usage Guidelines
You cannot recover a deleted file except possibly by using the Disaster Recovery System.
Caution
You get prompted for confirmation after entering the command. You cannot delete directories or files that
are in use.
Requirements
Command privilege level: 1
Allowed during upgrade: Yes
Example
The following example deletes the install log:
file delete install install.log
file dump
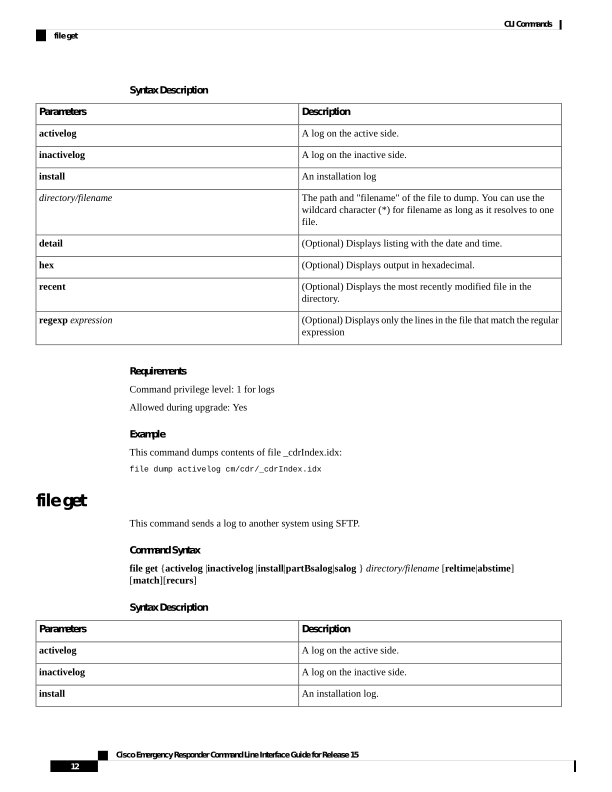
This command dumps the contents of a file to the screen, a page at a time.
Command Syntax
file dump {activelog |inactivelog |install } directory/filename [detail] [hex] [recent] [regexpexpression]
Cisco Emergency Responder Command Line Interface Guide for Release 15
11
CLI Commands
file delete

Page 24
Syntax Description
Description
Parameters
A log on the active side.
activelog
A log on the inactive side.
inactivelog
An installation log
install
The path and "filename" of the file to dump. You can use the
wildcard character (*) for filename as long as it resolves to one
file.
directory/filename
(Optional) Displays listing with the date and time.
detail
(Optional) Displays output in hexadecimal.
hex
(Optional) Displays the most recently modified file in the
directory.
recent
(Optional) Displays only the lines in the file that match the regular
expression
regexp expression
Requirements
Command privilege level: 1 for logs
Allowed during upgrade: Yes
Example
This command dumps contents of file _cdrIndex.idx:
file dump activelog cm/cdr/_cdrIndex.idx
file get
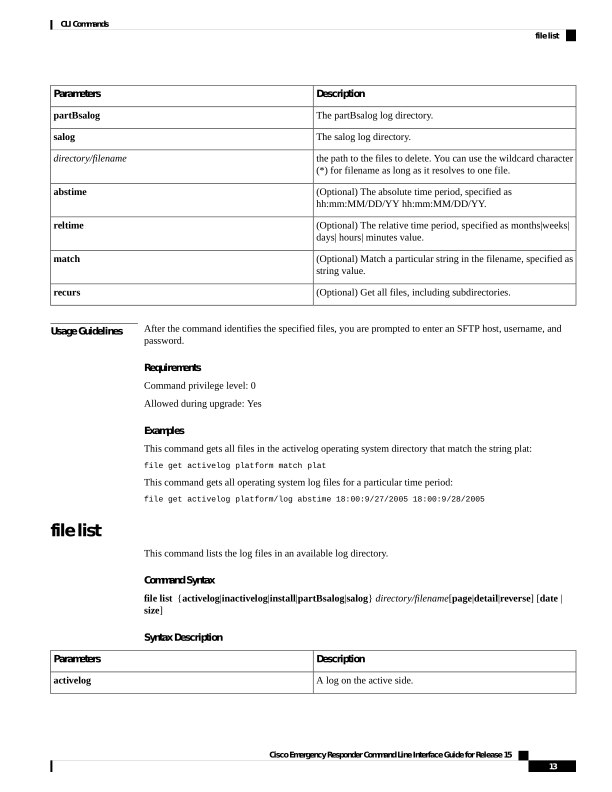
This command sends a log to another system using SFTP.
Command Syntax
file get {activelog |inactivelog |install|partBsalog|salog } directory/filename [reltime|abstime]
[match][recurs]
Syntax Description
Description
Parameters
A log on the active side.
activelog
A log on the inactive side.
inactivelog
An installation log.
install
Cisco Emergency Responder Command Line Interface Guide for Release 15
12
CLI Commands
file get
Page 25
Description
Parameters
The partBsalog log directory.
partBsalog
The salog log directory.
salog
the path to the files to delete. You can use the wildcard character
(*) for filename as long as it resolves to one file.
directory/filename
(Optional) The absolute time period, specified as
hh:mm:MM/DD/YY hh:mm:MM/DD/YY.
abstime
(Optional) The relative time period, specified as months|weeks|
days| hours| minutes value.
reltime
(Optional) Match a particular string in the filename, specified as
string value.
match
(Optional) Get all files, including subdirectories.
recurs
Usage Guidelines
After the command identifies the specified files, you are prompted to enter an SFTP host, username, and
password.
Requirements
Command privilege level: 0
Allowed during upgrade: Yes
Examples
This command gets all files in the activelog operating system directory that match the string plat:
file get activelog platform match plat
This command gets all operating system log files for a particular time period:
file get activelog platform/log abstime 18:00:9/27/2005 18:00:9/28/2005
file list
This command lists the log files in an available log directory.
Command Syntax
file list {activelog|inactivelog|install|partBsalog|salog} directory/filename[page|detail|reverse] [date |
size]
Syntax Description
Description
Parameters
A log on the active side.
activelog
Cisco Emergency Responder Command Line Interface Guide for Release 15
13
CLI Commands
file list
Page 26
Description
Parameters
A log on the inactive side.
inactivelog
An installation log.
install
The partBsalog log directory.
partBsalog
The salog log directory.
salog
The path to the directory to list. You can use a wildcard character
(*) for directory as long as it resolves to one directory.
directory
(Optional) Shows the output one screen at a time.
page
(Optional) Shows a detailed listing with date and time.
detail
(Optional) Reverse the sort direction.
reverse
(Optional) Sorts by date.
date
(Optional) Sorts by file size.
size
Requirements
Command privilege level: 1 for logs
Allowed during upgrade: Yes
Examples
This example lists operating system log files with details:
file list activelog platform/log page detail
This example lists directories created for Emergency Responder logs:
file list activelog er/logs
This example lists Emergency Responder logs in a specified directory by size:
file list activelog er/logs size
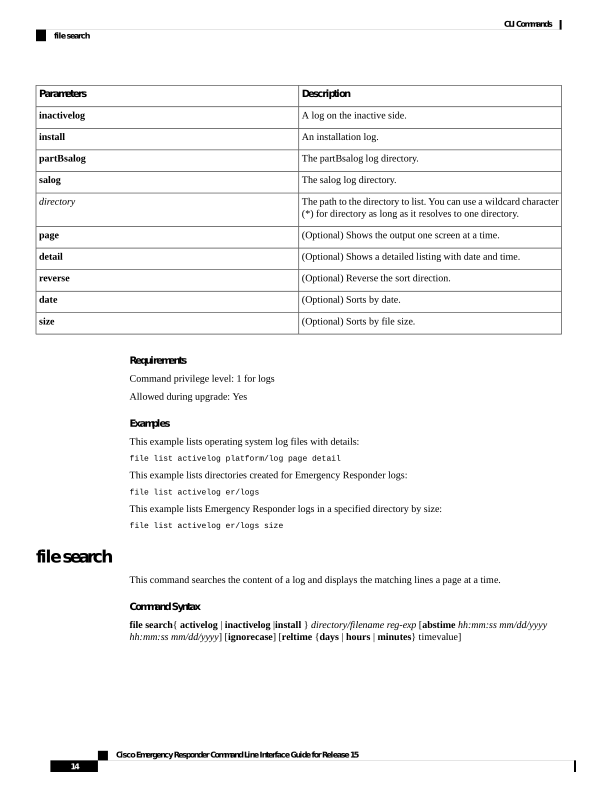
file search
This command searches the content of a log and displays the matching lines a page at a time.
Command Syntax
file search{ activelog | inactivelog |install } directory/filename reg-exp [abstime hh:mm:ss mm/dd/yyyy
hh:mm:ss mm/dd/yyyy] [ignorecase] [reltime {days | hours | minutes} timevalue]
Cisco Emergency Responder Command Line Interface Guide for Release 15
14
CLI Commands
file search
Page 27
Syntax Description
Description
Parameters
A log on the active side.
activelog
A log on the inactive side.
inactivelog
An installation log.
install
The path to the files to search. You can use the wildcard character
(*) to represent all or part of the filename.
directory/filename
A regular expression.
reg-exp
(Optional) The files to search based on file creation time. Enter
a start time and an end time.
abstime
(Optional) The file age is in days, hours, or minutes.
days|hours|minutes
(Optional) Ignores case when searching
ignorecase
(Optional) The files to search based on file creation time. Enter
the age of files to search.
reltime
(Optional) An absolute time, in the format hours:minutes:seconds
month/day/year.
hh:mm:ss mm/dd/yyyy
(Optional) The age of files to search. The unit of this value is
specified with the {days | hours | minutes} option.
timevalue
Usage Guidelines
Write the search term in the form of a regular expression, which is a special text string for describing a search
pattern.
If the search term is found in only one file, the filename appears at the top of the output. If the search term is
found in multiple files, each line of the output begins with the filename in which the matching line was found.
Requirements
Command privilege level: 0
Allowed during upgrade: Yes
Example
file search activelog platform/log/platform.log Err[a-z] ignorecase
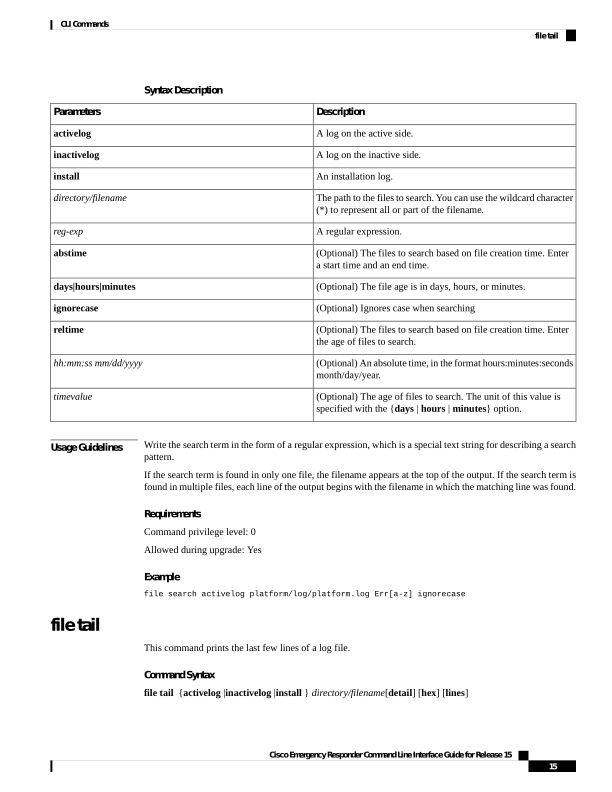
file tail
This command prints the last few lines of a log file.
Command Syntax
file tail {activelog |inactivelog |install } directory/filename[detail] [hex] [lines]
Cisco Emergency Responder Command Line Interface Guide for Release 15
15
CLI Commands
file tail
Page 28
Syntax Description
Description
Parameters
A log on the active side.
activelog
A log on the inactive side.
inactivelog
An installation log.
install
The path to the file to tail. You can use the wildcard character (*)
for filename as long as it resolves to one file.
directory/filename
(Optional) Long listing with date and time
detail
(Optional) Hexadecimal listing
hex
(Optional) Number of lines to display
lines
Requirements
Command privilege level: 1 for logs
Allowed during upgrade: Yes
Example
This example tails the operating system CLI log file:
file tail activelog platform/log/cli00001.log
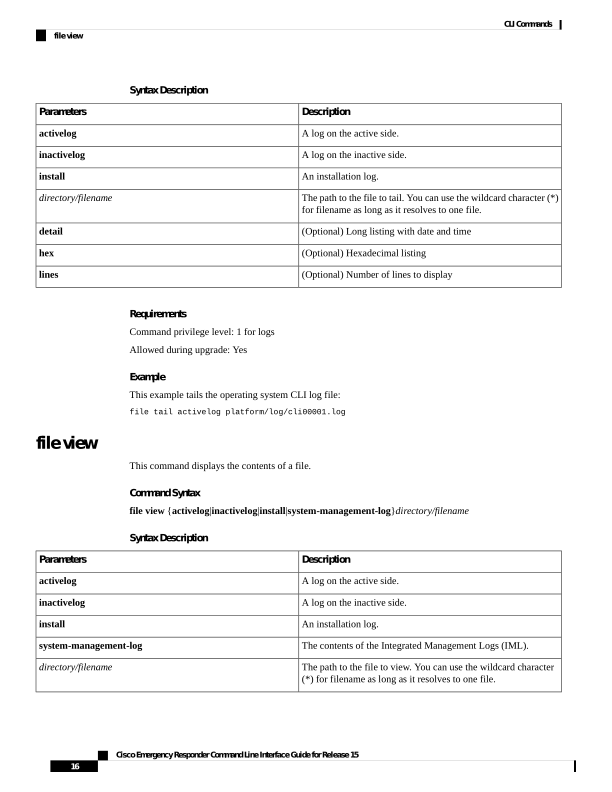
file view
This command displays the contents of a file.
Command Syntax
file view {activelog|inactivelog|install|system-management-log}directory/filename
Syntax Description
Description
Parameters
A log on the active side.
activelog
A log on the inactive side.
inactivelog
An installation log.
install
The contents of the Integrated Management Logs (IML).
system-management-log
The path to the file to view. You can use the wildcard character
(*) for filename as long as it resolves to one file.
directory/filename
Cisco Emergency Responder Command Line Interface Guide for Release 15
16
CLI Commands
file view
Page 29
Usage Guidelines
Do not use this command to view binary files because this can corrupt the terminal session.
Caution
Requirements
Command privilege level: 0
Allowed during upgrade: Yes
Examples
This example displays the install log:
file view install install.log
This example displays a particular CDR file:
file view activelog er/logs/CERAdmin01.log
License Manager Commands
license smart deregister
Use this command to unregister smart licensing on Cisco Emergency Responder and remove the product from
Cisco Smart Software Manager.
license smart deregister
Command Modes
Administrator (admin)
Requirements
Command privilege level: 4
Allowed during upgrade: Yes
license smart register idtoken
Use this command to register Cisco Emergency Responder with Cisco Smart Software Manager using an ID
token.
license smart register idtoken <token>
Command Modes
Administrator (admin)
Requirements
Command privilege level: 4
Allowed during upgrade: Yes
Cisco Emergency Responder Command Line Interface Guide for Release 15
17
CLI Commands
License Manager Commands

Page 30
license smart register idtoken (force)
Use this command to reregister Cisco Emergency Responder with Cisco Smart Software Manager using an
ID token.
license smart register idtoken <token> [force]
Command Modes
Administrator (admin)
Requirements
Command privilege level: 4
Allowed during upgrade: Yes
license smart renew auth
Use this command to manually renew the license usage information.
license smart renew auth
Command Modes
Administrator (admin)
Requirements
Command privilege level: 4
Allowed during upgrade: Yes
license smart renew ID
Use this command to manually renew the license registration.
license smart renew ID
Command Modes
Administrator (admin)
Requirements
Command privilege level: 4
Allowed during upgrade: Yes
license smart call-home destination address default
This command enables to update transport setting as Direct.
Command Syntax
license smart call-home destination address default
Command Modes
Administrator (admin:)
Cisco Emergency Responder Command Line Interface Guide for Release 15
18
CLI Commands
license smart register idtoken (force)
Page 31
Usage Guidelines
Requirements
Command privilege level: 4
Allowed during upgrade: Yes
license smart call-home destination address TransportGateway GatewayURL
This command enables to update transport setting as Transport Gateway/Satellite.
Command Syntax
license smart call-home destination address TransportGateway <url>
Command Modes
Administrator (admin:)
Usage Guidelines
Requirements
Command privilege level: 4
Allowed during upgrade: Yes
license smart call-home proxy ProxyIP ProxyPort
This command enables to update transport setting as as HTTP/HTTPS Proxy.
Command Syntax
license smart call-home proxy <ip> <port>
Command Modes
Administrator (admin:)
Usage Guidelines
Requirements
Command privilege level: 4
Allowed during upgrade: Yes
license smart reservation enable
This command enables the License Reservation.
Command Syntax
license smart reservation enable
Command Modes
Administrator (admin:)
Usage Guidelines
Requirements
Command privilege level: 4
Allowed during upgrade: Yes
Cisco Emergency Responder Command Line Interface Guide for Release 15
19
CLI Commands
license smart call-home destination address TransportGateway GatewayURL
Page 32
license smart reservation disable
Use this command to disable the license reservation feature.
license smart reservation disable
Command Modes
Administrator (admin)
Requirements
Command privilege level: 4
Allowed during upgrade: Yes
license smart reservation cancel
Use this command to cancel the ongoing reservation request.
Command Syntax
license smart reservation cancel
Command Modes
Administrator (admin)
Usage Guidelines
Requirements
Command privilege level: 4
Allowed during upgrade: Yes
license smart reservation request
Use this command to request for reservation code that is entered while performing License Reservation in
Cisco Smart Software Manager.
Command Syntax
license smart reservation request
Command Modes
Administrator (admin)
Usage Guidelines
Requirements
Command privilege level: 4
Allowed during upgrade: Yes
license smart reservation install "<authorization-code>"
Use this command to install the license reservation authorization-code generated on the Cisco Smart Software
Manager.
Cisco Emergency Responder Command Line Interface Guide for Release 15
20
CLI Commands
license smart reservation disable
Page 33
Command Syntax
license smart reservation install "<authorization-code>"
Command Modes
Administrator (admin)
Usage Guidelines
Requirements
Command privilege level: 4
Allowed during upgrade: Yes
license smart reservation return
Use this command to generate a return code that must be entered into the Cisco Smart Software Manager to
return the previously reserved licenses to the virtual account pool.
Command Syntax
license smart reservation return
Command Modes
Administrator (admin)
Usage Guidelines
Requirements
Command privilege level: 4
Allowed during upgrade: Yes
license smart reservation return-authorization "<authorization-code>"
Use this command to generate a return code using the authorization code specified on the command line. The
return code must be entered into the Cisco Smart Software Manager to return the licenses to the virtual account
pool.
license smart reservation return-authorization "<authorization-code>"
Command Modes
Administrator (admin)
Requirements
Command privilege level: 4
Allowed during upgrade: Yes
license smart reservation set license_count
Use this command to configure or update the license count for the system to operate within, when Permanent
License Reservation is enabled. License count configured using this CLI does not affect compliance status
and is for administrator reference only. The license count set by admin using the CLI will be displayed on the
Emergency Responder License Management UI screen.
Cisco Emergency Responder Command Line Interface Guide for Release 15
21
CLI Commands
license smart reservation return
Page 34
license smart reservation set license_count
Command Modes
Administrator (admin:)
Requirements
Command privilege level: 4
Allowed during upgrade: Yes
Applies to: Unified Communications Manager, Cisco Emergency Responder, and Cisco Unity Connection
Run and Set commands
run sql
This command allows you to run an SQL command.
Command Syntax
run sql sql_statement
Syntax Description
Description
Parameters
The SQL command to run.
sql_statement
Requirements
Command privilege level: 1
Allowed during upgrade: No
Examples
This example runs an SQL command:
run sql select * from cerserver
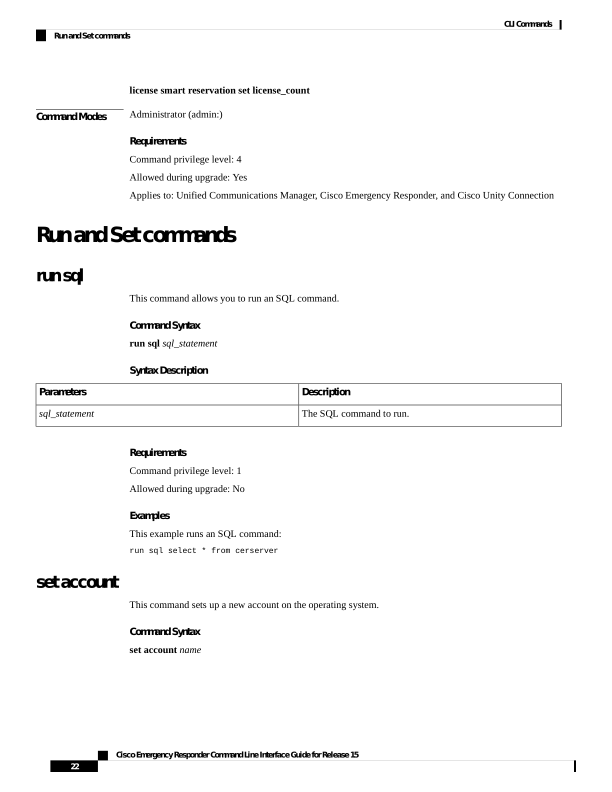
set account
This command sets up a new account on the operating system.
Command Syntax
set account name
Cisco Emergency Responder Command Line Interface Guide for Release 15
22
CLI Commands
Run and Set commands
Page 35
Syntax Description
Description
Parameters
The username for the new account.
Enter a name comprised of only alphabets or characters comprised
of alphanumeric characters (a-z, A-D, 0-9).
Umlaut characters are not supported.
Note
name
Usage Guidelines
After you enter the username, the system prompts you to enter the privilege level and password for the new
account.
Requirements
Command privilege level: 0
Allowed during upgrade: No
set account enable
This command is used to enable the user account if the account is disabled due to the password inactivity
feature.
Password inactivity period is the number of days of inactivity after a password has expired before the account
is disabled.
After entering this command, the user account is enabled with current system settings.The system settings are
Password min days, Password Max days, Password inactivity period.
Command Syntax
set account enable userid
Syntax Description
Description
Parameters
The name of the user account.
userid
Example
This example runs a set account enable command:
set account enable test
Enabling the account 'test' with current settings....
.....
Successfully enabled account 'test'
Requirements
Command privilege level: 1
Cisco Emergency Responder Command Line Interface Guide for Release 15
23
CLI Commands
set account enable
Page 36
Allowed during upgrade: Yes
show accountlocking
This command shows the current account locking settings.
Command Syntax
show accountlocking
Requirements
Command privilege level: 1
Allowed during upgrade: Yes
set accountlocking disable
This command disables accountlocking for the current administrator accounts.
Command Syntax
set accountlocking disable
Syntax Description
Description
Parameters
Disable account locking.
disable
Requirements
Command privilege level: 1
Allowed during upgrade: Yes
set accountlocking enable
This command enables accountlocking for the current administrator accounts.
Command Syntax
set accountlocking enable
Syntax Description
Description
Parameters
Enable account locking.
enable
Cisco Emergency Responder Command Line Interface Guide for Release 15
24
CLI Commands
show accountlocking
Page 37
Requirements
Command privilege level: 0
Allowed during upgrade: Yes
set accountlocking unlocktime
This command configures the unlock time for Emergency Responder OS administrator accounts in seconds.
Acceptable values should be equal to or greater than 300 seconds, but less than 3600 seconds (60 mins).
Command Syntax
set accountlocking unlocktime seconds
Syntax Description
Description
Parameters
The unlocktime in seconds.
seconds
Requirements
Command privilege level: 1
Allowed during upgrade: Yes
set cert delete
This command deletes the certificate test.pem for the unit IPsec.
Command Syntax
set cert delete [unit] [name]
Syntax Description
Description
Parameters
The name of the trust category.
unit
The certificate file name.
name
Example
set cert
delete ipsec test.pem
Requirements
Command privilege level: 1
Cisco Emergency Responder Command Line Interface Guide for Release 15
25
CLI Commands
set accountlocking unlocktime
Page 38
Allowed during upgrade: No
set cert import
This command imports the certificate for a specific unit | trust.
Command Syntax
set cert import [unit name]
Syntax Description
Description
Parameters
The name of the unit or trust.
unit name
Example
The following example runs a set cert import command:
set cert
import trust tomcat
Successfully regenerated certificate for tomcat.
Please restart services related to tomcat for the new certificate to become active.
Requirements
Command privilege level: 1
Allowed during upgrade: Yes
set cert regen
This command regenerates the certificate for the unit.
Command Syntax
set cert regen [name]
Parameter
Name is unit name
Syntax Description
Description
Parameters
The name of the unit.
Name
Cisco Emergency Responder Command Line Interface Guide for Release 15
26
CLI Commands
set cert import
Page 39
Example
This example runs a set cert regen command:
set cert regen tomcat
Successfully regenerated certificate for tomcat.
Please restart services related to tomcat for the new certificate to become active.
Requirements
Command privilege level: 1
Allowed during upgrade: No
set cli pagination
For the current CLI session, this command turns automatic pagination on or off.
Command Syntax
set cli pagination {on | off}
Syntax Description
Description
Parameters
Turns pagination on.
on
Turns pagination off.
off
Requirements
Level privilege: 1
Command privilege: 1
Allowed during upgrade: No
Example
admin:set cli pagination off
Automatic pagination is turned off
set cli session timeout
This command sets the time, in minutes, after which an active CLI session times out and disconnects.
Command Syntax
set cli session timeoutminutes
Cisco Emergency Responder Command Line Interface Guide for Release 15
27
CLI Commands
set cli pagination
Page 40
Syntax Description
Description
Parameters
Specifies the time, in minutes, that can elapse before an active
CLI session times out and disconnects:
• Value range: 5-99999 minutes
• Default value: 30 minutes
minutes
Useage Guidelines
Be aware that the new session timeout value becomes effective immediately for a new CLI session; however,
active sessions retain their original timeout value. Also the show cli session timeout command reflects the
new value, even if the current session does not use that value.
This setting gets preserved through a software upgrade and does not get reset to the default value.
Note
Command Mode
Administrator (admin:)
Requirements
Command privilege level: 1
Allowed during upgrade: No
set commandcount
This command changes the CLI command prompt so that it displays how many CLI commands have executed.
Command Syntax
set commandcount {enable | disable}
Syntax Description
Description
Parameters
Turns on command count.
enable
Turns off command count.
disable
Requirements
Command privilege level: 1
Allowed during upgrade: No
Cisco Emergency Responder Command Line Interface Guide for Release 15
28
CLI Commands
set commandcount

Page 41
set csr gen
It regenerates the certificate for the unit name.
Command Syntax
set csr gen name
Syntax Description
Description
Parameters
Specifies the unit on which the certificate is generated.
name
Example
set csr gen tomcat
Successfully regenerated certificate for tomcat.
Please restart services related to tomcat for the new certificate to become active.
Requirements
Command privilege level: 1
Allowed during upgrade: No
set date
This command sets the date on the system.
Command Syntax
set date HH:mm:ss:MM/DD/YY
Syntax Description
Description
Parameters
Represents the time format (24 hours format).
HH:mm:ss
Represents the date format.
This date format is also accepted: MM/DD/YYYY.
MM/DD/YY
Requirements
Command privilege level: 1
Allowed during upgrade: No
Cisco Emergency Responder Command Line Interface Guide for Release 15
29
CLI Commands
set csr gen
Page 42
Example
To set date and time to 2:10:33 p.m. February 13, 2008:
set date 14:10:33:02/13/08
set dscp
This command enables or disables DSCP marking on outgoing TCP or UDP packets. You can enable or
disable DSCP on a single port tag, or on all port tags at once.
Command Syntax
set dscp {enable | disable} {all| port_tag}
Syntax Description
Description
Parameters
Disables all DSCP port tags.
all
Represents a DSCP port tag, which is a string that is mapped to
a TCP or UDP port to identify the application that uses the port.
This value is for the portTag field displayed when you use the
command show dscp defaults.
The set of port tags is predefined.
port_tag
Command Mode
Administrator (admin:)
Requirements
Command privilege level: 1
Allowed during upgrade: No
set dscp defaults
This command sets the factory default DSCP settings for all of the port tags.
Command Syntax
set dscp defaults
Command Mode
Administrator (admin:)
Cisco Emergency Responder Command Line Interface Guide for Release 15
30
CLI Commands
set dscp
Page 43
Useage Guidelines
This command removes all non-default DSCP settings. The command show dscp defaults displays the factory
default DSCP settings.
Requirements
Command privilege level: 1
Allowed during upgrade: No
set dscp marking
This command sets DSCP markings on port tags by using well-known DSCP classes and numeric values.
Command Syntax
set dscp marking port_tag value
Syntax Description
Description
Parameters
Represents a DSCP port tag, which is a string that is mapped to
a TCP or UDP port to identify the application that uses the port.
This value is for the portTag field displayed when you use the
command show dscp defaults.
port_tag
A DSCP value. You can enter the name of a well-known DSCP
class or a numeric value in decimal or hexadecimal format.
Precede hexadecimal values with 0x or 0X.
value
Command Mode
Administrator (admin:)
Requirements
Command privilege level: 1
Allowed during upgrade: No
Useage Guidelines
The valid class names as defined by DSCP are:
• Class Selector: values CS0, CS1, CS2, CS3, CS5, CS6, CS7 The class selector (CS) values correspond
to IP Precedence values and are fully compatible with IP Precedence.
• Expedited Forwarding: value EF EF PHB is ideally suited for applications such as VoIP that require low
bandwidth, guaranteed bandwidth, low delay, and low jitter.
• Best Effort: value BE Also called default PHB, this value essentially specifies that a packet be marked
with 0x00, which gets the traditional best-effort service from the network router.
Cisco Emergency Responder Command Line Interface Guide for Release 15
31
CLI Commands
set dscp marking
Page 44
• Assured Forwarding: values AF11, AF12, AF13, AF21, AF22, AF23, AF41, AF42, AF43 There are four
types of Assured Forwarding classes, each of which has three drop precedence values. These precedence
values define the order in which a packet is dropped (if needed) due to network congestion. For example,
packets in AF13 class are dropped before packets in the AF12 class.
set ipsec
This command allows you to set IPSec policies and associations.
Command Syntax
set ipsec
policy {ALL | policy-name}
association policy-name {ALL | association-name}
Syntax Description
Description
Parameters
An IPSec policy.
policy-name
An IPSec association.
association-name
Requirements
Command privilege level: 1
Allowed during upgrade: No
set logging
This command allows you to enable or disable logging.
Command Syntax
set logging {enable | disable}
Syntax Description
Description
Parameters
Turns on logging.
enable
Turns off logging.
disable
Requirements
Command privilege level: 0
Cisco Emergency Responder Command Line Interface Guide for Release 15
32
CLI Commands
set ipsec
Page 45
Allowed during upgrade: No
set network cluster publisher hostname
This command configures the cluster publisher hostname. Changing the hostname is possible only from the
subscriber in a server group. This is supported when migrating from MCS to VMware platforms, but not in
any other scenarios.
A temporary loss of network connectivity occurs while the network is being restarted with the new
configuration.
Command Syntax
set network cluster publisher hostname name
Syntax Description
Description
Parameters
The hostname to be assigned.
name
set network cluster publisher ip
This command configures the cluster publisher IP address.
A temporary loss of network connectivity occurs while the network is being restarted with the new
configuration.
Command Syntax
set network cluster publisher ip addr
Syntax Description
Description
Parameters
Specifies the ip address of the network cluster.
ip addr
set network dhcp
This command enables or disables DHCP for Ethernet interface 0. You cannot configure Ethernet interface
1.
Command Syntax
set network dhcp eth0{enable| disable}{node_ip| net_mask| gateway_ip}
Cisco Emergency Responder Command Line Interface Guide for Release 15
33
CLI Commands
set network cluster publisher hostname
Page 46
Syntax Description
Description
Parameters
Specifies Ethernet interface 0.
eth0
This enables DHCP.
enable
This disables DHCP.
disable
The new static IP address for the server.
node_ip
The subnet mask for the server.
net_mask
The IP address of the default gateway.
gateway_ip
Usage Guidelines
The system asks whether you want to continue to execute this command.
If you continue, this command causes the system to restart. We recommend that you restart all nodes whenever
any IP address gets changed.
Caution
Requirements
Command privilege level: 1
Allowed during upgrade: No
set network dns
This command sets the IP address for the primary or secondary DNS server.
Command Syntax
set network dns {primary | secondary} ip-address
Syntax Description
Description
Parameters
The IP address of the primary or secondary DNS server.
ip-address
Usage Guidelines
The system asks whether you want to continue to execute this command.
If you continue, this command causes a temporary loss of network connectivity. If you change the IP address
of the DNS server, you must restart Cisco Tomcat. For more information, see utils service, on page 127.
Caution
Cisco Emergency Responder Command Line Interface Guide for Release 15
34
CLI Commands
set network dns

Page 47
Requirements
Command privilege level: 1
Allowed during upgrade: No
set network dns options
This command sets DNS options.
Command Syntax
set network dns options [timeout seconds] [attempts number] [rotate]
Syntax Description
Description
Parameters
Sets the DNS request timeout.
timeout
The DNS timeout period, in seconds.
seconds
Sets the number of times to attempt a DNS request before quitting.
attempts
Specifies the number of attempts.
number
Causes the system to rotate among the configured DNS servers,
distributing the load.
rotate
Requirements
Command privilege level: 0
Allowed during upgrade: Yes
set network domain
This command sets the domain name for the system.
Command Syntax
set network domain domain-name
Syntax Description
Description
Parameters
The system domain that you want to assign.
domain-name
Usage Guidelines
The system asks whether you want to continue to execute this command.
Cisco Emergency Responder Command Line Interface Guide for Release 15
35
CLI Commands
set network dns options
Page 48
If you continue, this command causes a temporary loss of network connectivity.
Caution
Requirements
Command privilege level: 1
Allowed during upgrade: No
set network failover
This command enables and disables network fault tolerance.
Command Syntax
failover {enable | disable}
Syntax Description
Description
Parameters
Enables network fault tolerance.
enable
Disables network fault tolerance.
disable
Requirements
Command privilege level: 1
Allowed during upgrade: No
set network gateway
This command enables you to configure the IP address of the network gateway.
Command Syntax
set network gateway ip-address
Syntax Description
Description
Parameters
The IP address of the network gateway that you want to assign.
ip-address
Usage Guidelines
The system asks whether you want to continue to execute this command.
Cisco Emergency Responder Command Line Interface Guide for Release 15
36
CLI Commands
set network failover

Page 49
If you continue, this command causes the system to restart.
Caution
Requirements
Command privilege level: 1
Allowed during upgrade: No
set network hostname
This command allows an administrator to set the network host name, change the IP address of the node, and
restart the system.
Before attempting this command, the administrator should have a valid DRF backup.
From Release 14SU2 onwards, tomcat and tomcat-ecdsa certificate must be exchanged between the publisher
and subscriber nodes before and after changing the ipaddress/hostname.
Note
Command Syntax
set network hostname hostname
Syntax Description
Description
Parameters
Represents the new network hostname of the system.
The host name must follow the rules for ARPANET
host names. It must start with an alphabetic
character, end with an alphanumeric character, and
consist of alphanumeric characters and hyphens.
The host name can have a maximum length of 63
characters.
Note
hostname
Command Mode
Administrator (admin:)
Requirements
Command privilege level: 1
Allowed during upgrade: No
Useage Guidelines
The system asks whether you want to continue to execute this command.
Cisco Emergency Responder Command Line Interface Guide for Release 15
37
CLI Commands
set network hostname


Page 50
If you continue, this command causes the system to restart.
Caution
Example
admin:set network hostname
WARNING: Changing this setting will invalidate software license on this server. The license
will have to be re-hosted.
Continue(y/n):
Continue (y/n)?y
ctrl-c: To quit the input.
*** W A R N I N G ***
Do not close this window without first canceling the command.
This command will automatically restart system services.
The command should not be issued during normal operating
hours.
Note: Please verify that the new hostname is a unique
name across the cluster and, if DNS services are
utilized, any DNS configuration is completed
before proceeding.
Security Warning : This operation will regenerate
all CUCM Certificates including any third party
signed Certificates that have been uploaded.
Enter the hostname:: app-lfwelty5
Would you like to change the network ip address at this time [yes]::
Warning: Do not close this window until command finishes.
ctrl-c: To quit the input.
*** W A R N I N G ***
Note: Please verify that the new ip address is unique
across the cluster.
Enter the ip address:: 106.1.34.154
Enter the ip subnet mask:: 255.0.0.0
Enter the ip address of the gateway:: 106.1.1.1
Hostname: app-lfwelty5
IP Address: 106.1.34.154
IP Subnet Mask: 255.0.0.0
Gateway: 106.1.1.1
Do you want to continue [yes/no]? yes
...
Cisco Emergency Responder Command Line Interface Guide for Release 15
38
CLI Commands
set network hostname

Page 51
The administrator can change both the hostname and IP address by responding yes. To change just the hostname,
respond no.
Note
set network ip
This command sets the IP address for Ethernet interface 0. You cannot configure Ethernet interface 1.
From Release 14SU2 onwards, tomcat and tomcat-ecdsa certificate must be exchanged between the publisher
and subscriber nodes before and after changing the ipaddress/hostname.
Note
Command Syntax
set network ip eth0 ip-address ip-mask
Syntax Description
Description
Parameters
Specifies Ethernet interface 0.
eth0
The IP address that you want assign.
ip-address
The IP mask that you want to assign.
ip-mask
Usage Guidelines
The system asks whether you want to continue to execute this command.
If you continue, this command restarts the following services:
• NIC driver
• NTP
• CLM
• Service Manager
Caution
Requirements
Command privilege level: 1
Allowed during upgrade: No
Cisco Emergency Responder Command Line Interface Guide for Release 15
39
CLI Commands
set network ip


Page 52
set network max_ip_contrack
This command sets the ip_conntrack_max value.
Command Syntax
set network max_ip_conntrack ip_conntrack_max
Syntax Description
Description
Parameters
Specifies the value for ip_conntrack_max.
ip_conntrack_max
set network mtu
This command sets the maximum MTU value.
Command Syntax
set network mtu mtu_max
Syntax Description
Description
Parameters
Specifies the maximum MTU value.
The system default MTU value equals 1500.
Note
mtu_max
Usage Guidelines
The system asks whether you want to continue to execute this command.
If you continue, the system temporarily loses network connectivity.
Caution
Requirements
Level privilege: 1
Command privilege: 1
Allowed during upgrade: No
Example
admin:set network mtu 576
W A R N I N G
This will cause the system to temporarily lose network connectivity
Do you want to continue?
Enter "yes" to continue or any other key to abort
Cisco Emergency Responder Command Line Interface Guide for Release 15
40
CLI Commands
set network max_ip_contrack

Page 53
yes
executing...
set network nic
This command sets the properties of the Ethernet interface 0. You cannot configure Ethernet interface 1.
Command Syntax
set network nic eth0{auto{ en | dis}} {speed | {10 | 100} } {duplex| {half | full}}
Syntax Description
Description
Parameters
Specifies Ethernet interface 0.
eth0
Specifies whether auto negotiation gets enabled or disabled.
auto
Specifies the speed of the Ethernet connection: 10 or 100 Mbps.
speed
Specifies half-duplex or full-duplex.
duplex
Usage Guidelines
The system asks whether you want to continue to execute this command.
If you continue, this command causes a temporary loss of network connections while the NIC gets reset.
Caution
You can enable only one active NIC at a time.
Note
Requirements
Command privilege level: 1
Allowed during upgrade: No
set network ntp option
This command adds a noquery option to /etc/config file.
Command Syntax
set network ntp option noquery
set network pmtud
This command enables and disables path MTU discovery.
Cisco Emergency Responder Command Line Interface Guide for Release 15
41
CLI Commands
set network nic


Page 54
Command Syntax
set network pmtud{enable | disable}
Syntax Description
Description
Parameters
Enables Path MTU Discovery.
enable
Disables Path MTU Discovery.
disable
Usage Guidelines
The system asks whether you want to continue to execute this command.
If you continue, the system temporarily loses network connectivity.
Caution
Requirements
Level privilege: 1
Command privilege: 1
Allowed during upgrade: No
Example
This example runs the set network pmtud command.
admin:set network pmtud enable
W A R N I N G
This will cause the system to temporarily lose network connectivity
Do you want to continue?
Enter "yes" to continue or any other key to abort
yes
executing...
admin:
set network restore
This command configures the specified Ethernet port to use a specified static IP address.
Only use this command option if you cannot restore network connectivity using any other set network
commands. This command deletes all previous network settings for the specified network interface, including
network fault tolerance. After running this command, you must restore your previous network configuration
manually.
Caution
Cisco Emergency Responder Command Line Interface Guide for Release 15
42
CLI Commands
set network restore

Page 55
The server temporarily loses network connectivity when you use this command.
Caution
Command Syntax
set network restore eth0 ip-address network-mask gateway
Syntax Description
Description
Parameters
Specifies Ethernet interface 0.
eth0
Specifies the IP address.
ip-address
Specifies the subnet mask.
network-mask
Specifies the IP address of the default gateway.
gateway
Requirements
Command privilege level: 0
Allowed during upgrade: Yes
set network status
This command sets the status of Ethernet 0 to up or down. You cannot configure Ethernet interface 1.
Command Syntax
set network status eth0 {up | down}
Syntax Description
Description
Parameters
Specifies Ethernet interface 0.
eth0
Sets the status of Ethernet interface 0 to up.
up
Sets the status of Ethernet interface 0 to down.
down
Usage Guidelines
The system asks whether you want to continue to execute this command.
If you continue, the system temporarily loses network connectivity.
Caution
Cisco Emergency Responder Command Line Interface Guide for Release 15
43
CLI Commands
set network status

Page 56
Requirements
Command privilege level: 1
Allowed during upgrade: No
set password
This command allows you to change the administrator password.
Command Syntax
set password {admin | security}
Syntax Description
Description
Parameters
Administrator.
admin
Security.
security
Usage Guidelines
The system prompts you for the old and new passwords.
The password must contain at least six characters, and the system checks it for strength.
Servers in a cluster use the security password to authenticate communication between servers. You must reset
the cluster after you change the security password.
To change a password:
1.
Change the security password on the publisher server and then reboot the server.
2.
Change the security password on all the subscriber servers to the same password that you created on the
publisher server and restart the subscriber server to propagate the password change.
We recommend that you restart each server after the password is changed on that server.
Note
Failure to reboot the servers causes system service problems and problems with the Emergency Responder
Administration on the subscriber servers.
Caution
Requirements
Command privilege level: 1
Allowed during upgrade: No
Cisco Emergency Responder Command Line Interface Guide for Release 15
44
CLI Commands
set password


Page 57
set password age minimum
This command modifies the value of minimum password age for OS admin accounts in days.
Usage Guidelines
Acceptable values should be equal to or greater than 0 days but less or equal to 10 days.
Command Syntax
set password age minimum days
Syntax Description
Description
Parameters
The minimum password age in days.
days
Requirements
Command privilege level: 1
Allowed during upgrade: Yes
set password age maximum
This command modifies the value of maximum password age for Emergency Responder OS administration
accounts in days.
Command Syntax
set password age maximum days
Usage Guidelines
Acceptable values should be equal to or greater than 10 days but less than 3650 days (10 years).
Syntax Description
Description
Parameters
The maximum password age in days.
days
Requirements
Command privilege level: 1
Allowed during upgrade: No
set password complexity character disable
This command disables password complexity. Changes take effect only at the next password change.
When disabled, the password created or changed after executing the command is no longer strong. The
password does not need uppercase, lowercase, digit and special characters.
Cisco Emergency Responder Command Line Interface Guide for Release 15
45
CLI Commands
set password age minimum
Page 58
Command Syntax
set password complexity character disable
Requirements
Command privilege level: 1
Allowed during upgrade: Yes
set password complexity character enable
This command enables password complexity rules for the type of characters in a password.
When enabled, the passwords need to follow these guidelines:
• It must have at least one lowercase character.
• It must have at least one uppercase, one digit, and one special character.
• All of the adjacent characters on the keyboard are not accepted.
• Any of the previous ten passwords cannot be reused.
• The admin user password can only be changed once in 24 hours.
• A violation of any of the preceding rules results in a failure.
Command Syntax
set password complexity character enable
Requirements
Command privilege level: 1
Allowed during upgrade: No
set password complexity minimum-length
This command modifies the value of minimum password length for Unified CM OS accounts.
Command Syntax
set password complexity minimum-length length
Syntax Description
Description
Parameters
The minimum password length.
length
Useage Guidelines
Acceptable values should be equal to or greater than 6. Use this command only after enabling the character
complexity of passwords.
Cisco Emergency Responder Command Line Interface Guide for Release 15
46
CLI Commands
set password complexity character enable
Page 59
Requirements
Command privilege level: 1
Allowed during upgrade: No
set password expiry maximum-age
This command enables or disables the password expiry maximum age settings for Cisco Unified Operating
System Administrator accounts.
Command Syntax
set password expiry maximum-age {enable| disable}
Syntax Description
Description
Parameters
Turns on password expiry maximum age settings for Cisco Unified
Operating System administrator accounts. The set password expiry
enable command sets the value of maximum password age to
3650 days (10 yrs) for Cisco Unified Operating System
Administrator accounts.
enable
Turns off password expiry maximum age settings for Cisco
Unified Operating System administrator accounts. The set
password expiry disable command results in Cisco Unified
Operating System Administrator accounts never expiring.
disable
set password expiry minimum-age enable
This command enables minimum password expiry for OS accounts.
Usage Guidelines
This command sets the value of minimum password age to 1 day (24 hrs) for OS administration accounts.
Command Syntax
set password expiry minimum-age enable.
set password expiry minimum-age disable
This command is used to disable minimum password aging for OS accounts.
This means passwords for OS admin accounts can be changed at any interval.
Command Syntax
set password expiry minimum-age disable
Cisco Emergency Responder Command Line Interface Guide for Release 15
47
CLI Commands
set password expiry maximum-age
Page 60
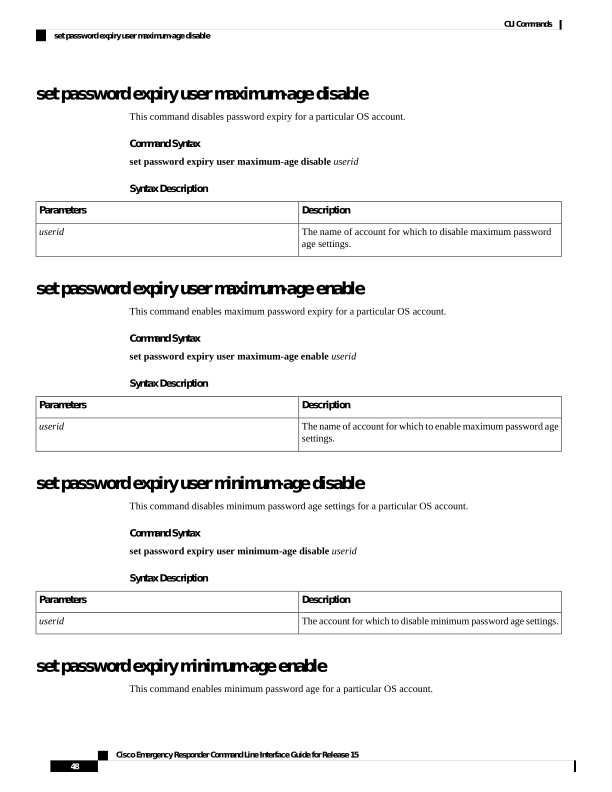
set password expiry user maximum-age disable
This command disables password expiry for a particular OS account.
Command Syntax
set password expiry user maximum-age disable userid
Syntax Description
Description
Parameters
The name of account for which to disable maximum password
age settings.
userid
set password expiry user maximum-age enable
This command enables maximum password expiry for a particular OS account.
Command Syntax
set password expiry user maximum-age enable userid
Syntax Description
Description
Parameters
The name of account for which to enable maximum password age
settings.
userid
set password expiry user minimum-age disable
This command disables minimum password age settings for a particular OS account.
Command Syntax
set password expiry user minimum-age disable userid
Syntax Description
Description
Parameters
The account for which to disable minimum password age settings.
userid
set password expiry minimum-age enable
This command enables minimum password age for a particular OS account.
Cisco Emergency Responder Command Line Interface Guide for Release 15
48
CLI Commands
set password expiry user maximum-age disable
Page 61
Command Syntax
set password expiry user minimum-age enable userid
Syntax Description
Description
Parameters
The account for which to enable minimum password age settings.
userid
Requirements
Command privilege level: 1
Allowed during upgrade: Yes
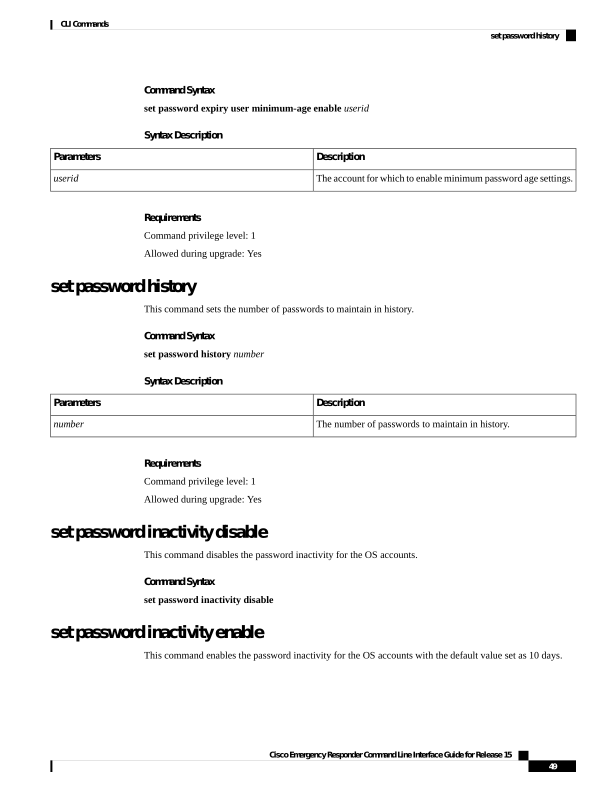
set password history
This command sets the number of passwords to maintain in history.
Command Syntax
set password history number
Syntax Description
Description
Parameters
The number of passwords to maintain in history.
number
Requirements
Command privilege level: 1
Allowed during upgrade: Yes
set password inactivity disable
This command disables the password inactivity for the OS accounts.
Command Syntax
set password inactivity disable
set password inactivity enable
This command enables the password inactivity for the OS accounts with the default value set as 10 days.
Cisco Emergency Responder Command Line Interface Guide for Release 15
49
CLI Commands
set password history
Page 62
Command Syntax
set password inactivity enable
set password inactivity period
This command sets the password inactivity for the OS accounts with the configured value.
Command Syntax
set password inactivity period days
Syntax Description
Description
Parameters
The number of days for which to set inactivity. Acceptable values
are 1 to 99 days.
days
Requirements
Command privilege level: 1
Allowed during upgrade: Yes
set password user admin
This commands sets a new administration password.
Command Syntax
set password user admin
Example
This example runs the set password user admin command:
set password user admin
Please enter the old password :********
Please enter the new password:********
re-enter new password to confirm:********
Requirements
Command privilege level: 1
Allowed during upgrade: No
set password user security
This command sets a new platform security password.
Cisco Emergency Responder Command Line Interface Guide for Release 15
50
CLI Commands
set password inactivity period
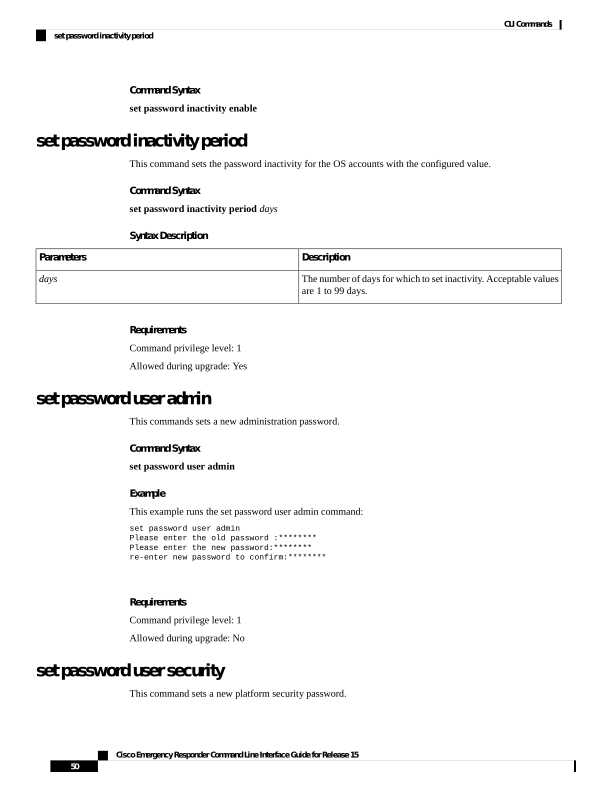
Page 63
Command Syntax
set password user security
Example
This example runs the set password user security command:
set password user security
Please enter the password:********
re-enter the password to confirm: ********
Requirements
Command privilege level: 1
Allowed during upgrade: No
set session maxlimit
This command sets the upper limit for concurrent sessions.
Command Syntax
set session maxlimit [value]
Syntax Description
Description
Parameters
This command sets the upper limit for concurrent sessions.
Acceptable values are 1 - 100.
If no upper limit is entered, the default value of 10 is assigned to
sshd_config param.
maxlimit
Acceptable values are 1 - 100.
[value]
Command Mode
Administrator (admin:)
Requirements
Command privilege level: 1
Allowed during upgrade: Yes
set smtp
This command sets the SMTP server hostname.
Cisco Emergency Responder Command Line Interface Guide for Release 15
51
CLI Commands
set session maxlimit
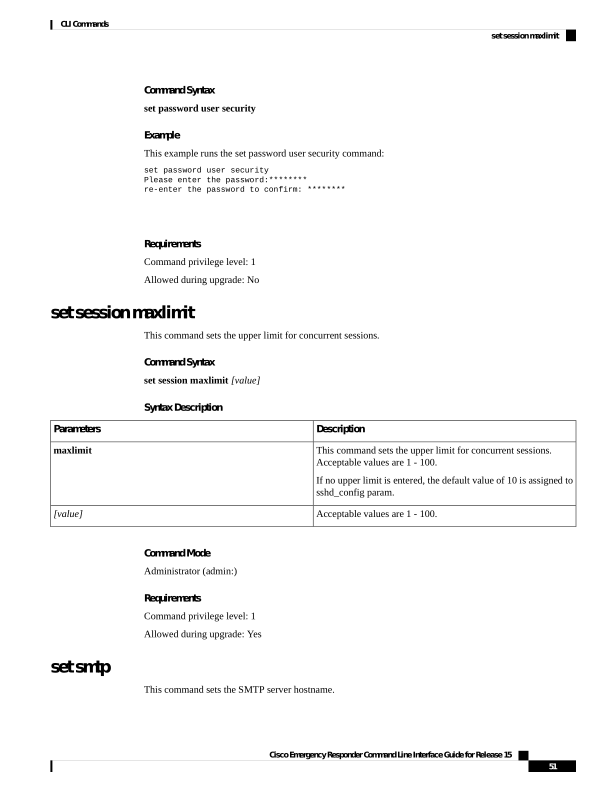
Page 64
Command Syntax
set smtp hostname
Syntax Description
Description
Parameters
The SMTP server name.
hostname
Requirements
Command privilege level: 0
Allowed during upgrade: No
set timezone
This command changes the system time zone.
Command Syntax
set timezone timezone
Usage Guidelines
Enter enough characters to uniquely identify the new time zone. Be aware that the time zone name is
case-sensitive.
You must restart the system after you change the time zone.
Note
Syntax Description
Description
Parameters
The new timezone.
timezone
Requirements
Command privilege level: 0
Allowed during upgrade: No
Example
This example sets the time zone to Pacific time:
set timezone Pac
Cisco Emergency Responder Command Line Interface Guide for Release 15
52
CLI Commands
set timezone

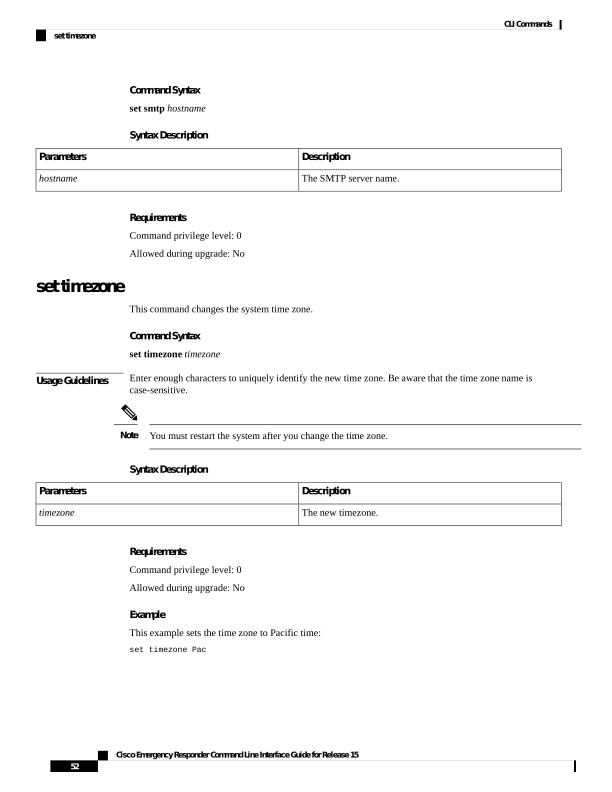
Page 65
set tls min-version
This command sets the minimum version of Transport Layer Security (TLS) protocol.
• The system automatically restarts after you set the minimum TLS version.
• You need to configure the minimum TLS version for each node.
Note
Command Syntax
set tls min-version tls minVersion
Syntax Description
Description
Parameters
Type any one of the following options to set the minimum TLS
version.
• 1.0
• 1.1
• 1.2
tls minVersion
Command Modes
Administrator (admin:)
Usage Guidelines
Requirements
Command privilege level: 1
Allowed during upgrade: Yes
Applies to: Cisco Emergency Responder
Example
admin: set tls min-version 1.1
This command results in setting the minimum TLS version to 1.1 to all secured interfaces. If you have custom
applications that make secure connection to the system, then make sure the applications support the TLS
version that you have selected to configure. See Cisco Unified Reporting Administration Guide to make sure
the endpoints in your deployment support this feature.
This will set the minimum TLS to 1.1 and the server will reboot.
Warning
Do you want to continue (Yes or No)? Yes
The minimum TLS version is set to 1.1 successfully.
The system restarts in few minutes.
Cisco Emergency Responder Command Line Interface Guide for Release 15
53
CLI Commands
set tls min-version


Page 66
set tls resumption-timeout
This command sets the number of seconds after which the TLS resumption will not work and the sessions
will be invalid.
Command Syntax
set tls resumption-timeout set tls resumption-timeout
Syntax Description
Description
Parameters
Enter a value up to 3600 seconds to configure. After the
configured value, the TLS sessions are invalid.
seconds
Command Modes
Administrator (admin:)
Usage Guidelines
Requirements
Command privilege level: 1
Allowed during upgrade: Yes
Applies to: Cisco Emergency Responder
set tls trace
Currently the set tls trace command is supported only for the HAProxy service. Cisco Emergency Responder
does not support the HAProxy service and hence the following commands are not applicable.
set tls trace disable
This CLI command disables the TLS tracing for a service.
After you disable the TLS trace for a service, the service automatically gets restarted. During the restart
process, any functionality related to the service will be not reachable.
Note
Command Syntax
set tls trace disable service
Syntax Description
Description
Parameters
Specifies the service that you use to disable TLS tracing.
service
Cisco Emergency Responder Command Line Interface Guide for Release 15
54
CLI Commands
set tls resumption-timeout

Page 67
Command Modes
Administrator (admin:)
Usage Guidelines
Requirements
Command privilege level: 1
Allowed during upgrade: No
Example
admin:set tls trace disable
CER doesnt support HAProxy service.Blocking user input
set tls trace enable
This CLI command enables the TLS tracing for a service.
After you enable the TLS trace for a service, the service automatically gets restarted. During the restart process,
any functionality related to the service will be not reachable.
Note
Command Syntax
set tls trace enable service
Syntax Description
Description
Parameters
Specifies the service that you use to enable TLS tracing.
service
Command Modes
Administrator (admin:)
Usage Guidelines
Requirements
Command privilege level: 1
Allowed during upgrade: No
Example
admin:set tls trace enable
CER doesnt support HAProxy service.Blocking user input
set trace
This command sets trace activity for the specified task.
Command Syntax
set trace{enable Error| enable Special| enable State_Transition| enable Significant| enable Entry_exit|
enable Arbitrary| enable Detailed| disable} tname
Cisco Emergency Responder Command Line Interface Guide for Release 15
55
CLI Commands
set tls trace enable

Page 68
Syntax Description
Description
Parameters
The task for which you want to enable or disable traces.
tname
Sets task trace settings to the error level.
enable Error
Sets task trace settings to the special level.
enable Special
Sets task trace settings to the state transition level.
enable State_Transition
Sets task trace settings to the significant level.
enable Significant
Sets task trace settings to the entry_exit level.
enable Entry_exit
Sets task trace settings to the arbitrary level.
enable Arbitrary
Sets task trace settings to the detailed level.
enable Detailed
Disables the task trace settings.
disable
Requirements
Command privilege level: 1
Allowed during upgrade: No
set web-security
This command sets the web security certificate information for the operating system.
Command Syntax
set web-security orgunit orgname locality state [country] [alternate-host-name]
Usage Guidelines
When you set an alternate-host-name parameter with the set web-security command, self-signed certificates
for Tomcat contains the Subject Alternate Name extension with the alternate host name specified. CSR for
Emergency Responder contains Subject Alternate Name Extension with the alternate host name included in
the CSR.
Syntax Description
Description
Parameters
The organizational unit.
orgunit
The organizational name.
orgname
The organization location.
locality
The organization state.
state
The organization country.
country represents
Cisco Emergency Responder Command Line Interface Guide for Release 15
56
CLI Commands
set web-security
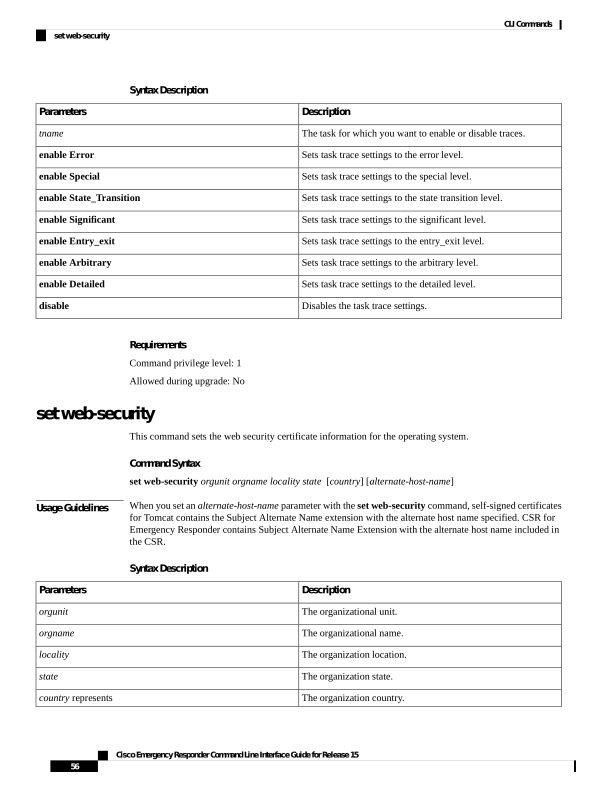
Page 69
Description
Parameters
(Optional) Specifies an alternate name for the host when you
generate a web-server (Tomcat) certificate.
alternate-host-name
Requirements
Command privilege level: 0
Allowed during upgrade: No
set webapp session maxlimit
This command sets the maximum limit for concurrent web application sessions per user. This applies to the
following interfaces:
• Cisco Unified Operating System Administration
• Disaster Recovery System
For the session maximum limit setting to become effective, the administrator must restart the Cisco Tomcat
service.
Restarting the Cisco Tomcat service ends all active sessions and can affect the system performance. We
recommend that you only execute this command during off-peak traffic hours.
Note
This setting gets preserved through a software upgrade and does not get reset to the default value.
Note
Command Syntax
set webapp session maxlimit number
Cisco Emergency Responder Command Line Interface Guide for Release 15
57
CLI Commands
set webapp session maxlimit

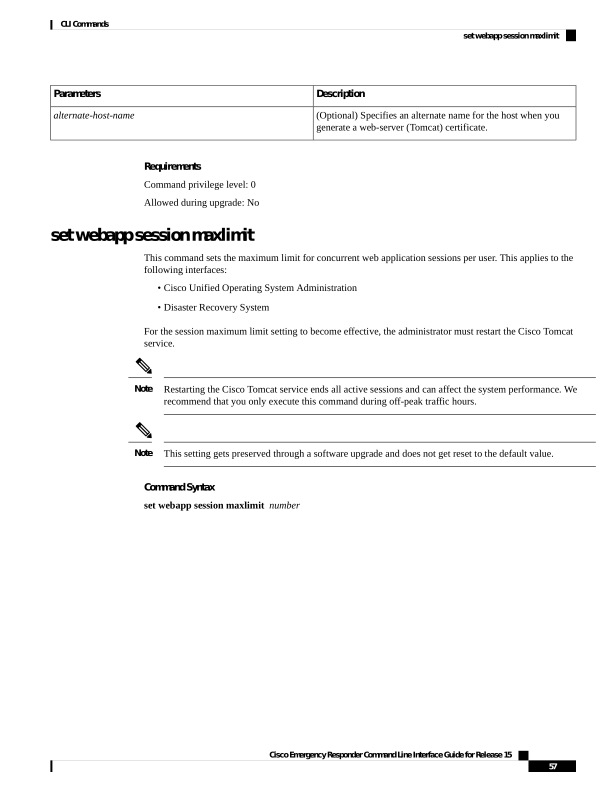
Page 70
Syntax Description
Description
Parameters
Specifies the number to limit the concurrent web application
sessions.
The value ranges from 1 to 10.
Default value is 10.
If the utils EnhancedSecurityMode command is enabled, then
the session limit is restricted to 3. For more details on how to
Configure Enhanced Security Mode, see the "FIPS 140-2 Mode
Setup" chapter in the Security Guide for Cisco Unified
Communications Manager, Release 11.5(1)SU1.
When you exceed the defined sign-in sessions
maximum limit, then the interface sign-in page
displays the Logon Status message as: The Session
limit has already been reached for
<username>. Please logout from those
sessions or wait 30 minutes for inactive
sessions to be automatically closed.
When Enhanced Security Mode is enabled, then the
session limit is restricted to 3. However,
Administrator can change the session limit using the
set webapp session maxlimit command to any
value ranging from 1 to 10.
Note
number
Command Mode
Administrator (admin:)
Requirements
Command privilege level: 4
Allowed during upgrade: No
set webapp session timeout
This command sets a timeout period for the web application session of Cisco Emergency Responder and logs
off the user on expiry.
For the new webapp session timeout setting to become effective, you must restart the Cisco Tomcat service.
Until you restart the Cisco Tomcat service, the show webapp session timeout command reflects the new
values, but system continues to use and reflect the old values. This command prompts you to restart the service.
Restarting the Cisco Tomcat service ends all active sessions and can affect system performance. Cisco
recommends that you only execute this command during off-peak traffic hours.
Caution
Cisco Emergency Responder Command Line Interface Guide for Release 15
58
CLI Commands
set webapp session timeout

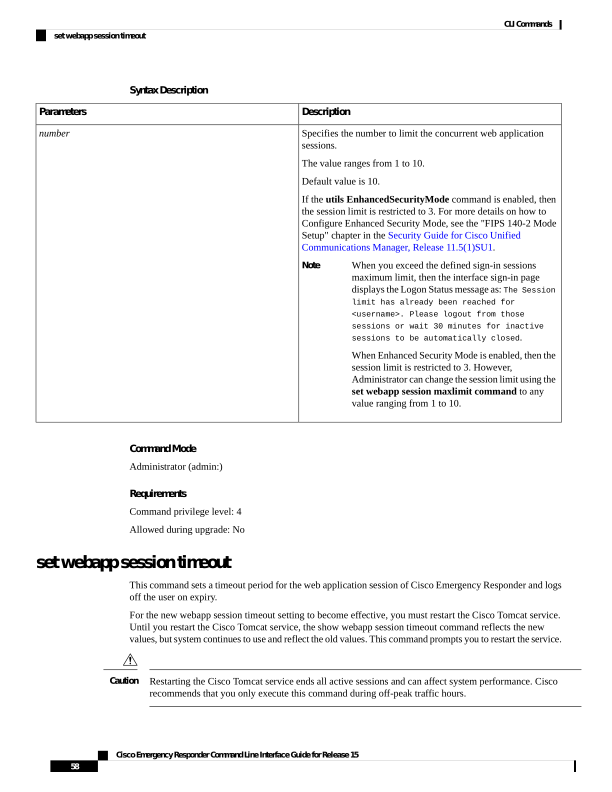
Page 71
This setting gets preserved through a software upgrade and does not get reset to the default value.
Note
Command Syntax
set webapp session timeout minutes
Syntax Description
Description
Parameters
Specifies the time, in minutes, that can elapse before a web
application times out and logs off the user.
Cisco Emergency Responder User page does not
expire in case of inactivity. Hence, this time out
value is not applicable for this User page.
Note
• Value range: 5-35000 minutes
• Default value: 30 minutes
minutes
Command Mode
Administrator (admin:)
Requirements
Command privilege level: 1
Allowed during upgrade: No
set workingdir
This command sets the working directory for active, inactive, and installation logs.
Command Syntax
set workingdir {activelog| inactivelog| install} directory
Syntax Description
Description
Parameters
Sets the working directory for active logs.
activelog
Sets the working directory for inactive logs.
inactivelog
Sets the working directory for installation logs.
install
The current working directory.
directory
Cisco Emergency Responder Command Line Interface Guide for Release 15
59
CLI Commands
set workingdir

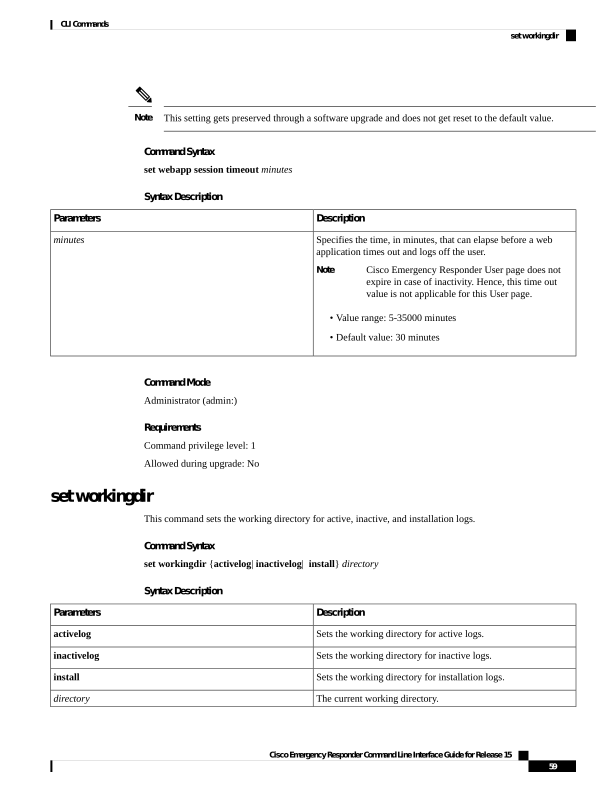
Page 72
Requirements
Command privilege level: 0 for logs
Allowed during upgrade: Yes
Show Commands
show account
This command lists current administrator accounts, except the master administrator account.
Command Syntax
show account
Requirements
Command privilege level: 4
Allowed during upgrade: Yes
show cert
This command displays certificate contents and certificate trust lists.
Command Syntax
Table 2: Available Commands
Result
Command
This command displays certificate trust lists.
show cert list {own | trust}
This command displays certificate contents.
show cert own filename
This command displays certificate contents.
show cert trust filename
Syntax Description
Description
Parameters
The name of the certificate file.
filename
Specifies owned certificates.
own
Specifies trusted certificates.
trust
Specifies a certificate trust list.
list
Cisco Emergency Responder Command Line Interface Guide for Release 15
60
CLI Commands
Show Commands
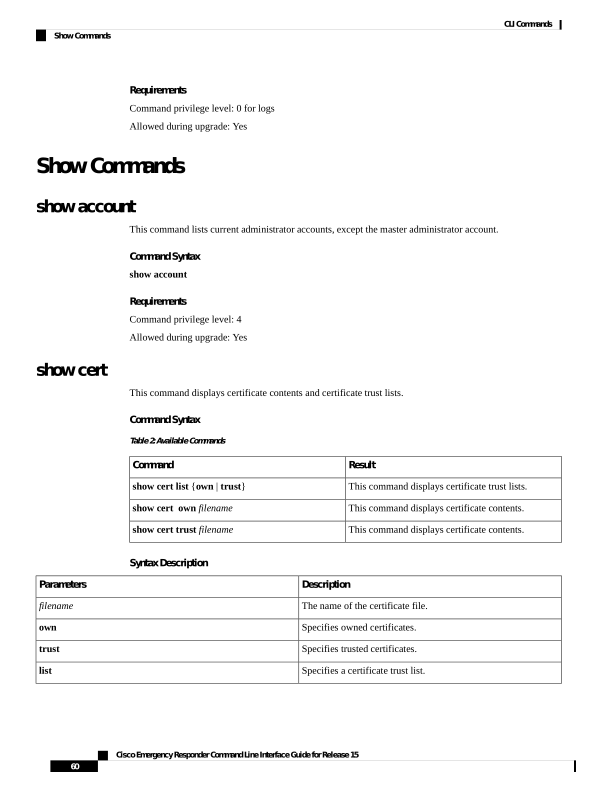
Page 73
Requirements
Command privilege level: 1
Allowed during upgrade: Yes
Example
This command displays own certificate trust lists:
show cert list own
show cli pagination
This command displays the status of the automatic CLI pagination.
Command Syntax
show cli pagination
Requirements
Level privilege: 0
Command privilege: 0
Allowed during upgrade: Yes
Example
The following example runs the show cli pagination command:
admin: show cli paginationAutomatic Pagination: Off.
show cli session timeout
This command displays the CLI session timeout value, which is the amount of time, in minutes, that can elapse
before a CLI session times out and disconnects.
Command Syntax
show cli session timeout
Command Mode
Administrator (admin:)
Requirements
Command privilege level: 1
Allowed during upgrade: Yes
Cisco Emergency Responder Command Line Interface Guide for Release 15
61
CLI Commands
show cli pagination
Page 74
show csr list
This command displays the selected CSR file.
Command Syntax
show csr list type
Example
This example runs a show csr list command:
show csr list own
tomcat/tomcat.csr
Vipr-QuetzalCoatl/Vipr-QuetzalCoatl.csr
show ctl
This command displays the contents of the Certificate Trust List (CTL) file on the server, and it notifies you
if the CTL is not valid.
Command Syntax
show ctl
show date
This command shows the system date.
Command Syntax
show date
Requirements
Command privilege level: 1
Allowed during upgrade: Yes
show diskusage
This command displays information about disk usage on the server.
Command Syntax
show diskusage activelog {activelog| common| inactivelog| install| tmp} filename filename {directory |
sort}
Cisco Emergency Responder Command Line Interface Guide for Release 15
62
CLI Commands
show csr list
Page 75
Syntax Description
Description
Parameters
Displays disk usage information about the activelog directory.
activelog
Displays disk usage information about the common directory.
common
Displays disk usage information about the inactivelog directory.
inactivelog
Displays disk usage information about the install directory.
install
Displays disk usage information about the tmp directory.
tmp
(Optional)Saves the output to a file specified by a filename. These
files are stored in the platform/cli directory. To view saved files,
use the file view activelog command.
filename filename
(Optional)Displays only the directory sizes.
directory
(Optional)Sorts the output based on file size. File sizes are
displayed in 1024-byte blocks.
sort
Requirements
Command privilege level: 0
Allowed during upgrade: Yes
show dscp all
This command displays the current DSCP traffic markings on all the ports. It displays the DSCP markings in
decimal and hexidecimal. If the value corresponds to a class then it displays the correct class. If the value
does not correspond to a class, then it displays N/A.
Command Syntax
show dscp all
Command Mode
Administrator (admin:)
Requirements
Command privilege level: 0
Allowed during upgrade: No
show dscp defaults
This command displays the default factory DSCP settings. These values take effect if the set dscp defaults
command is executed.
Cisco Emergency Responder Command Line Interface Guide for Release 15
63
CLI Commands
show dscp all
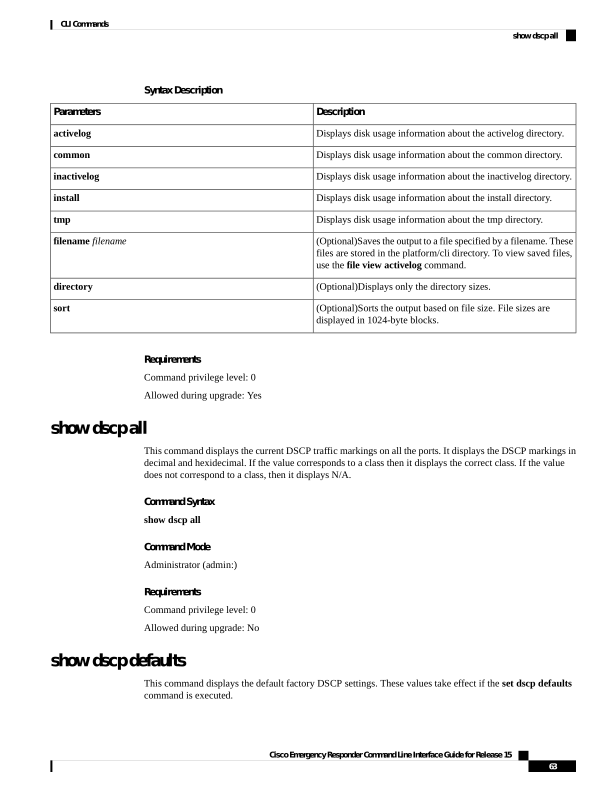
Page 76
Command Syntax
show dscp defaults
Command Mode
Administrator (admin:)
Requirements
Command privilege level: 0
Allowed during upgrade: No
show dscp marking
This command displays the current DSCP traffic markings for a particular DSCP value.
Command Syntax
show dscp marking value
Syntax Description
Description
Parameters
DSCP value. You can enter the name of a well-known DSCP
class, or a numeric value in decimal or hexadecimal format.
Precede hexadecimal values with 0x or 0X.
value
Useage Guidelines
The valid class names as defined by DSCP are:
• Class Selector: values CSO, CS1, CS2, CS3, CS5, CS6 CS7 The class selector (CS) values correspond
to IP Precedence values and are fully compatible with IP Precedence.
• Expedited Forwarding: value EF EF PHB is ideally suited for applications such as VoIP that require low
bandwidth, guaranteed bandwidth, low delay, and low jitter.
• Best Effort: value BE Also called default PHB, this value essentially specifies that a packet be marked
with 0x00, which gets the traditional best-effort service from the network router.
• Assured Forwarding: values AF11, AF12, AF13, AF21, AF22, AF23, AF41, AF42, AF43 There are four
types of Assured Forwarding classes, each of which has three drop precedence values. These precedence
values define the order in which a packet is dropped (if needed) due to network congestion. For example,
packets in AF13 class are dropped before packets in the AF12 class.
Command Mode
Administrator (admin:)
Cisco Emergency Responder Command Line Interface Guide for Release 15
64
CLI Commands
show dscp marking
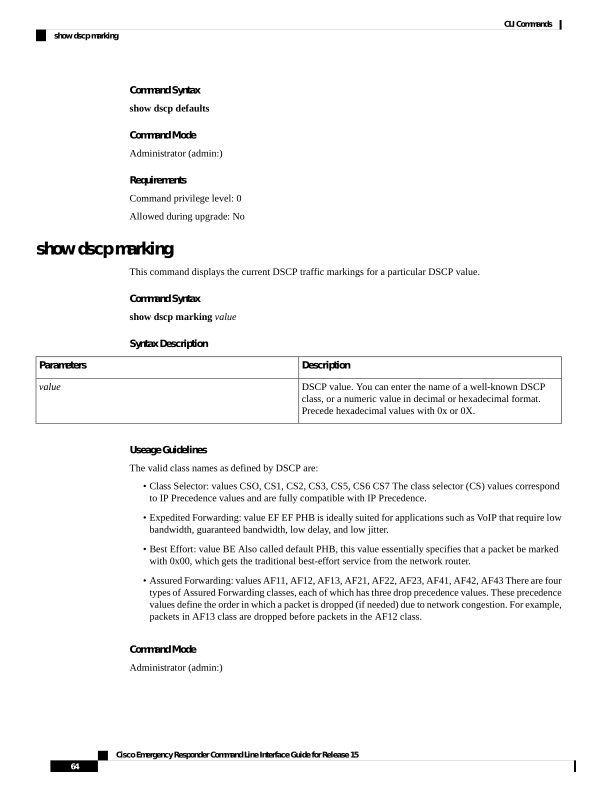
Page 77
Requirements
Command privilege level: 1
Allowed during upgrade: Yes
show dscp status
This command displays the current DSCP traffic markings.
Command Syntax
show dscp status {enabled|disabled}
Syntax Description
Description
Parameters
Filters the output to show only DSCP traffic markings that are
enabled. If you do not specify a status, this filter is the default
option.
enabled
Filters the output to show only DSCP traffic markings that are
disabled.
disabled
Command Mode
Administrator (admin:)
Requirements
Command privilege level: 0
Allowed during upgrade: No
show environment
This command displays information about the server hardware.
Command Syntax
show environment {fans |power-supply |temperatures}
Syntax Description
Description
Parameters
Displays information gathered by fan probes.
fans
Displays information gathered by power supply probes.
power-supply
Displays information gathered by temperature probes.
temperatures
Cisco Emergency Responder Command Line Interface Guide for Release 15
65
CLI Commands
show dscp status
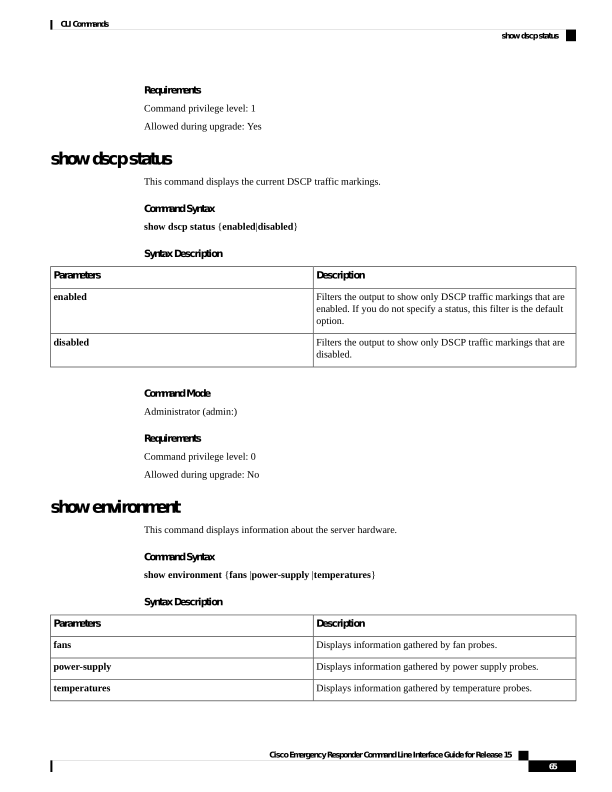
Page 78
show hardware
This command displays the following information about the platform hardware.
Command Syntax
show hardware
Usage Guidelines
This command displays the following information about the platform hardware:
• Platform
• Serial number
• BIOS build level
• BIOS manufacturer
• Active processors
• RAID controller status
Requirements
Command privilege level: 0
Allowed during upgrade: Yes
show ipsec
This command displays information about IPsec policies and associations.
Command Syntax
Table 3: Available Commands
Result
Command
This command displays detailed information about
the specified ipsec policy.
show ipsec information policy_group| policy_name
This command displays all the ipsec policy group on
the node.
show ipsec policy_group
This command displays the list of ipsec policy names
that exist in the specified policy group.
show ipsec policy_namepolicy_group
show ipsec status
Syntax Description
Description
Parameters
Displays the association details and status for the policy.
information
Cisco Emergency Responder Command Line Interface Guide for Release 15
66
CLI Commands
show hardware
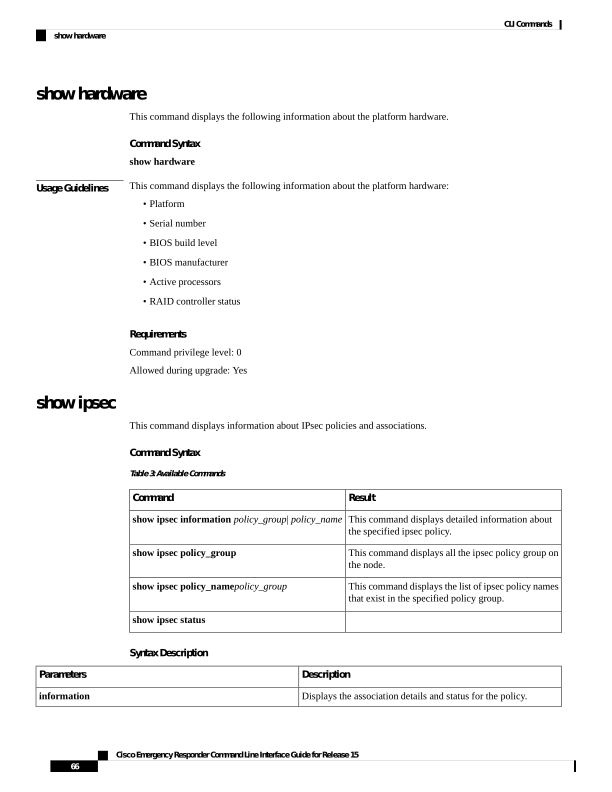
Page 79
Description
Parameters
Displays the status of all IPsec tunnels that are defined in the
system.
status
The name of a specific IPsec policy.
policy_group
Requirements
Command privilege level: 1
Allowed during upgrade: yes
Example
This example displays IPsec policies:
show ipsec policy
show license all
This command displays the details about smart licensing status, entitlements in use, product information, and
smart agent version.
show license all
Command Modes
Administrator (admin:)
Requirements
Command privilege level: 0
Allowed during upgrade: Yes
show license status
This command displays the overall smart licensing status along with the failure reasons, if any.
show license status
Command Modes
Administrator (admin:)
Requirements
Command privilege level: 0
Allowed during upgrade: Yes
show license summary
This command displays the overall smart licensing status and license usage.
Cisco Emergency Responder Command Line Interface Guide for Release 15
67
CLI Commands
show license all
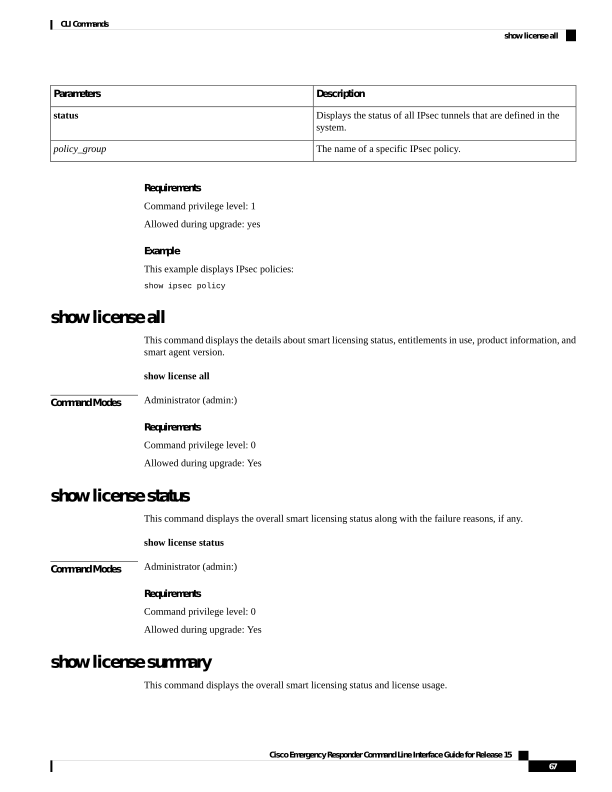
Page 80
show license summary
Command Modes
Administrator (admin:)
Requirements
Command privilege level: 0
Allowed during upgrade: Yes
show license tech support
This command displays all information that aids in debugging smart agent.
show license tech support
Command Modes
Administrator (admin:)
Requirements
Command privilege level: 0
Allowed during upgrade: Yes
show license trace
This command dumps the content of smart agent-related logs to the console.
show license trace
Command Modes
Administrator (admin:)
Requirements
Command privilege level: 0
Allowed during upgrade: Yes
show license udi
This command displays the product information or all members in the Unique Device Identifier (UDI) structure
that are not NULL.
show license UDI
Command Modes
Administrator (admin:)
Requirements
Command privilege level: 0
Allowed during upgrade: Yes
Cisco Emergency Responder Command Line Interface Guide for Release 15
68
CLI Commands
show license tech support
Page 81
show license usage
This command displays the details of entitlements or licenses that are in use.
show license usage
Command Modes
Administrator (admin:)
Requirements
Command privilege level: 0
Allowed during upgrade: Yes
show logins
This command displays recent logins to the server.
Command Syntax
show logins number
Syntax Description
Description
Parameters
The number of most recent logins to display. The default is 20.
number
show memory
This command displays information about the server memory.
Command Syntax
show memory{count| module[ALL | module_number]| size}
Syntax Description
Description
Parameters
Displays information about all installed memory modules.
ALL
Specifies the memory module to display.
module_number
(Optional)Displays the number of memory modules on the system.
count
(Optional)Displays detailed information about each memory
module.
module
(Optional)Displays the total amount of memory.
size
Cisco Emergency Responder Command Line Interface Guide for Release 15
69
CLI Commands
show license usage
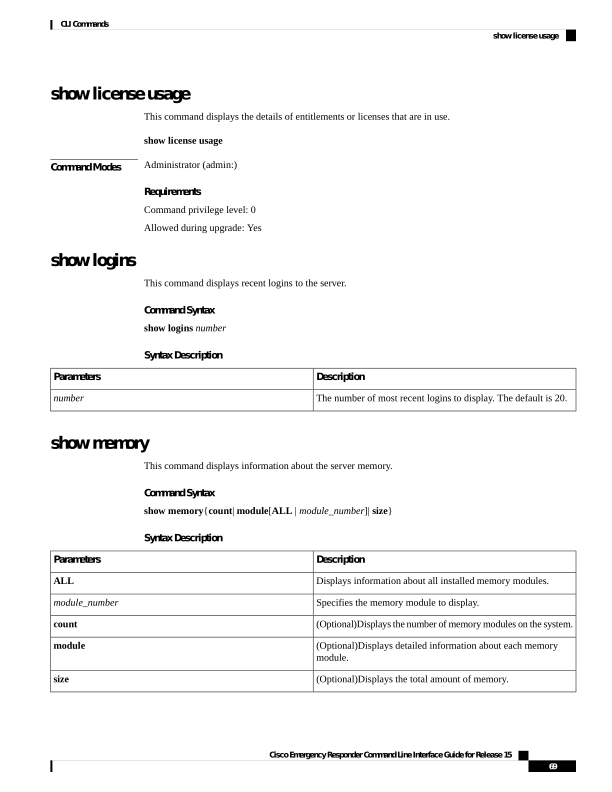
Page 82
show myself
This command displays information about the current account.
Command Syntax
show myself
Requirements
Command privilege level: 0
Allowed during upgrade: Yes
show network
This command displays network information.
Command Syntax
Table 4: Available Commands
Result
Command
This command shows network information for
listening and non-listening sockets.
show networkall [detail]
This command shows network information for
ethernet 0.
show networketh0 [detail]
This command shows Network Fault Tolerance
information.
show networkfailover [detail] [page]
This command shows network routing information.
show networkroute [detail]
This command shows active internet connections.
show network status [detail] [listen] [process] [all]
[nodns] [search stext]
This command shows ip_conntrack usage information.
show network ip_conntrack
This command shows max_ip_conntrack information.
show network max_ip_conntrack
This command shows DHCP status information.
show network dhcp eth0 status
This command lists nodes in the network cluster.
show network cluster
This command shows the list of ports that have been
requested to be opened or translated in the firewall.
show network ipprefs{all |enabled| public
show network ntp
This command shows Network Fault Tolerance
information.
show network failover[detail][page]
Cisco Emergency Responder Command Line Interface Guide for Release 15
70
CLI Commands
show myself
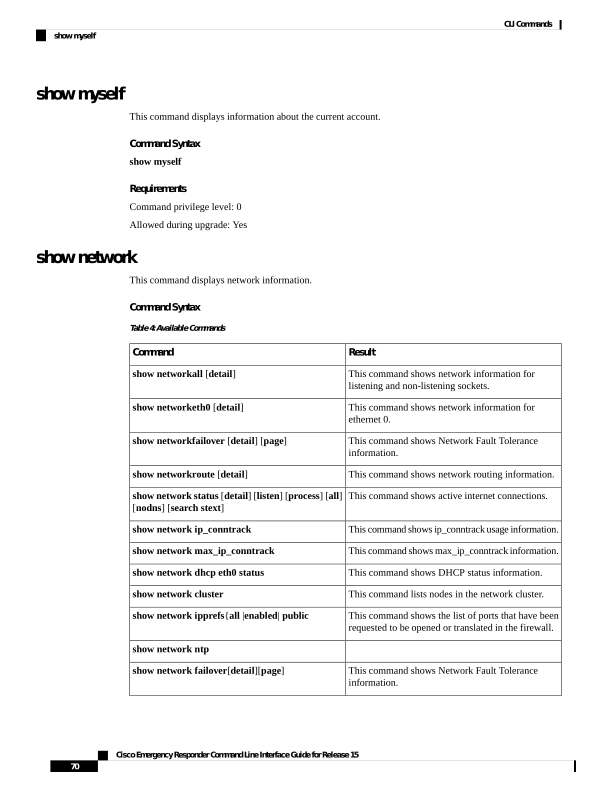
Page 83
Result
Command
This command shows IPv6 network routes and
network settings.
show network ipv6{route| settngs}
Syntax Description
Description
Parameters
Specifies Ethernet 0.
eth0
Specifies Network Fault Tolerance information.
failover
Specifies network routing information.
route
Specifies active Internet connections.
status
Specifies ip_conntrack usage information.
ip_conntrack
Specifies max_ip_conntrack information.
max_ip_conntrack
Displays DHCP status information.
dhcp eth0 status
Specifies all basic network information.
all
(Optional)Displays additional information.
options
(Optional)Displays more detailed additional information.
detail
(Optional)Displays information one page at a time.
page
(Optional)Displays only listening sockets.
listen
(Optional)Displays the process ID and name of the program to
which each socket belongs.
process
(Optional)Displays both listening and nonlistening sockets.
all
(Optional)Displays numerical addresses without any DNS
information.
nodns
(Optional)Searches for the stext in the output.
search stext
Usage Guidelines
The eth0 parameter displays Ethernet port 0 settings, including DHCP and DNS configurations and options.
Requirements
Command privilege level: 0
Allowed during upgrade: Yes
Example
This example displays active Internet connections:
Cisco Emergency Responder Command Line Interface Guide for Release 15
71
CLI Commands
show network
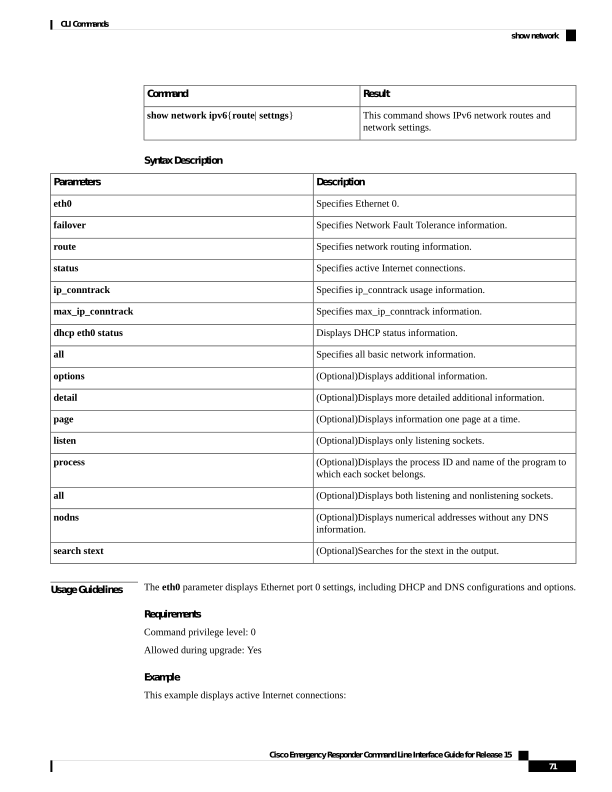
Page 84
show network status
show network cluster
This command lists nodes in the network cluster.
Command Syntax
show network cluster
Command Mode
Administrator (admin:)
Requirements
Command privilege level: 0
Allowed during upgrade: Yes
show network ipprefs
This command displays the list of ports that have been requested to be opened or translated in the firewall.
Command Syntax
ipprefs {all| enabled| public}
Syntax Description
Description
Parameters
Displays all incoming ports that may be used on the product.
all
Displays all incoming ports that are currently opened.
enabled
Displays all incoming ports that are currently opened for any
remote client.
public
Requirements
Level privilege: 0
Command privilege: 0
Allowed during upgrade: Yes
Example
The following example shows show the network ipprefs command:
admin:show network ipprefs public
Application IPProtocol PortValue
Type
XlatedPort Status
Description
Cisco Emergency Responder Command Line Interface Guide for Release 15
72
CLI Commands
show network cluster
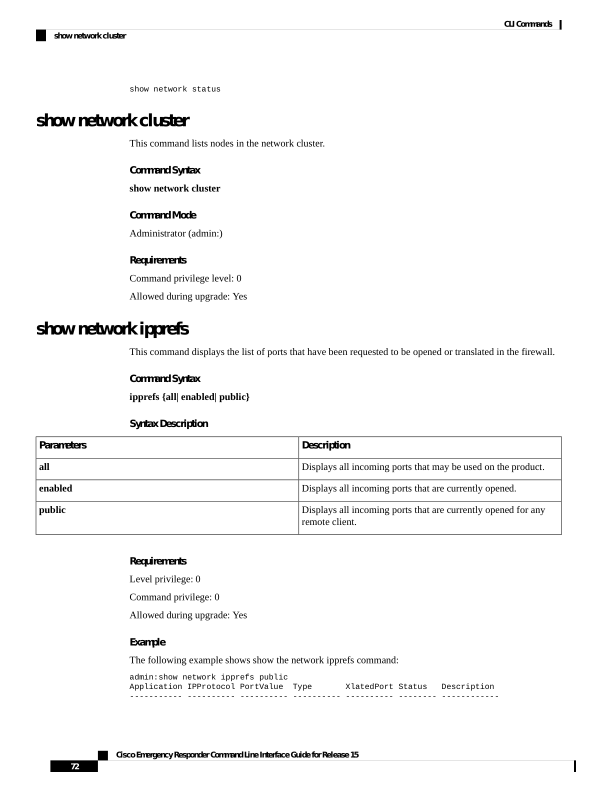
Page 85
sshd
tcp
22
public
enabled
sftp and ssh access
tomcat
tcp
8443
translated 443
enabled
secure web access
tomcat
tcp
8080
translated 80
enabled
web access
clm
udp
8500
public
enabled
cluster manager
clm
tcp
8500
public
enabled
cluster manager
ntpd
udp
123
public
enabled
network time sync
snmpdm
udp
161
public
enabled
SNMP
ccm
tcp
2000
public
enabled
SCCP-SIG
ctftp
udp
6969
translated 69
enabled
TFTP access to CUCM TFTP
Server
ctftp
tcp
6970
public
enabled
HTTP access to CUCM TFTP
Server
admin:
set network ntp option
This command adds a noquery option to /etc/config file.
Command Syntax
set network ntp option noquery
show open
This command displays open files and ports on the system.
Syntax Description
Table 5: Available Commands
Result
Command
This command shows open files on the system.
show open files [all] [regexp reg_exp]
This command shows all open ports on the system.
show open ports [all] [regexp reg_exp]
Syntax Description
Description
Parameters
displays open files on the system.
files
displays open ports on the system.
ports
(Optional)Displays all open files or ports.
all
(Optional)Displays open files that belong to the specified process.
process
(Optional)Specifies a process.
processID
(Optional)Displays open files or ports that match the specified
regular expression.
regexp
(Optional)A regular expression.
reg_exp
Cisco Emergency Responder Command Line Interface Guide for Release 15
73
CLI Commands
set network ntp option
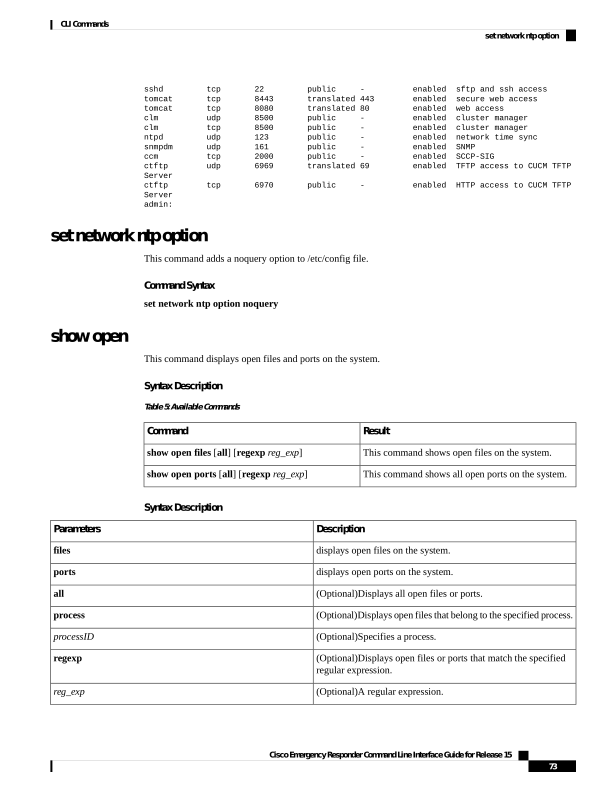
Page 86
show packages
This command displays the name and version for installed packages.
Command Syntax
show packages{active| inactive} name [page]
Syntax Description
Description
Parameters
Specifies active packages.
active
Specifies inactive packages.
inactive
The package name. To display all active or inactive packages,
use the wildcard character (*).
name
(Optional)Displays the output one page at a time.
page
Requirements
Command privilege level: 0
Allowed during upgrade: Yes
show password expiry maximum-age
This command displays the configured password expiration parameters.
Command Syntax
show password expiry maximum-age
show password expiry minimum-age
This command displays the configured password expiration parameters.
Command Syntax
show password expiry minimum-age
show password expiry user maximum-age
This command displays the configured password expiration parameters for a particular OS user.
Command Syntax
show password expiry user maximum-age userid
Cisco Emergency Responder Command Line Interface Guide for Release 15
74
CLI Commands
show packages
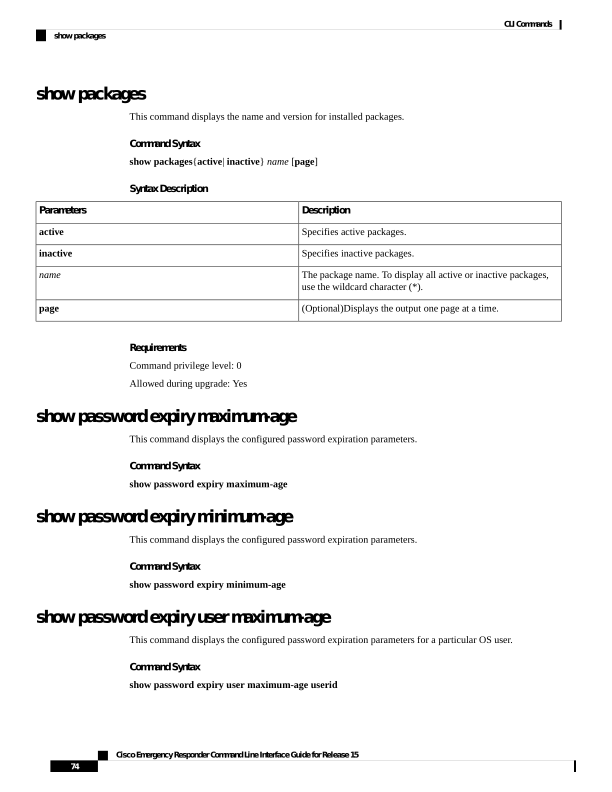
Page 87
show password expiry user minimum-age
This command displays the configured password expiration parameters for a particular OS user.
Command Syntax
show password expiry user minimum-age userid
show password history
This command displays the number of passwords that are maintained in the history for OS admin accounts.
Command Syntax
show password history
Requirements
Command privilege level: 0
Allowed during upgrade: Yes
show password inactivity
This command displays the status of the password inactivity for OS accounts.
Password inactivity is the number of days of inactivity after a password has expired before the account is
disabled.
Command Syntax
show password inactivity
Example
show password inactivity
Password Inactivity: Enabled and is currently set to 10
days
Requirements
Command privilege level: 0
Allowed during upgrade: Yes
show process
This command displays information about processes running on the system.
Cisco Emergency Responder Command Line Interface Guide for Release 15
75
CLI Commands
show password expiry user minimum-age
Page 88
Syntax
Result
Command
This command displays a list of all the processes and
critical information about each process and visually
indicates the child-parent relationships between the
processes.
show processlist [file filename] [detail]
This command displays the current load on the system.
show processload [cont] [clear] [noidle] [num
number] [thread] [cpu | memory| time] [page]
This command displays the details of processes that
share the same name and indicates their parent-child
relationship.
show process name process [file filename]
This command lists the open file descriptors for a
comma-separated list of process IDs.
show process open-fd process-id [, process-id2]
This command searches for the pattern that the regular
expression regexp specifies in the output of the
operating system-specific process listing.
show process search regexp [file filename]
This command displays a list of the most
CPU-intensive processes.
show process using-most cpu [number] [file
filename]
This command displays a list of the most
memory-intensive processes.
show process using-most memory [number] [file
filename]
This command displays a list of PIDs.
show process pid pid[file filename]
This command retrieves details of processes that share
the user name and displays parent-child relationship.
show process user username [file filename]
This command lists the most intensive processes.
show process using most
Syntax Description
Description
Parameters
displays a list of all the processes and critical information about
each process, and visually indicates the child-parent relationships
between the processes.
list
displays the current load on the system.
load
displays the details of processes that share the same name and
indicates their parent-child relationship.
name
lists the open file descriptors for a comma-separated list of process
IDs.
open-fd
searches for the pattern specified by the regular expression regexp
in the output of the operating system-specific process listing.
search
Cisco Emergency Responder Command Line Interface Guide for Release 15
76
CLI Commands
show process
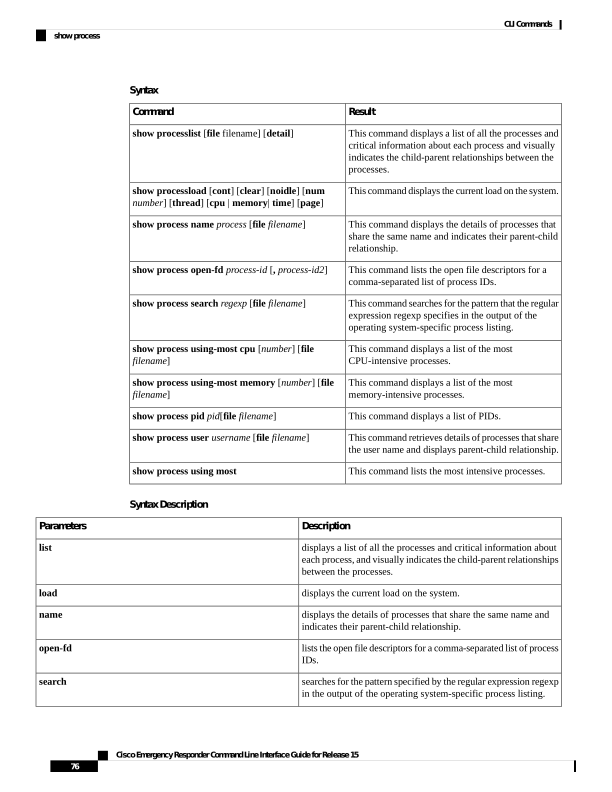
Page 89
Description
Parameters
displays a list of the most CPU-intensive processes.
using-most cpu
displays a list of the most memory-intensive processes.
using-most memory
(Optional)Outputs the results to the file specified by the filename.
filefilename
(Optional)Displays the detailed output.
detail
(Optional)Repeats the command continuously.
cont
(Optional)Clears the screen before displaying output.
clear
(Optional)Ignores the idle/zombie processes.
noidle
(Optional)Displays the number of processes specified by number.
The default number of processes is 10. Set number to all to display
all processes.
num number
(Optional)Displays threads.
thread
(Optional)Sorts output by CPU usage, memory usage, or time
usage. The default is to sort by CPU usage.
[cpu | memory | time]
(Optional)Displays the output in pages.
page
(Optional)Specifies the name of a process.
process
(Optional)Specifies the process ID number of a process.
process-id
(Optional)A regular expression.
regexp
(Optional)The number of processes to display. The default is 5.
number
Specifies the process ID number of a process.
pid
Specifies the username.
username
show session maxlimit
This command shows the upper limit for concurrent SSH sessions.
Command Syntax
show session maxlimit
Command Mode
Administrator (admin:)
Requirements
Command privilege level: 1
Cisco Emergency Responder Command Line Interface Guide for Release 15
77
CLI Commands
show session maxlimit

Page 90
Allowed during upgrade: Yes
show smtp
This command displays the name of the SMTP host.
Command Syntax
show snmp
Requirements
Command privilege level: 0
Allowed during upgrade: Yes
show stats io
This command displays system I/O statistics.
Command Syntax
show stats io [kilo] [detail] [page] [file filename]
Syntax Description
Description
Parameters
Displays statistics in kilobytes.
kilo
Displays detailed statistics on every available device on the system
and overrides the kilo option.
detail
Displays one page at a time.
page
Outputs the information to a file.
file filename
Useage Guidelines
The file option saves the information to
platform/cli/filename.txt.
The filename cannot contain the "." character.
Requirements
Command privilege level: 1
Allowed during upgrade: Yes
Cisco Emergency Responder Command Line Interface Guide for Release 15
78
CLI Commands
show smtp
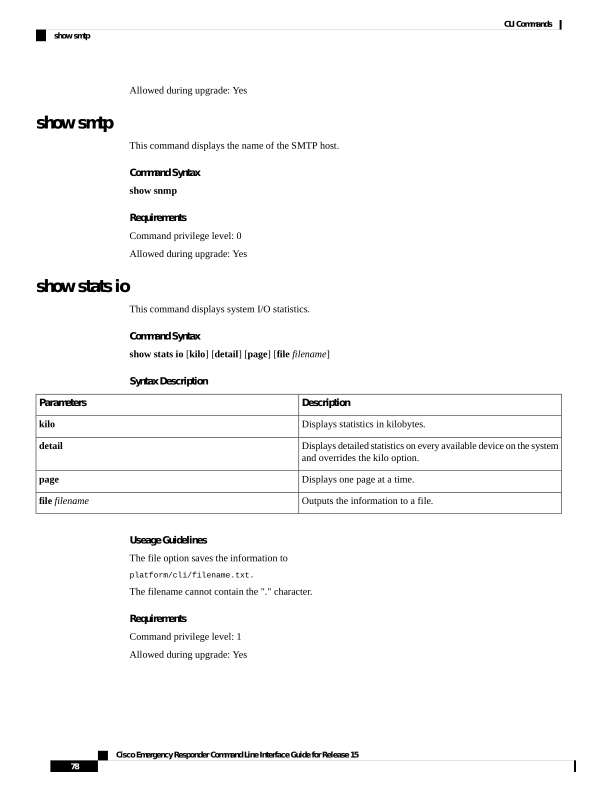
Page 91
show status
This command displays basic platform status.
Command Syntax
show status
Usage Guidelines
This command displays the following basic platform status:
• Host name
• Date
• Time zone
• Locale
• Product version
• Platform version
• CPU usage
• Memory and disk usage
Requirements
Command privilege level: 0
show tech all
This command displays the combined output of all show tech commands.
Command Syntax
show tech all [page] [file filename]
Syntax Description
Description
Parameters
Displays one page at a time.
page
Outputs the information to a file.
filefilename
Useage Guidelines
The file option saves the information to
platform/cli/filename.txt.
The file name cannot contain the "." character.
Cisco Emergency Responder Command Line Interface Guide for Release 15
79
CLI Commands
show status
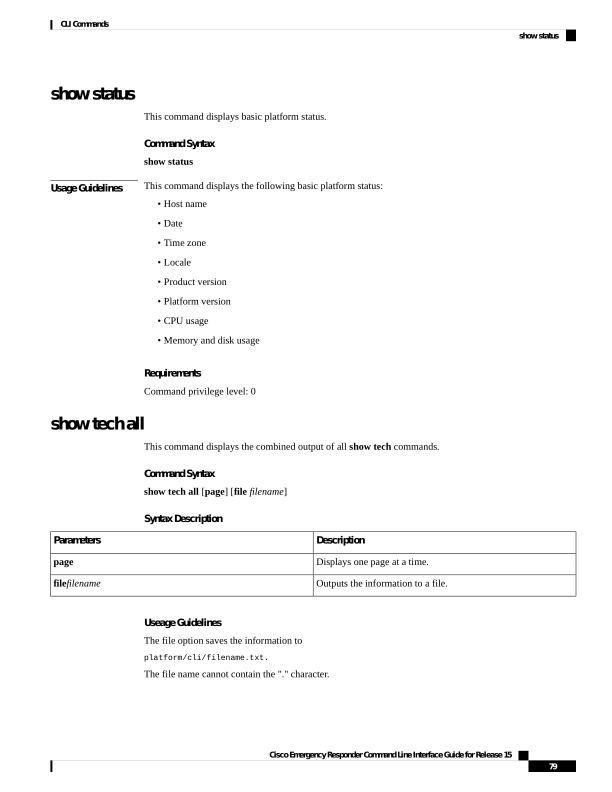
Page 92
Requirements
Command privilege level: 1
Allowed during upgrade: Yes
show tech database
This command creates a CSV file of the entire database.
Command Syntax
show tech database {dump| sessions}
Syntax Description
Description
Parameters
Creates a CSV file of the entire database.
dump
Redirects the session and SQL information of the present session
IDs to a file.
sessions
Requirements
Command privilege level: 1
Allowed during upgrade: Yes
show tech database dump
This command creates a CSV file of the entire database.
Command Syntax
show tech database dump
show tech dbintegrity
This command displays the database integrity.
Command Syntax
show tech dbintegrity
show tech dbinuse
This command displays the database in use.
Cisco Emergency Responder Command Line Interface Guide for Release 15
80
CLI Commands
show tech database
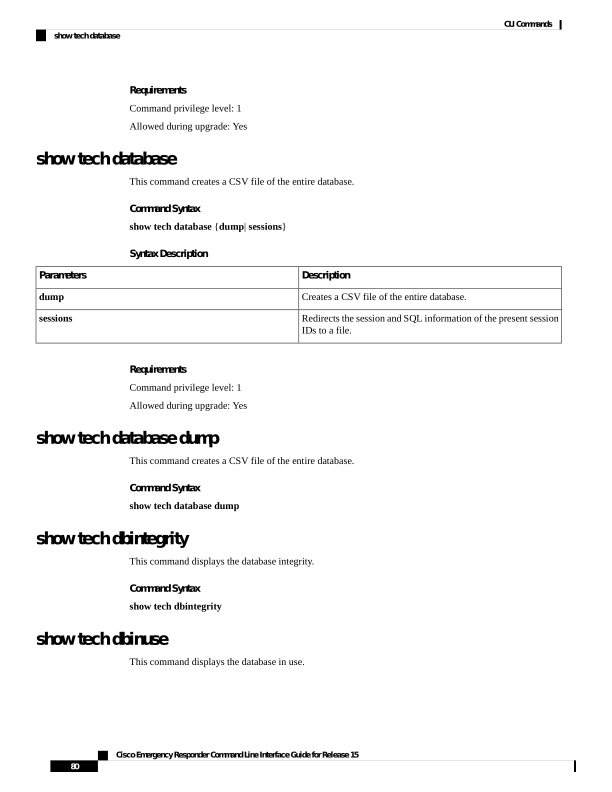
Page 93
Command Syntax
show tech dbinuse
Requirements
Command privilege level: 1
Allowed during upgrade: Yes
show tech dbschema
This command displays the database schema in a CSV file.
Command Syntax
show tech dbschema
Requirements
Command privilege level: 1
Allowed during upgrade: Yes
show tech dbstateinfo
This command displays the state of the database.
Command Syntax
show tech dbstateinfo
show tech network
This command displays network aspects of the server.
Command Syntax
Result
Command
show tech network
This command displays network tech information for
a page.
show tech network [page] [file filename]
This command displays all network tech information.
show tech network all [page] [search text] [file
filename]
This command displays information about hosts
configuration.
show tech network hosts [page] [search text] [file
filename]
This command displays information about the network
interfaces.
show tech network interfaces [page] [search text]
[file filename]
Cisco Emergency Responder Command Line Interface Guide for Release 15
81
CLI Commands
show tech dbschema
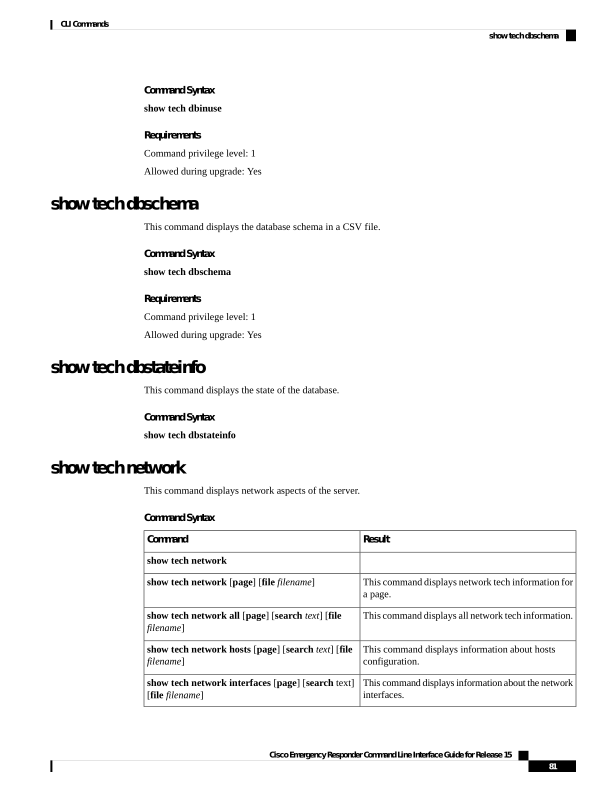
Page 94
Result
Command
This command displays information about hostname
resolution.
show tech network resolv [page] [search text] [file
filename]
This command displays information about network
routes.
show tech network routes [page] [search text] [file
filename]
This command displays the list of open sockets.
show tech network sockets {numeric}
Syntax Description
Description
Parameters
displays all network technical information.
all
displays information about hosts configuration.
hosts
displays information about the network interfaces.
interfaces
displays information about hostname resolution.
resolv
displays information about network routes.
routes
displays the list of open sockets.
sockets
(Optional)Displays one page at a time.
page
(Optional)Searches the output for the string specified by text. The
search is not case sensitive.
search text
(Optional)Outputs the information to a file.
file filename
(Optional)Displays the numerical addresses of the ports instead
of determining symbolic hosts. It is equivalent to running the
Linux netstat [-n] shell command.
numeric
Usage Guidelines
The file option saves the information to platform/cli/filename.txt. The file name cannot contain the "." character.
Requirements
Command privilege level: 1
Allowed during upgrade: Yes
show tech prefs
This command displays all preferences files for Emergency Responder and its database.
Usage Guidelines
This information is written to a file, which can be viewed subsequently using the file view CLI.
Cisco Emergency Responder Command Line Interface Guide for Release 15
82
CLI Commands
show tech prefs
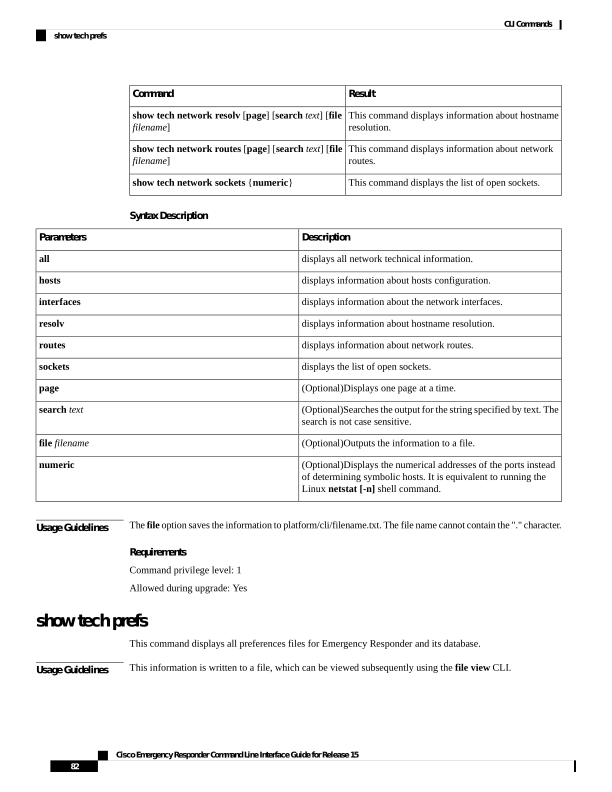
Page 95
Command Syntax
show tech prefs
show tech runtime
This command displays server runtime.
Command Syntax
show tech runtime {all | cpu| disk| env| memory} [page] [file filename]
Syntax Description
Description
Parameters
Displays all runtime information.
all
Displays CPU usage information at the time the command is run.
cpu
Displays system disk usage information.
disk
Displays environment variables.
env
Displays memory usage information.
memory
Displays one page at a time.
page
Outputs the information to a file.
file filename
Usage Guidelines
The file option saves the information to
platform/cli/filename.txt.
The file name cannot contain the "." character.
Requirements
Command privilege level: 1
Allowed during upgrade: Yes
show tech systables
This command displays the name of all tables in the sysmaster database.
Command Syntax
show tech systables
Requirements
Command privilege level: 1
Cisco Emergency Responder Command Line Interface Guide for Release 15
83
CLI Commands
show tech runtime
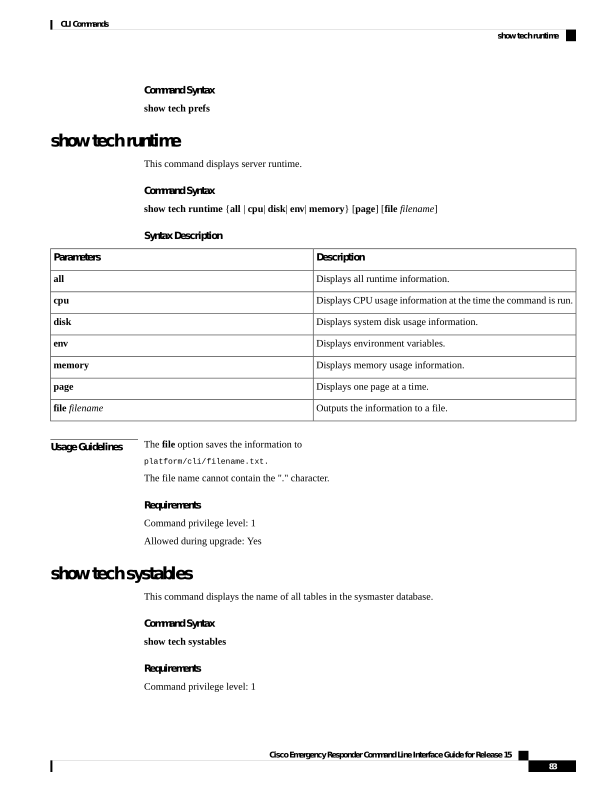
Page 96
Allowed during upgrade: Yes
show tech system
This command displays the system aspects of the server.
Command Syntax
show tech system {all| bus| hardware| host| kernel| software| tools} [page] [file filename]
Syntax Description
Description
Parameters
Displays all of the system information.
all
Displays information about the data buses on the server.
bus
Displays information about the server hardware.
hardware
Displays information about the server.
host
Lists the installed kernel modules.
kernel
Displays information about the installed software versions.
software
Displays information about the software tools on the server.
tools
Displays one page at a time.
page
Outputs the information to a file.
file filename
Usage Guidelines
The file option saves the information to
platform/cli/filename.txt
. The file name cannot contain the "." character.
Requirements
Command privilege level: 1
Allowed during upgrade: Yes
show tech table
This command displays the contents of the specified database table.
Command Syntax
show tech table table_name [page] [csv]
Cisco Emergency Responder Command Line Interface Guide for Release 15
84
CLI Commands
show tech system
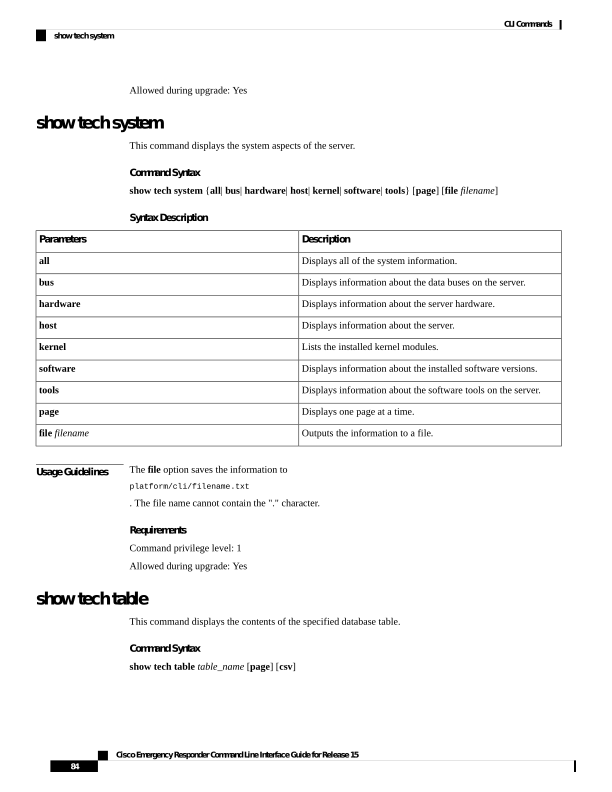
Page 97
Syntax Description
Description
Parameters
The name of the table to display.
table_name
Displays the output one page at a time.
page
Sends the output to a comma separated values file.
csv
Requirements
Command privilege level: 1
Allowed during upgrade: Yes
show tech version
This command displays the version of the installed components.
Command Syntax
show tech version [page]
Syntax Description
Description
Parameters
Displays the output one page at a time.
page
Requirements
Command privilege level: 1
Allowed during upgrade: Yes
show timezone
This command displays time zone information.
Command Syntax
show timezone{config| list [page] }
Syntax Description
Description
Parameters
Displays the current time zone settings.
config
Displays the available time zones.
list
Cisco Emergency Responder Command Line Interface Guide for Release 15
85
CLI Commands
show tech version
Page 98
Description
Parameters
Displays the output one page at a time.
page
Requirements
Command privilege level: 0
Allowed during upgrade: Yes
show tls trace
This command shows the status of TLS trace for a service.
Command Syntax
show tls trace service
Syntax Description
Description
Parameters
Represents the TLS tracing status of a service. It is a mandatory
parameter.
service
Command Modes
Administrator (admin:)
Usage Guidelines
Requirements
Command privilege level: 1
Allowed during upgrade: Yes
Applies to: Cisco Emergency Responder
Example
admin:show tls trace
CER doesnt support HAProxy service.Blocking user input
show tls min-version
This command shows the minimum configured version of Transport Layer Security (TLS) protocol.
Command Syntax
show tls min-version
Command Modes
Administrator (admin:)
Usage Guidelines
Requirements
Cisco Emergency Responder Command Line Interface Guide for Release 15
86
CLI Commands
show tls trace
Page 99
Command privilege level: 1
Allowed during upgrade: Yes
Applies to: Cisco Emergency Responder
Example
admin:show tls min-version
The configured TLS minimum version is 1.0.
show tls resumption-timeout
This command shows the TLS session resumption timeout.
Command Syntax
show tls resumption-timeout
Command Modes
Administrator (admin:)
Usage Guidelines
Requirements
Command privilege level: 1
Allowed during upgrade: Yes
Applies to: Cisco Emergency Responder
show trace
This command displays trace information for a particular task.
Command Syntax
show trace [task_name]
Syntax Description
Description
Parameters
The name of the task for which you want to display the trace
information.
task_name
Useage Guidelines
If you do not enter any parameters, the command returns a list of available tasks.
Requirements
Command privilege level: 0
Allowed during upgrade: Yes
Cisco Emergency Responder Command Line Interface Guide for Release 15
87
CLI Commands
show tls resumption-timeout
Page 100
Example
This example displays trace information for CDP.
show trace cdps
show ups status
This command shows the current status of the USB-connected APC smart-UPS device and starts the monitoring
service if not already started.
Command Syntax
show ups status
Usage Guidelines
This command only can provide a complete status on 7835-H2 and 7825-H2 servers.
show version
This command displays the software version on the active or inactive partition.
Command Syntax
show version {active| inactive}
Syntax Description
Description
Parameters
Displays the version running on the active partition.
active
Displays the version on the inactive partition.
inactive
Requirements
Command privilege level: 0
Allowed during upgrade: Yes
show webapp session timeout
This command displays the webapp session timeout value, which is the amount of time, in minutes, that can
elapse before a web application times out and logs off the user.
Command Syntax
show webapp session timeout
Command Mode
Administrator (admin:)
Cisco Emergency Responder Command Line Interface Guide for Release 15
88
CLI Commands
show ups status
Page 101
Requirements
Command privilege level: 0
Allowed during upgrade: Yes
show web-security
This command displays the contents of the current web-security certificate.
Command Syntax
show web-security
Requirements
Command privilege level: 0
Allowed during upgrade: Yes
show workingdir
This command retrieves the current working directory for activelog, inactivelog, install, and TFTP.
Command Syntax
show workingdir
Command Mode
Administrator (admin:)
Requirements
Command privilege level: 0
Allowed during upgrade: Yes
Unset Commands
unset ipsec
This command allows you to disable IPsec policies and associations.
Command Syntax
Result
Command
unset ipsec policy {ALL | policy-name}
Cisco Emergency Responder Command Line Interface Guide for Release 15
89
CLI Commands
show web-security
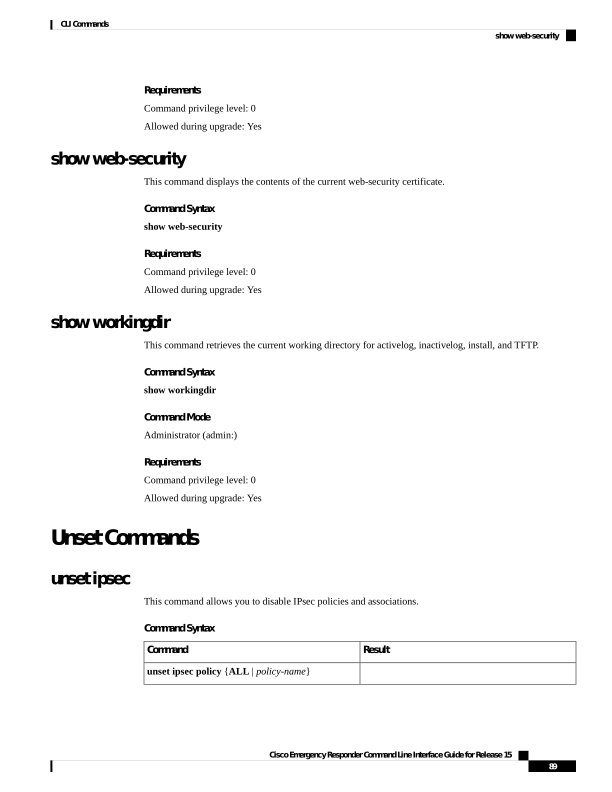
Page 102
Result
Command
unset ipsec association policy-name {ALL |
association-name}
Syntax Description
Description
Parameters
The name of an IPsec policy.
policy-name
The name of an IPsec association.
association-name
Requirements
Command privilege level: 1
Allowed during upgrade: No
unset network
This command unsets DNS options.
Command Syntax
unset network dns options [timeout] [attempts] [rotate]
Syntax Description
Description
Parameters
Sets the wait time before the system considers a DNS query failed
to the default.
timeout
Sets the number of DNS attempts to make before failing to the
default.
attempts
Sets the method for selecting a name server to the default. This
affects how loads are distributed across name servers.
rotate
Usage Guidelines
The system asks whether you want to continue to execute this command.
If you continue, the system temporarily loses network connectivity.
Caution
unset network domain
This command unsets the domain name and restarts the server.
Cisco Emergency Responder Command Line Interface Guide for Release 15
90
CLI Commands
unset network

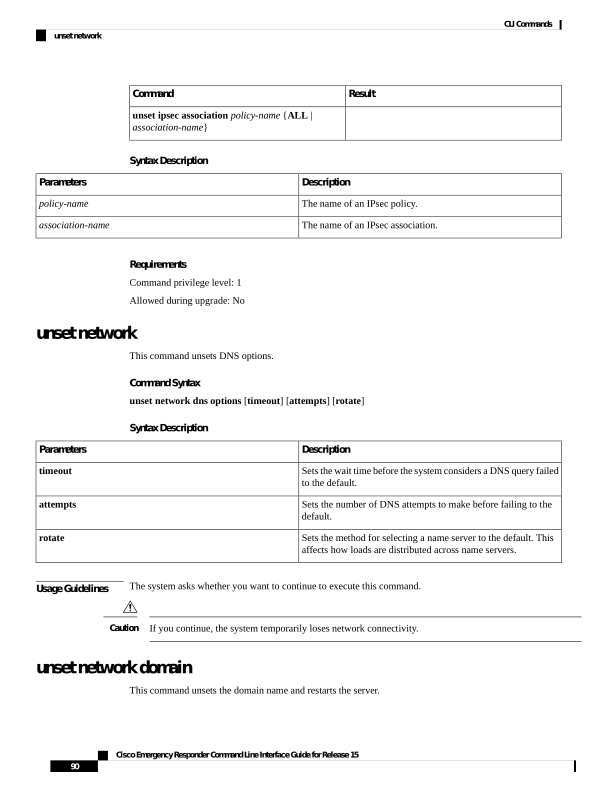
Page 103
Command Syntax
unset network domain
Requirements
Command privilege level: 1
Allowed during upgrade: Yes
Utils Commands
utils auditd
This command starts, stops, and provides the status of the system auditing service.
Command Syntax
utils auditd{enable|disable|status}
Syntax Description
Description
Parameters
Enables the collection of audit logs. When enabled, the system
monitors and records user actions as well as Linux events such
as the creation and removal of users, as well as the editing and
deleting of files.
enable
Disables the collection of audit logs.
disable
Displays the status of audit log collection. Cisco recommends that
you retrieve the audit log by using the Real-Time Monitoring
Tool, but you can also retrieve it by using the CLI.
status
Command Mode
Administrator (admin:)
Requirements
Command privilege level: 1
Allowed during upgrade: Yes
Useage Guidelines
After the service has been enabled, it monitors and logs activity on the system. Be aware that the system
auditing service logs a lot of information. Care must be taken not to overfill the disk.
Cisco Emergency Responder Command Line Interface Guide for Release 15
91
CLI Commands
Utils Commands
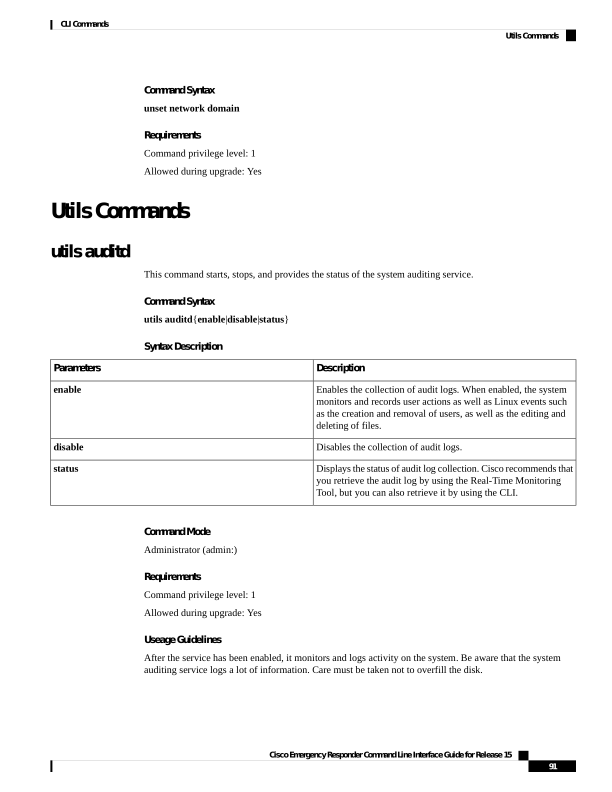
Page 104
utils core list
This command lists all existing core files.
Command Syntax
utils core{active| inactive} list
utils core analyze
This command generates a backtrace for the specified core file, a thread list, and the current value of all CPU
registers.
Command Syntax
utils core analyze core file name
Syntax Description
Description
Parameters
Specifies the name of a core file.
core file name
Usage Guidelines
The command creates a file of the same name as the core file, with a .txt extension, in the same directory as
the core file. This command works only on the active partition.
utils create report
This command creates reports about the server in the platform or log directory.
Command Syntax
utils create report {hardware| platform| csa}
Syntax Description
Description
Parameters
Creates a system report containing disk array, remote console,
diagnostic, and environmental data.
hardware
Collects all of the platform configuration files into a TAR file.
platform
Collects all the files required for CSA diagnostics and assembles
them into a single CSA diagnostics file. You can retrieve this file
by using the file get command.
csa
Usage Guidelines
You are prompted to continue after you enter the command.
Cisco Emergency Responder Command Line Interface Guide for Release 15
92
CLI Commands
utils core list
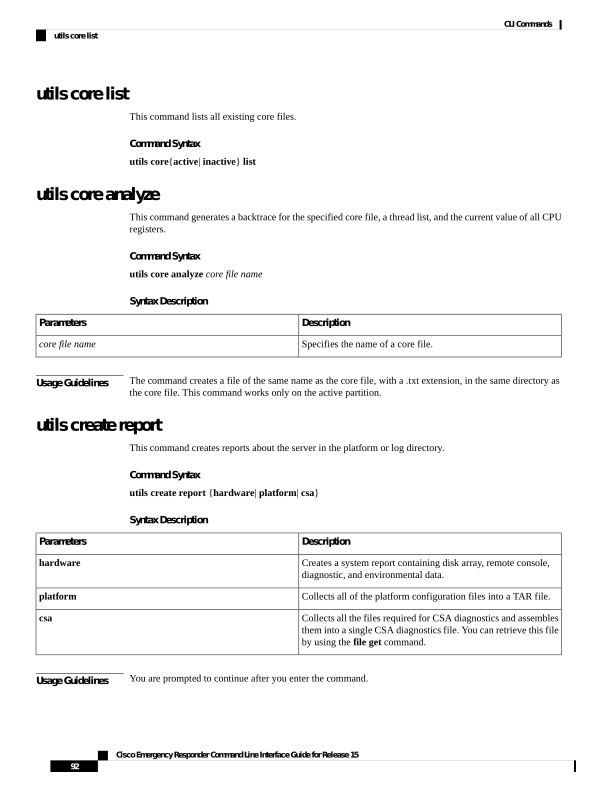
Page 105
After creating a report, to get the report use the command file get activelog platform/log/filename, where
filename is the report filename that is displayed after the command completes.
Requirements
Level privilege: 1
Command privilege level: 0
Allowed during upgrade: Yes
utils create report database
Collects all log files needed for database troubleshooting.
Command Syntax
Utils create report database.
Example
admin:utils create report database
Created /var/log/active/cm/log/informix/[hostname]_db_report_Oct_27_11_13_10 for log
collection...
Collecting database logs, please be patient...
Collecting message logs (ccm.log) and assert failure files (af files)...
Collecting ris and ats files...
Collecting DB Replication logs...
Collecting DB install logs...
Collecting dblrpc and dbmon logs...
Collecting CDR information...
COMPLETED! Database report created successfully...
To retrieve the [hostname]_db_report_Oct_27_11_13_10.tar, use CLI command:
file get activelog cm/log/informix/[hostname]_db_report_Oct_27_11_13_10.tar
To delete the [hostname]_db_report_Oct_27_11_13_10.tar, use CLI command:
file delete activelog cm/log/informix/[hostname]_db_report_Oct_27_11_13_10.tar
utils configapisecurehttp
This command enables secure http for UCAT service(ConfigAPI).
Command Syntax
Result
Command
This command when enabled, UCAT(ConfigAPI)
connections are allowed only over secure http.
utils configapisecurehttp enable
This command when disabled, non-secure http
UCAT(ConfigAPI) connections are allowed.
utils configapisecurehttp disable
Displays the enabled or disabled status of the
command.
utils configapisecurehttp status
Cisco Emergency Responder Command Line Interface Guide for Release 15
93
CLI Commands
utils create report database
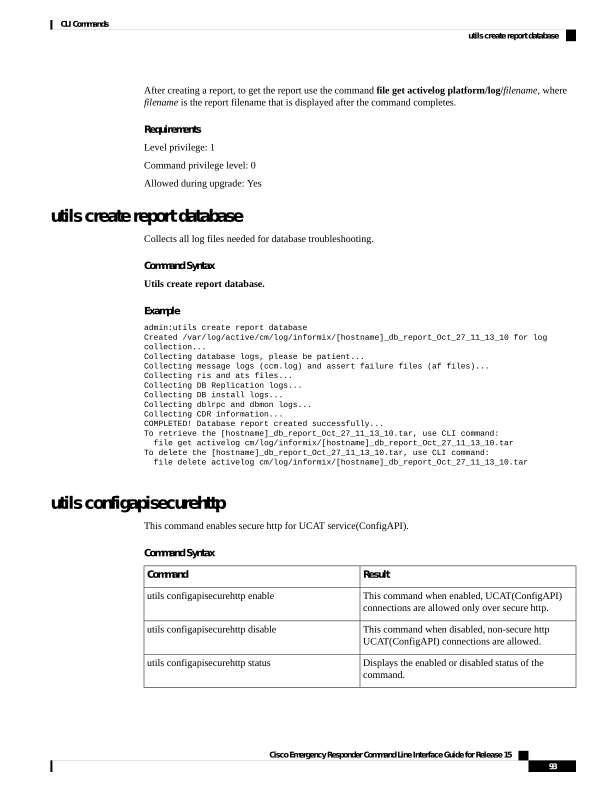
Page 106
Usage Guidelines
We recommend that you enable the configapisecurehttp when the FIPS mode or Enhanced Security Mode
is enabled on the Cisco Emergency Responder server.
Requirements
Command privilege level: 1
Allowed during upgrade: Yes
utils dbreplication dropadmindb
This command drops the Informix syscdr database on any server in the cluster.
Command Syntax
utils dbreplication dropadmindb
Usage Guidelines
You should run this command only if database replication reset or cluster reset fails and replication cannot
be restarted.
Command Modes
Administrator (admin:)
Requirements
Command privilege level: 0
Allowed during upgrade: No
Applies to: Unified Communications Manager, IM and Presence service on Unified Communications Manager,
Cisco Unity Connection.
utils dbreplication status
This command displays the status of database replication. Use this command only on the first publisher server
of a cluster.
Command Syntax
utils dbreplication status
utils dbreplication stop
This command stops the automatic setup of database replication. Run this command on subscriber and publisher
servers before executing the CLI command utils dbreplication reset or utils dbreblication clusterreset.
You can run this command on the subscriber servers simultaneously, before you run it on the publisher server.
Command Syntax
utils dbreplication stop {nodename| all}
Cisco Emergency Responder Command Line Interface Guide for Release 15
94
CLI Commands
utils dbreplication dropadmindb
Page 107
Syntax Description
Description
Parameters
Specifies the name of the node on which to stop the automatic
setup of database replication.
nodename
Stops database replication on all nodes.
all
Command Mode
Administrator (admin:)
Requirements
Command privilege level: 0
Allowed during upgrade: No
utils dbreplication repair
This command repairs database replication.
Command Syntax
utils dbreplication repair
utils dbreplication reset
This command resets and restarts database replication.
Command Syntax
utils dbreplication reset
Usage Guidelines
You must restart the Emergency Responder Subscriber node from CUOS Administration or using the CLI
command utils system restart after executing utils dbreplication reset command. See help utils dbreplication
reset CLI command for more details.
utils diagnose
This command enables you to diagnose and attempt to automatically fix system problems.
Command Syntax
utils diagnose {fix| list| module| test| version} [module_name]
Cisco Emergency Responder Command Line Interface Guide for Release 15
95
CLI Commands
utils dbreplication repair
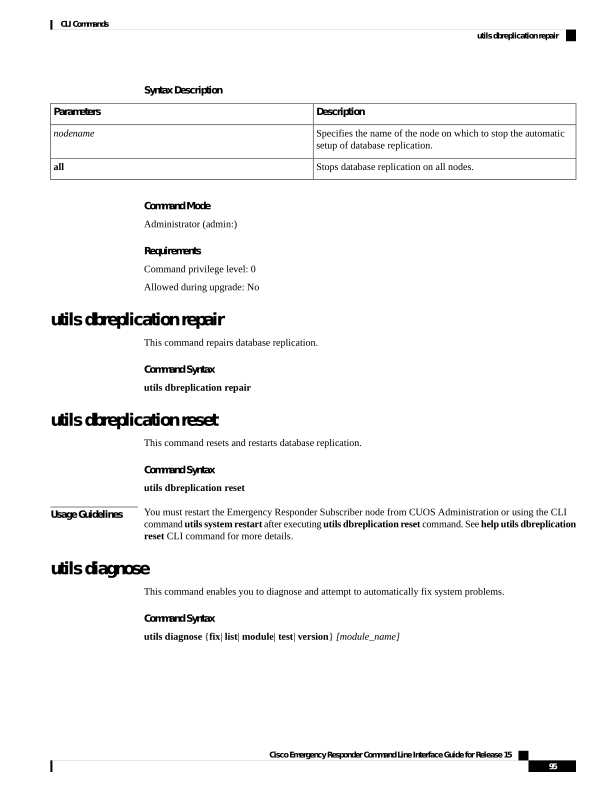
Page 108
Syntax Description
Description
Parameters
Runs all diagnostic commands and attempts to fix problems.
fix
Lists all available diagnostic commands.
list
Runs a single diagnostic command or group of commands and
attempts to fix problems.
module
Runs all diagnostic commands but does not attempt to fix
problems.
test
Displays the diagnostic framework version.
version
The name of a diagnostics module.
module_name
utils diagnose test
This command enables you to run all diagnostic commands but does not attempt to fix any problems.
Command Syntax
utils diagnose test
utils disaster_recovery backup network
This command starts a backup job and stores the resulting tar file on a remote server.
Command Syntax
utils disaster_recovery backup network [featurelist] [path] [servername] [username]
Syntax Description
Description
Parameters
Specifies the list of features to back up, separated by commas.
featurelist
Represents the location of the backup files on the remote server.
path
Represents the IP address or host name of the server where you
stored the backup files.
servername
Represents the username that is needed to log in to the remote
server.
username
Cisco Emergency Responder Command Line Interface Guide for Release 15
96
CLI Commands
utils diagnose test
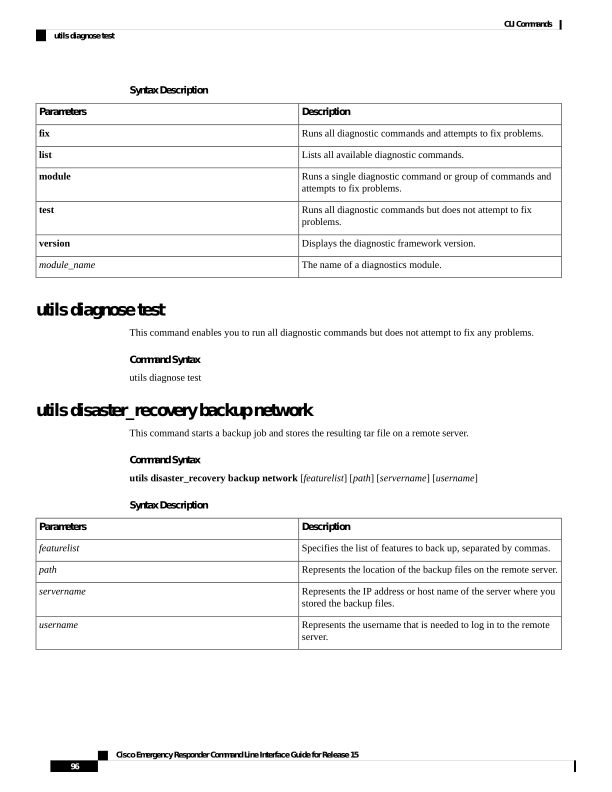
Page 109
Usage Guidelines
The system prompts you to enter the password for the account on the remote server.
Note
Requirements
Command privilege level: 1
Allowed during upgrade: Yes
utils disaster_recovery cancel_backup
This command cancels the ongoing backup job.
Command Syntax
utils disaster_recovery cancel_backup
Usage Guidelines
The system prompts you to confirm that you want to cancel the backup job.
Requirements
Command privilege level: 1
Allowed during upgrade: Yes
utils disaster_recovery device add network
This command adds the backup network device.
Command Syntax
utils disaster_recovery device add network device_name path server_name/ip_address username
[Number_of_backups]
Syntax Description
Description
Parameters
The name of the backup device to be added.
device_name
The path to retrieve backup device from this location.
path
The hostname or IP address of the server where the backup file
needs to be stored.
server_name/ip_address
the user ID to connect to remote machine
username
(Optional)The number of backups to store on Network
Directory(default 2).
Number_of_backups
Cisco Emergency Responder Command Line Interface Guide for Release 15
97
CLI Commands
utils disaster_recovery cancel_backup

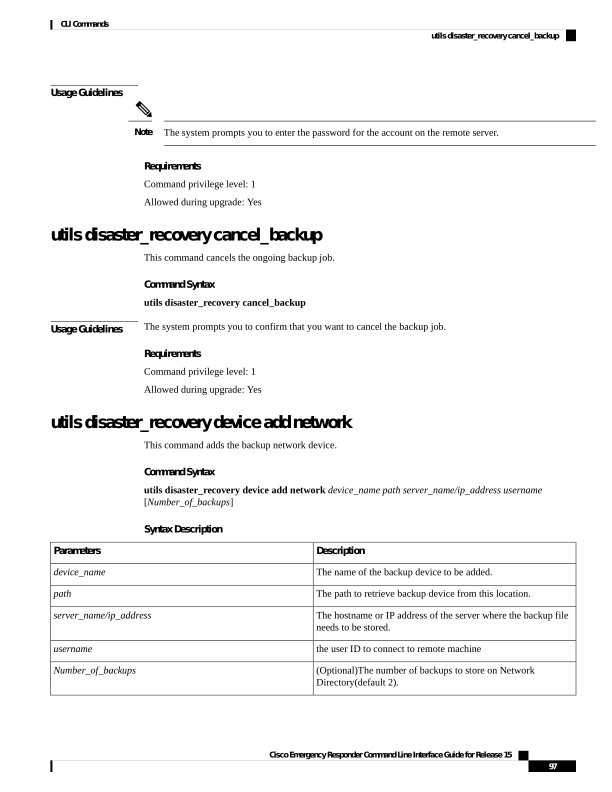
Page 110
Example
Use the following example when running the utils disaster_recovery device add network command:
utils disaster_recovery device add network
networkDevice /root 10.77.31.116 root 3
Requirements
Command privilege level: 1
Allowed during upgrade: No
utils disaster_recovery device delete
This command deletes the device.
Command Syntax
utils disaster_recovery device delete device_name|*
Syntax Description
Description
Parameters
The name of the device to be deleted.
device_name
Deletes all the existing devices except for the ones associated to
a schedule.
*
Requirements
Command privilege level: 1
Allowed during upgrade: No
utils disaster_recovery device list
This command shows the device name, device type, and device path for all the backup devices.
Command Syntax
utils disaster_recovery device list
Example
The following example shows how to run this command:
utils disaster_recovery device list
sftpdevice
NETWORK
10.77.31.116 : /root
tapedevice
TAPE
/dev/nst0
localdevice
LOCAL
/common/drfbackup
Cisco Emergency Responder Command Line Interface Guide for Release 15
98
CLI Commands
utils disaster_recovery device delete
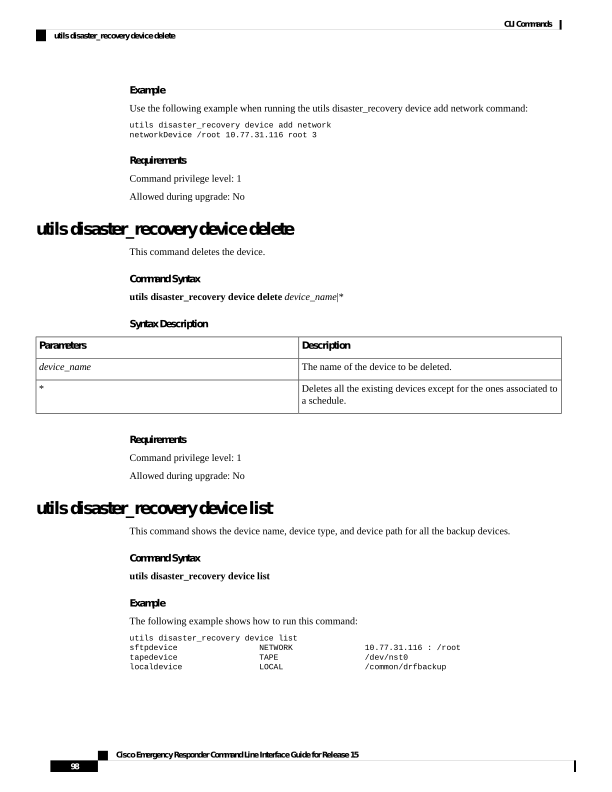
Page 111
Requirements
Command privilege level: 1
Allowed during upgrade: Yes
utils disaster_recovery estimate_tar_size
estimate_tar_size help:
This command provides the estimated size of last successful backup from SFTP/Local device.
Syntax Description
Description
Parameters
This will give the tar file name through which the size can be
estimated.
Name of the tar
Example
admin:utils disaster_recovery estimate_tar_size CER
Estimated tar size successfully: Estimated size of backup for selected feature(s) is 42.52
MB.
utils disaster_recovery history
This command shows the history of a previous backup or restore
Command Syntax
utils disaster_recovery history operation
Syntax Description
Description
Parameters
The name of an operation such as backup or restore.
operation
Example
The following example shows how to run this command:
utils disaster_recovery history backup
Tar Filename: Backup Device: Completed On: Result: Backup Type: Features Backed Up:
2009-10-30-14-53-32.tar TAPE
Fri Oct 30 14:55:31 CDT 2009
ERROR
MANUAL
2009-12-10-10-30-17.tar TAPE
Thu Dec 10 10:35:22 CST 2009
SUCCESS
MANUAL
CDR_CAR,CCM
utils disaster_recovery jschLogs
This command enables and disables detailed JSch logging.
Cisco Emergency Responder Command Line Interface Guide for Release 15
99
CLI Commands
utils disaster_recovery estimate_tar_size
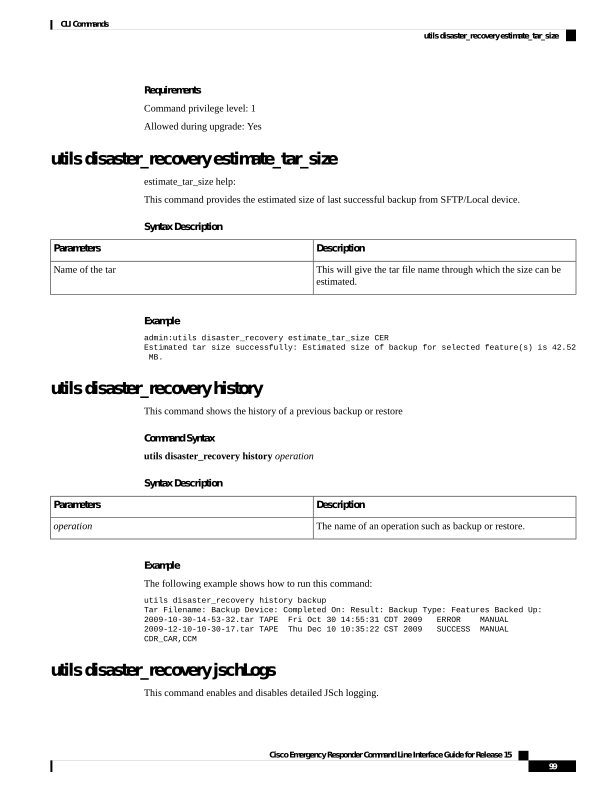
Page 112
Example
drfCliCommand: JSch detailed logging enabled.
Restart DRS Master and Local Agent in this machine for the changes to take effect.
drfCliCommand: JSch detailed logging disabled.
Restart DRS Master and Local Agent in this machine for the changes to take effect.
JSch logs deleted successfully.
utils disaster_recovery schedule add
This command adds the configured schedules.
Command Syntax
utils disaster_recovery schedule add schedulename devicename featurelist datetime frequency
Syntax Description
Description
Parameters
The name of the scheduler.
schedulename
The name of the device for which scheduling is done.
devicename
The comma-separated feature list to back up.
featurelist
The date when the scheduler is set. The format is
(yyyy/mm/dd-hh:mm) 24-hr clock.
datetime
The frequency at which the scheduler is set to receive a backup.
For example: ONCE, DAILY, WEEKLY and MONTHLY .
frequency
Example
The following example show how to run this command:
utils disaster_recovery schedule add schedulename devicename featurelist
datetime frequency
Schedule has been saved successfully.
Requirements
Command privilege level: 1
Allowed during upgrade: Yes
utils disaster_recovery schedule delete
This command deletes the specified schedule.
Command Syntax
utils disaster_recovery schedule delete schedulename|*
Cisco Emergency Responder Command Line Interface Guide for Release 15
100
CLI Commands
utils disaster_recovery schedule add
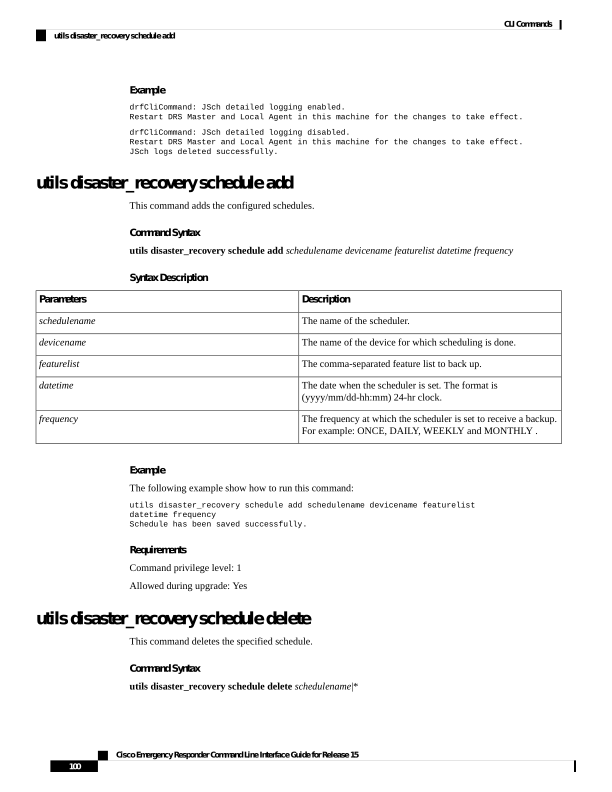
Page 113
Syntax Description
Description
Parameters
The name of the schedule that needs to be deleted.
schedulename
Deletes all of the existing schedules.
*
Example
The following example shows how this command is run:
utils disaster_recovery schedule delete schedule1|
Schedules deleted successfully.
Requirements
Command privilege level: 1
Allowed during upgrade: No
utils disaster_recovery schedule disable
This command disables the specified schedule.
Command Syntax
utils disaster_recovery schedule disable schedulename
Syntax Description
Description
Parameters
The name of the schedule that needs to be disabled.
schedulename
Example
The following example shows how to run this command:
utils disaster_recovery schedule disable schedule1
Schedule disabled successfully.
Requirements
Command privilege level: 1
Allowed during upgrade: No
utils disaster_recovery schedule enable
This command enables the specified schedule.
Cisco Emergency Responder Command Line Interface Guide for Release 15
101
CLI Commands
utils disaster_recovery schedule disable
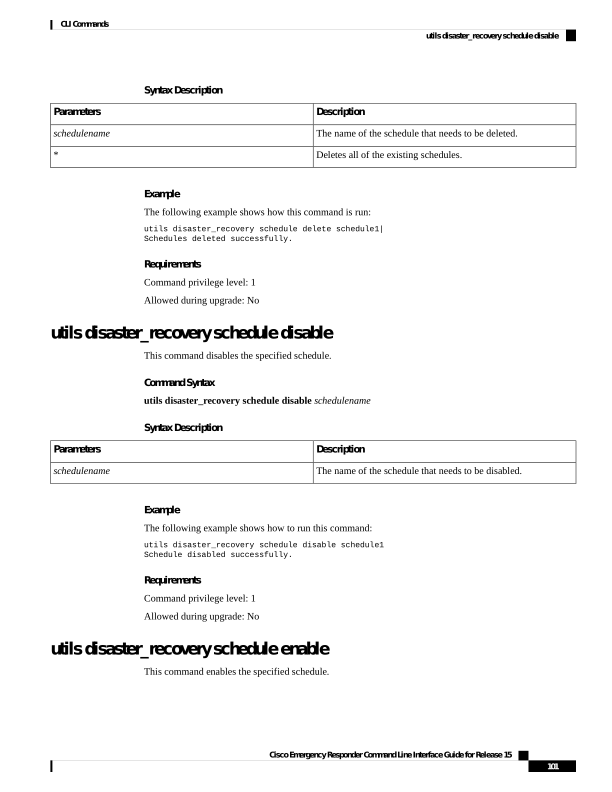
Page 114
Command Syntax
utils disaster_recovery schedule enable schedulename
Syntax Description
Description
Parameters
The name of the schedule that needs to be enabled.
schedulename
Example
The following example shows how to run this command:
utils disaster_recovery schedule enable schedule1
Schedule enabled successfully.
Requirements
Command privilege level: 1
Allowed during upgrade: No
utils disaster_recovery schedule list
This command displays all the of configured schedules.
Command Syntax
utils disaster_recovery schedule list
Requirements
Command privilege level: 1
Allowed during upgrade: No
utils disaster_recovery restore network
This command starts a restore job and takes the backup tar file from a remote server.
Command Syntax
utils disaster_recovery restore network restore_server tarfilename path servername username
Syntax Description
Description
Parameters
Specifies the hostname of the server that you want to restore.
restore_server
Specifies the name of the file to restore.
tarfilename
Cisco Emergency Responder Command Line Interface Guide for Release 15
102
CLI Commands
utils disaster_recovery schedule list
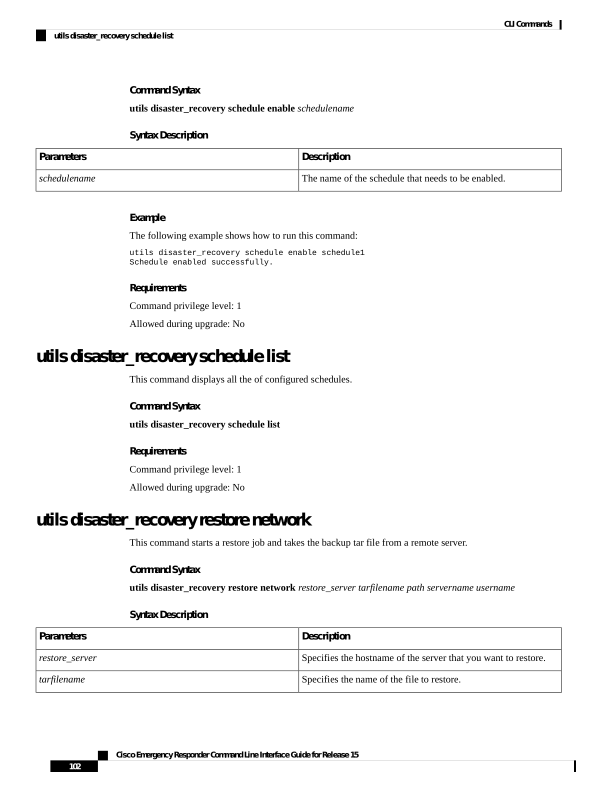
Page 115
Description
Parameters
Represents the location of the backup files on the remote server.
path
Represents the IP address or host name of the server where you
stored the backup files.
servername
Represents the username that is needed to log in to the remote
server.
username
Usage Guidelines
The system prompts you to enter the password for the account on the remote server.
Note
Requirements
Command privilege level: 1
Allowed during upgrade: Yes
utils disaster_recovery show_backupfiles tape
This command displays information about the backup files that are stored on a tape.
Command Syntax
utils disaster_recovery show_backupfiles tape tapeid
Syntax Description
Description
Parameters
Represents the ID of an available tape device.
tapeid
Requirements
Command privilege level: 1
Allowed during upgrade: No
utils disaster_recovery show_backupfiles network
This command displays information about the backup files that are stored on a remote server.
Command Syntax
utils disaster_recovery show_backupfiles network path servername username
Cisco Emergency Responder Command Line Interface Guide for Release 15
103
CLI Commands
utils disaster_recovery show_backupfiles tape

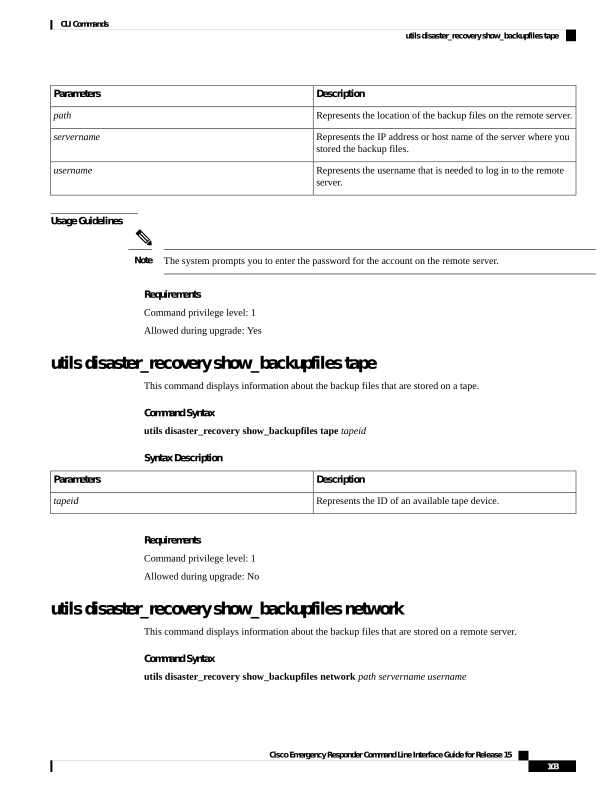
Page 116
Syntax Description
Description
Parameters
Represents the location of the backup files on the remote server.
path
The IP address or host name of the server where you stored the
backup files.
servername
The username that is needed to log in to the remote server.
username
Requirements
Command privilege level: 1
Allowed during upgrade: No
utils disaster_recovery show_registration
This command displays the registered features and components on the specified server.
Command Syntax
utils disaster_recovery show_registration hostname
Syntax Description
Description
Parameters
The server that you want to display registration information.
hostname
Requirements
Command privilege level: 1
Allowed during upgrade: No
utils disaster_recovery status
This command displays the status of the current backup or restore job.
Command Syntax
utils disaster_recovery status operation
Syntax Description
Description
Parameters
The name of the ongoing operation: backup or restore.
operation
Cisco Emergency Responder Command Line Interface Guide for Release 15
104
CLI Commands
utils disaster_recovery show_registration
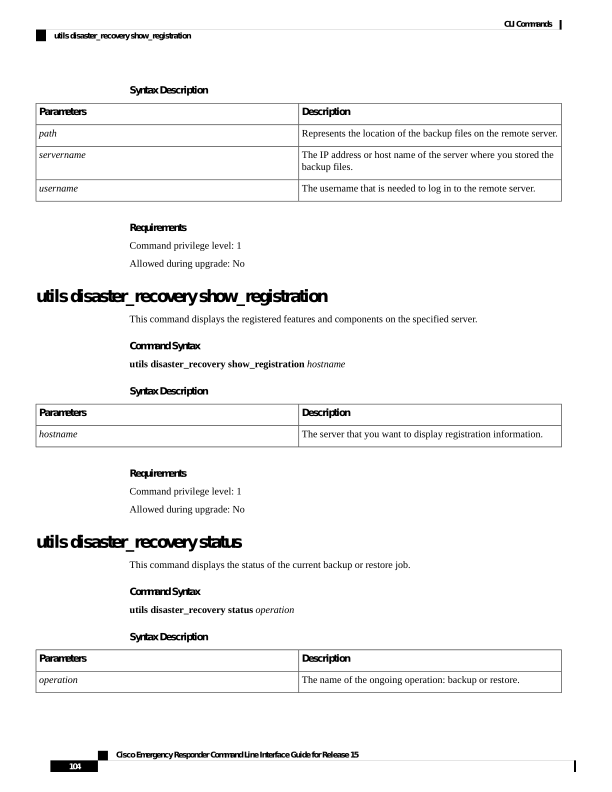
Page 117
Requirements
Command privilege level: 1
Allowed during upgrade: No
utils EnhancedSecurityMode
This command allows you to check and change Enhanced Security Mode status on a particular node.
Command Syntax
Result
Command
This command allows you to change and check
Enhanced Security Mode status on a particular node.
When Enhanced Security Mode is enabled, the system
implements a set of strict security and risk
management controls that allow your system to
comply with the Enhanced Security Mode guidelines.
utils EnhancedSecurityMode
Run this command to disable a cluster node for
Enhanced Security Mode.
utils EnhancedSecurityMode disable
Run this command to enable a cluster node for
Enhanced Security Mode.
utils EnhancedSecurityMode enable
Run this command to verify if Enhanced Security
Mode is enabled.
utils EnhancedSecurityMode status
Syntax Description
Description
Parameters
Deactivates Enhanced Security Mode and prompts
disabling of FIPS mode.
disable
Activates Enhanced Security Mode and prompts for
enabling FIPS mode. If FIPS mode is enabled, then
Enhanced Security Mode will be activated.
enable
Displays the status of Enhanced Security Mode.
status
Usage Guidelines
FIPS mode must be enabled before you enable Enhanced Security Mode. If you haven't already enabled FIPS,
you will be prompted to enable it when you attempt to enable Enhanced Security Mode.
FIPS Mode and Enhanced Security Mode do not support MD5 or DES encryption methods. If SNMPv3 setting
is enabled using both MD5 and DES, then enabling FIPS Mode or Enhanced Security Mode changes these
encryption methods to SHA-1 and AES-128 respectively.
Note
Cisco Emergency Responder Command Line Interface Guide for Release 15
105
CLI Commands
utils EnhancedSecurityMode

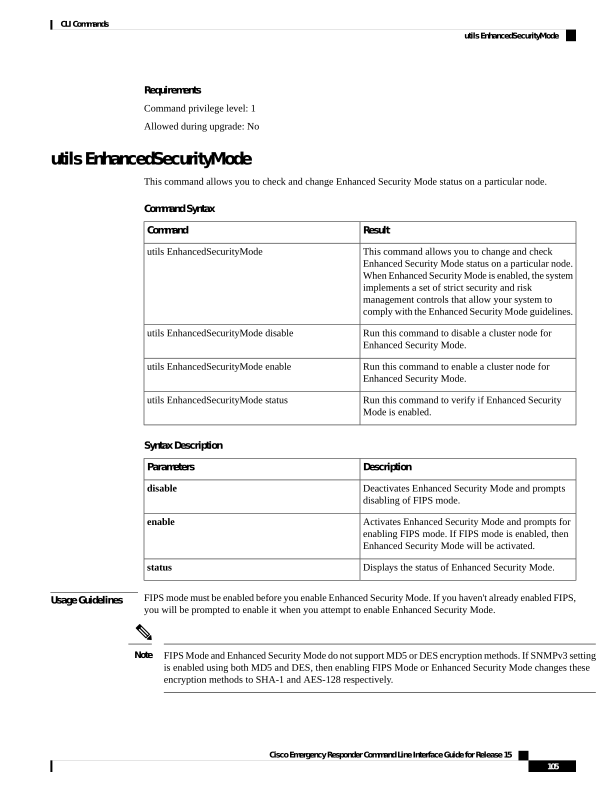
Page 118
Confirm that your phones support SHA-512. Enhanced Security Mode compliance requires this level of
encryption for digital signatures. Legacy phones that do not support SHA-512 encryption will not work after
you configure the system to use SHA-512.
Do not run this command on all nodes simultaneously.
Requirements
Command privilege level: 0
Allowed during upgrade: No
utils fior
This command allows you to monitor the I/O on the server.
Usage Guidelines
The file I/O reporting service provides a kernel-based daemon for collecting file I/O per process.
Command Syntax
Result
Command
This command allows you to monitor the I/O on the
server. The File I/O Reporting service provides a
kernel-base daemon for collecting file I/O per process.
utils fior
utils fior disable
utils fior enable
This command displays a list of the I/O events for all
processes.
utils fior list [start=date-time] [stop=date-time]
utils fiorstart
utils fior status
utils fior stop
This command displays a list of I/O statistics for I/O
bound processes at the time that you run this
command.
utils fior top number [read | write | read-rate |
write-rate] [start=date-time] [stop=date-time]
Syntax Description
Description
Parameters
Prevents the file I/O reporting service from starting automatically
when the machine boots. This command does not stop the service
without a reboot. Use the stop option to stop the service
immediately.
disable
Cisco Emergency Responder Command Line Interface Guide for Release 15
106
CLI Commands
utils fior
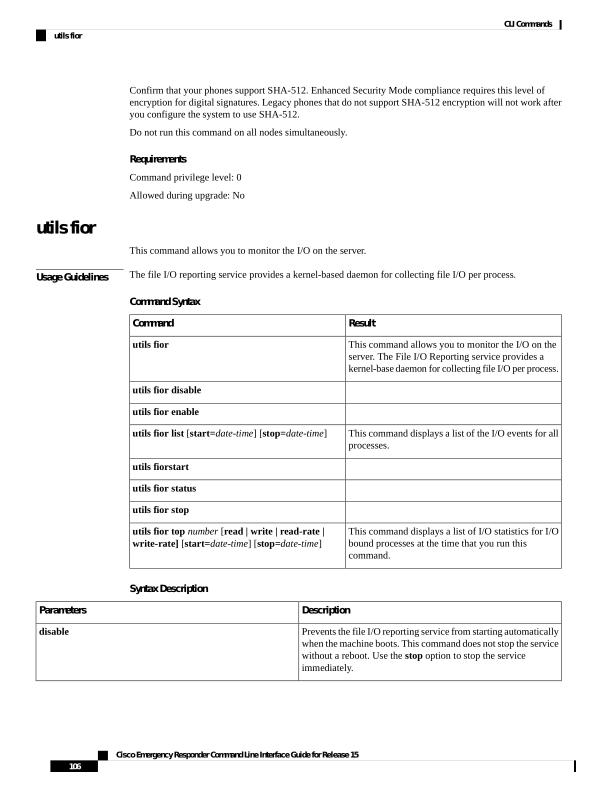
Page 119
Description
Parameters
Enables the file I/O reporting service to start automatically when
the machine boots. This command does not start the service
without a reboot. Use the start option to start the service
immediately.
enable
This command displays a list of file I/O events, in chronological
order, from oldest to newest.
list
Starts a previously stopped file I/O reporting service. The service
remains in a started state until it is manually stopped or the
machine is rebooted.
start
Displays the status of the file I/O reporting service.
status
Stops the file I/O reporting service. The service remains in a
stopped state until it is manually started or the machine is
rebooted.
stop
Displays a list of top processes that create file I/O. This list can
be sorted by the total number of bytes read, the total number of
bytes written, the rate of bytes read, or the rate of bytes written.
top
Specifies a starting date and time.
start
Specifies a stopping date and time.
stop
Specifies a date and time, in any of the following formats: H:M,
H:M:S a, H:M, a, H:M:S Y-m-d, H:M, Y-m-d, H:M:S.
date-time
Specifies how many of the top processes to list.
number
Specifies the metric used to sort the list of the top processes.
[read | write | read-rate | write-rate]
Requirements
Command privilege level: 1
Allowed during upgrade: Yes
utils fips
FIPS mode is only supported on releases that have been through FIPS compliance. Be warned that FIPS mode
should be disabled before you upgrade to a non-FIPS compliance version of Cisco Emergency Responder.
For information about which releases are FIPS compliant and to view their certifications, see the FIPS 140
document at http://www.cisco.com/web/strategy/government/security\_certification/net\_business\_benefit\_
seccert_fips140.html.
Caution
Cisco Emergency Responder Command Line Interface Guide for Release 15
107
CLI Commands
utils fips

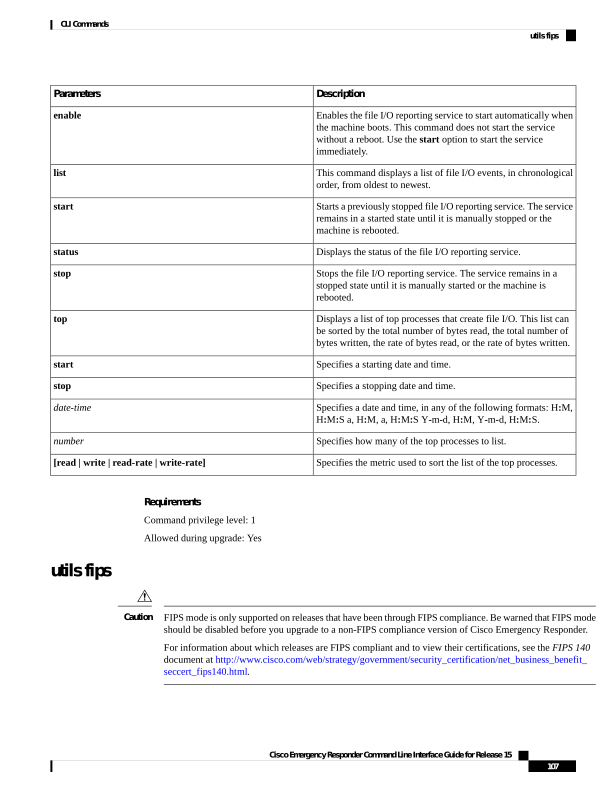
Page 120
This command enables, disables, or displays the status of FIPS 140-2 mode. FIPS 140-2 mode is disabled by
default; only an administrator can enable FIPS.
FIPS Mode and Enhanced Security Mode do not support MD5 or DES encryption methods. If SNMPv3 setting
is enabled using both MD5 and DES, then enabling FIPS Mode or Enhanced Security Mode changes these
encryption methods to SHA-1 and AES-128 respectively.
Note
Command Syntax
utils fips {enable | disable | status}
Syntax Description
Description
Parameters
Activates FIPS 140-2 mode.
enable
Deactivates FIPS 140-2 mode.
disable
Displays the status of FIPS 140-2 mode.
status
Command Modes
Administrator (admin:)
Usage Guidelines
Before enabling FIPS mode, we recommend that you perform a system backup. If FIPS checks fail at start-up,
the system halts and requires a recovery CD to be restored.
Consider the following information before you enable FIPS 140-2 mode:
• After FIPS mode is enabled on a server, please wait until the server reboots before enabling FIPS on the
next server.
• In FIPS mode, the Cisco Emergency Responder service uses Red Hat Openswan (FIPS validated) in
place of Racoon (non-FIPS validated). If the security policies in Racoon contain functions that are not
FIPS approved, the CLI command asks you to redefine the security policies with FIPS approved functions
and abort.
Certificates and SSH key are regenerated automatically, in accordance with FIPS requirements.
Note
Consider the following information before you disable FIPS 140-2 mode: In multiple server groups, each
server must be disabled separately; FIPS mode is not disabled group-wise but on a per server basis.
Requirements
Command privilege level: 0
Allowed during upgrade: No
Cisco Emergency Responder Command Line Interface Guide for Release 15
108
CLI Commands
utils fips

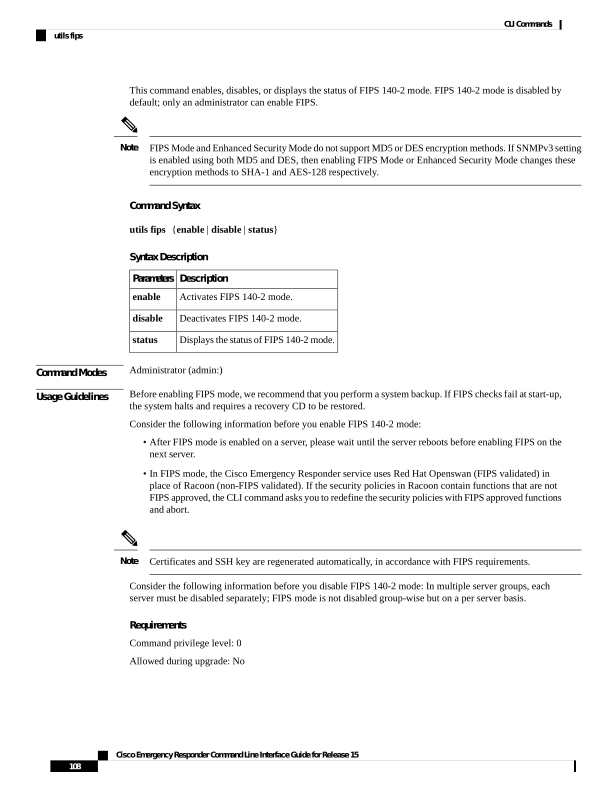
Page 121
utils firewall
This command manages the firewall on the node.
Command Syntax
Result
Command
This commands enables and disables firewall.
utils firewall {enable |disable[time]}
This commands displays the current configuration of
the firewall.
utils firewall list
This command displays the current status of the IPv4
firewall.
utils firewall status
Syntax Description
Description
Parameters
Disables the firewall.
disable
The duration for which the firewall is disabled, in one of these
formats:
• [0–1440]m to specify a duration in minutes.
• [0–24]h to specify a duration in hours.
• [0–23]h[0–60]m to specify a duration in hours and minutes.
• If you do not specify a time, the default is 5 minutes.
time
The current firewall configuration.
list
The status of the firewall.
status
Usage Guidelines
When the firewall is disabled, you must enter the URL of the Cisco Unified Communications Manager server
in the following format to log into the web interface:
https://server:8443/
where server is the server name or IP address of the server.
Disabling the firewall is not recommended.
Requirements
Command privilege level: 0
Allowed during upgrade: Yes
Cisco Emergency Responder Command Line Interface Guide for Release 15
109
CLI Commands
utils firewall
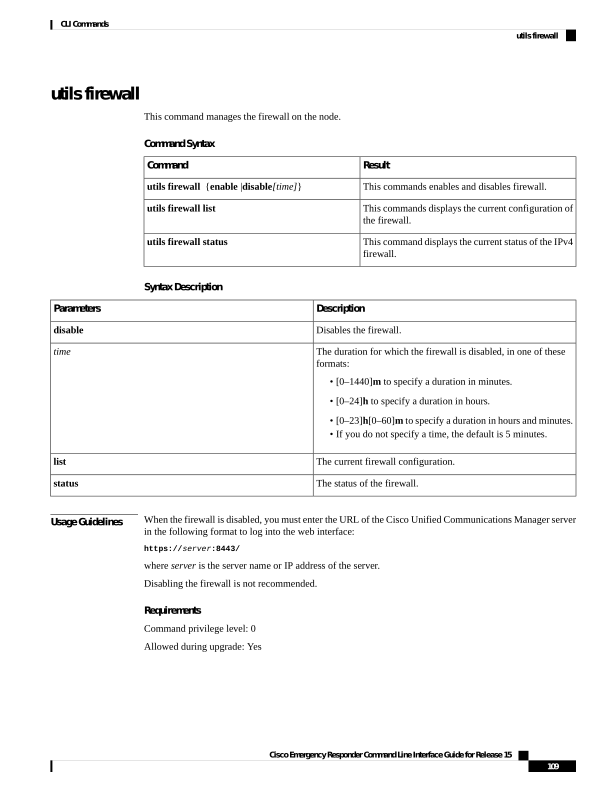
Page 122
utils firewall ipv4
This command enables and disables IPv4 firewall.
Command Syntax
utils firewall ipv4 {enable|disable|[time]}
Syntax Description
Description
Parameters
Turns on the IPv4 firewall.
enable
Turns off the IPv4 firewall. If you do not enter the time parameter,
this command disables the firewall for 5 minutes.
disable
(Optional) Sets the duration for which the firewall is to be disabled
in the following formats:
• Minutes: 0–1440m
• Hours: 0–23h
• Hours and minutes: 0–23h 0–60m
[time]
Command Mode
Administrator (admin:)
Requirements
Command privilege level: 0
Allowed during upgrade: Yes
utils firewall ipv4 debug
This command turns IPv4 firewall debugging on or off. If you do not enter a time parameter, this command
turns on debugging for 5 minutes.
Command Syntax
utils firewall ipv4 debug {off| [time]}
Cisco Emergency Responder Command Line Interface Guide for Release 15
110
CLI Commands
utils firewall ipv4
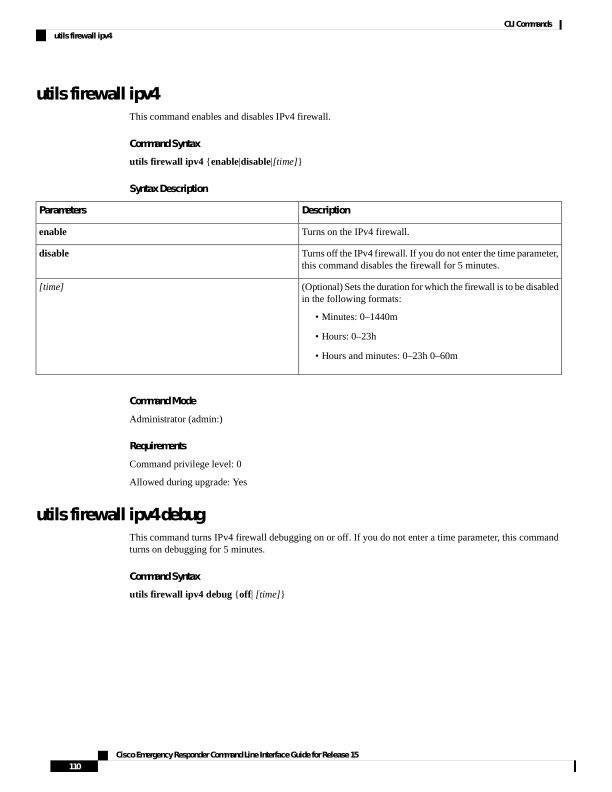
Page 123
Syntax Description
Description
Parameters
Enables the collection of audit logs. When enabled, the system
monitors and records user actions as well as Linux events such
as the creation and removal of users, as well as the editing and
deleting of files.
off
(Optional) Disables the collection of audit logs.
[time]
Command Mode
Administrator (admin:)
Requirements
Command privilege level: 0
Allowed during upgrade: Yes
utils firewall ipv4 list
This command displays the current configuration of the IPv4 firewall.
Command Syntax
utils firewall ipv4 list
Command Mode
Administrator (admin:)
Requirements
Command privilege level: 0
Allowed during upgrade: Yes
utils firewall ipv4 status
This command displays the current status of the IPv4 firewall.
Command Syntax
utils firewall ipv4 status
Command Mode
Administrator (admin:)
Cisco Emergency Responder Command Line Interface Guide for Release 15
111
CLI Commands
utils firewall ipv4 list
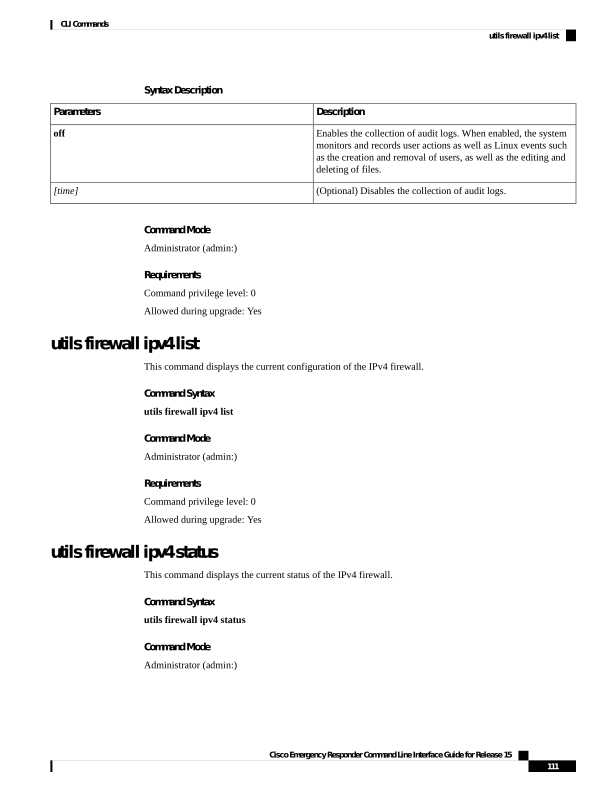
Page 124
Requirements
Command privilege level: 0
Allowed during upgrade: Yes
utils filebeat
This command uses the filebeat client to upload logs from the Cisco Emergency Responder server to the
external logstash server.
Command Syntax
utils filebeat {config |enable|disable|status}
Syntax Description
Description
Parameters
Allows you to enter the logstash server details. You can enable
the filebeat service if the logstash server is reachable by choosing
one of the following log types:
• Platform audit logs(/var/log/active/audit/vos/vos-audit.log)
• Remote Support
logs(/var/log/active/audit/vos/remote_activity.log_*)
config
Enables the filebeat service, and the selected logs are uploaded
to an external logstash server if service is active else, you can also
restart the service.
enable
Disables the filebeat service.
disable
Displays the active status of the filebeat service.
status
Command Mode
Administrator (admin:)
Requirements
Command privilege level: 4
Allowed during upgrade: Yes
Usage Guidelines
After the service has been enabled, the selected logs will be uploaded to the external logstash server.
Warning: There may loss of data when the service is restarted.
Warning
Cisco Emergency Responder Command Line Interface Guide for Release 15
112
CLI Commands
utils filebeat

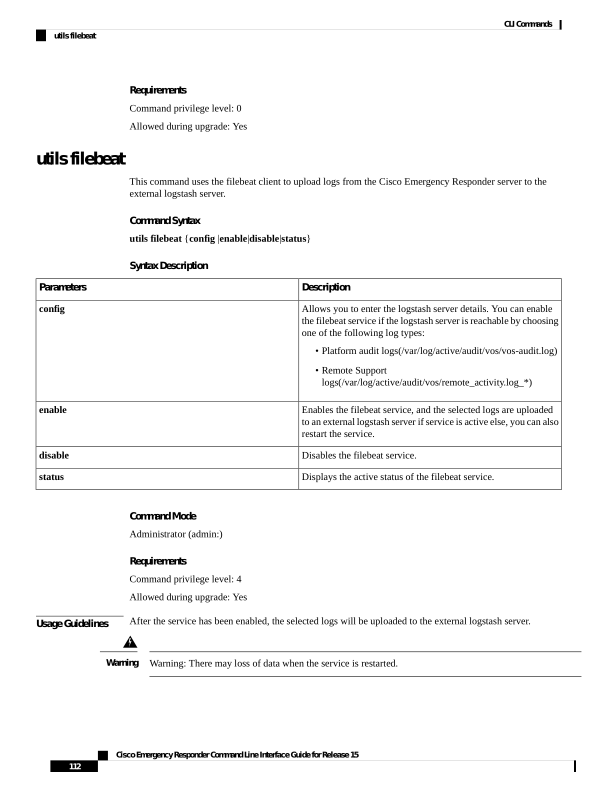
Page 125
utils filebeat tls
This command configures Transport Layer Security (TLS) 1.2 as the protocol for communication between
the FileBeat client and the logstash server.
Command Syntax
utils filebeat tls {enable|disable|status}
Syntax Description
Description
Parameters
Enables a secure connection between the FileBeat client and the
logstash server.
enable
Disables the TLS for FileBeat client.
disable
Displays the status for TLS.
status
Command Mode
Administrator (admin:)
Requirements
Command privilege level: 4
A security certificate has to be uploaded from the logstash server to the cluster.
utils import config
This command imports all configuration settings found on the platformConfig.xml file and then reboots the
system.
Command Syntax
utils import config
utils iostat
This command displays the iostat output for the given number of iterations and interval.
Command Syntax
utils iostat [interval] [iterations] [filename]
Cisco Emergency Responder Command Line Interface Guide for Release 15
113
CLI Commands
utils filebeat tls
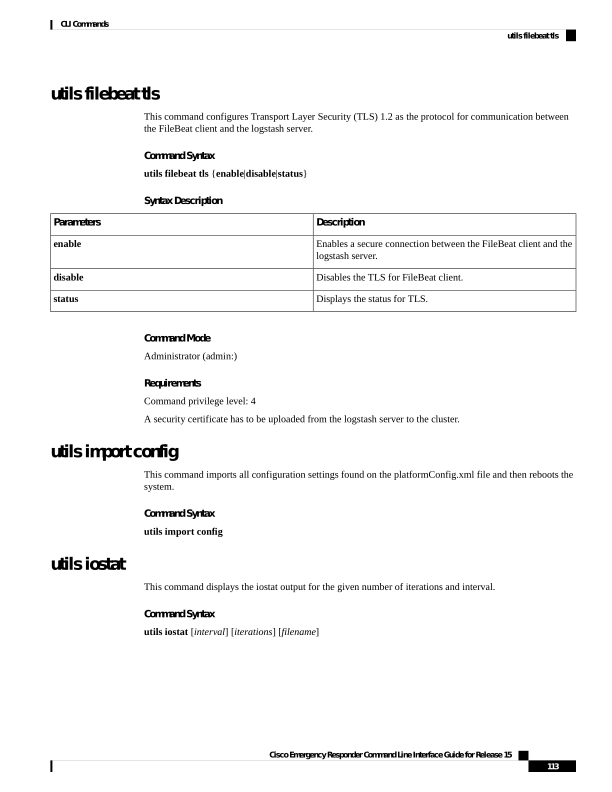
Page 126
Syntax Description
Description
Parameters
The value in seconds between two iostat readings (mandatory if
you specify the number of iterations).
interval
The number of iostat iterations to be performed (mandatory if you
specify an interval).
interations
Redirects the output to a file.
filename
Requirements
Level privilege: 0
Command privilege: 1
Allowed during upgrade: No
utils iothrottle enable
This command enables I/O throttling enhancements. When enabled, I/O throttling enhancements lower the
impact of upgrades on an active system.
Command Syntax
utils iothrottle enable
utils iothrottle disable
This command disables I/O throttling enhancements.
Usage Guidelines
This could adversely affect the system during upgrades.
Command Syntax
utils iothrottle disable
utils iothrottle status
This command displays the status of I/O throttling enhancements.
Command Syntax
utils iothrottle status
utils network arp
This command lists, sets, or deletes Address Resolution Protocol (ARP) table entries.
Cisco Emergency Responder Command Line Interface Guide for Release 15
114
CLI Commands
utils iothrottle enable
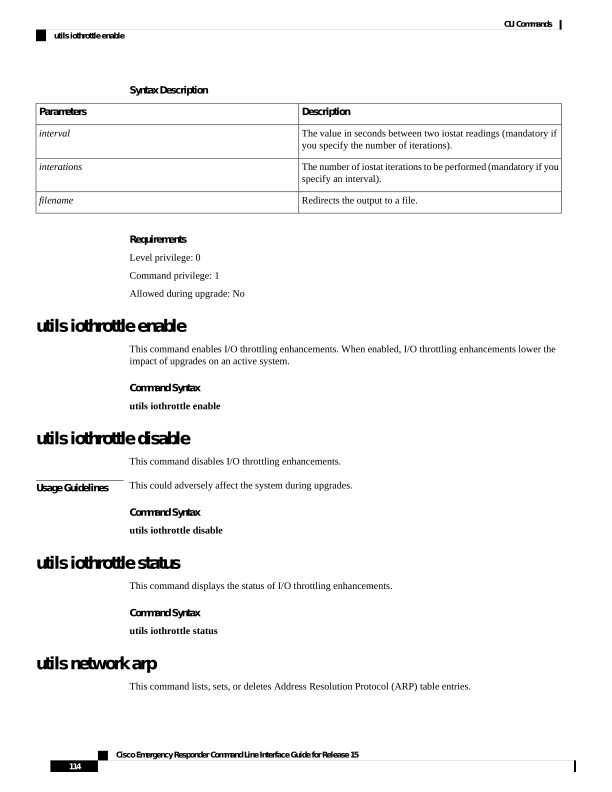
Page 127
Command Syntax
Result
Command
This command lists the contents of the Address
Resolution Protocol table.
utils network arplist [host host] [page] [numeric]
This command sets an entry in the Address Resolution
Protocol table.
utils network arpset {host} {address}
This command deletes an entry in the Address
Resolution Protocol table.
utils network arpdelete host
Syntax Description
Description
Parameters
Lists the contents of the address resolution protocol table.
list
sets an entry in the address resolution protocol table.
set
deletes an entry in the address resolution table.
delete
represents the host name or IP address of the host to add or delete
to the table.
host
represents the MAC address of the host to be added. Enter the
MAC address in the following format: XX:XX:XX:XX:XX:XX.
address
Displays the output one page at a time.
page
Displays hosts as dotted IP addresses.
numeric
Requirements
Command privilege level: 0
Allowed during upgrade: Yes
utils network capture eth0
This command captures IP packets on the specified Ethernet interface.
Command Syntax
utils network capture eth0 [page] [numeric] [file fname] [count num] [size bytes] [src addr] [dest addr]
[port num]
Syntax Description
Description
Parameters
Specifies Ethernet interface 0.
eth0
Cisco Emergency Responder Command Line Interface Guide for Release 15
115
CLI Commands
utils network capture eth0
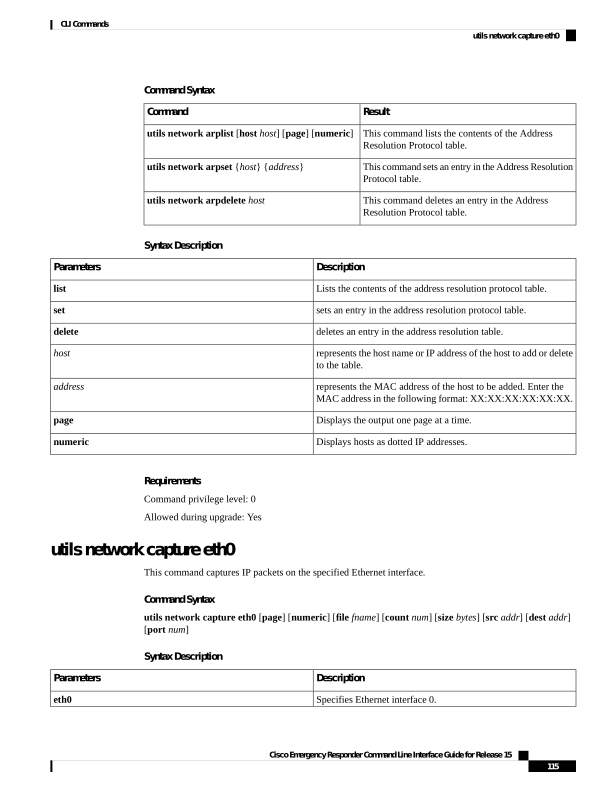
Page 128
Description
Parameters
(Optional)Displays the output one page at a time. When you use
the page or file options, the complete capture of all requested
packets must occur before the command completes.
page
(Optional)Displays hosts as dotted IP addresses.
numeric
(Optional)Outputs the information to a file. The file option saves
the information to platform/cli/fname.cap. The filename cannot
contain the "." character.
file fname
(Optional)Sets a count of the number of packets to capture. For
screen output, the maximum count equals 1000 and, for file output,
the maximum count equals 10,000.
count num
(Optional)Sets the number of bytes of the packet to capture. For
screen output, the maximum number of bytes equals 128, for file
output, the maximum of bytes can be any number or ALL.
size bytes
(Optional)Specifies the source address of the packet as a host
name or IPV4 address.
src addr
(Optional)Specifies the destination address of the packet as a host
name or IPV4 address.
dest addr
(Optional)Specifies the port number of the packet, either source
or destination.
port num
Requirements
Command privilege level: 0
Allowed during upgrade: Yes
utils network connectivity
This command verifies the server's network connection to the publisher server. It is only valid on a subscriber
server.
Command Syntax
utils network connectivity
Requirements
Command privilege level: 0
Allowed during upgrade: Yes
Cisco Emergency Responder Command Line Interface Guide for Release 15
116
CLI Commands
utils network connectivity
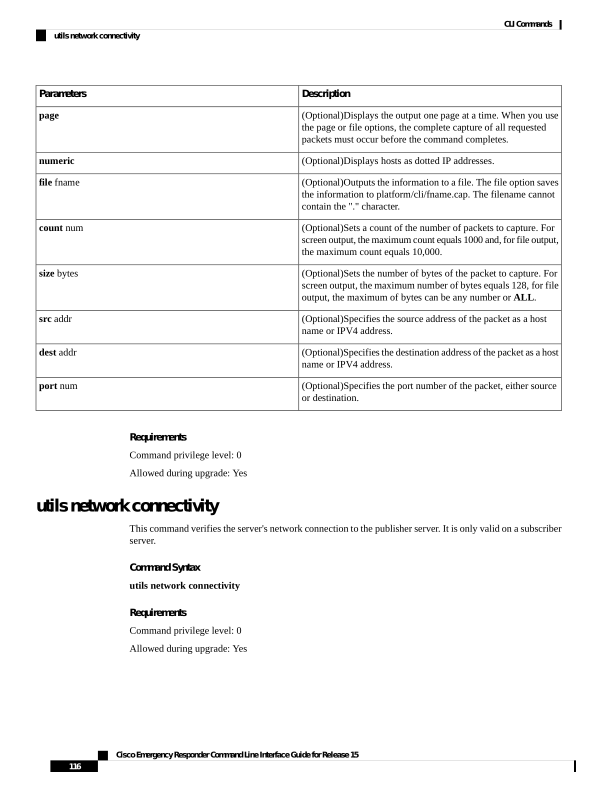
Page 129
utils network connectivity output
This command verifies the node network connection to the first node in the cluster. It is for Cisco Emergency
Responder Subscriber only.
Command Syntax
utils network connectivity output
utils network host
This command resolves a host name to an address or an address to a host name.
Command Syntax
utils network host hostname [server server-name] [page] [detail] [srv]
Syntax Description
Description
Parameters
The host name or IP address that you want to resolve.
hostname
(Optional)Specifies an alternate domain name server.
server-name
(Optional)Displays the output one screen at a time.
page
(Optional)Displays a detailed listing.
detail
(Optional)Displays DNS SRV records.
srv
Requirements
Command privilege level: 0
Allowed during upgrade: Yes
utils network ping
This command allows you to ping another server.
Command Syntax
utils network ping destination [count]
Syntax Description
Description
Parameters
The hostname or IP address of the server that you want to ping.
destination
Cisco Emergency Responder Command Line Interface Guide for Release 15
117
CLI Commands
utils network connectivity output
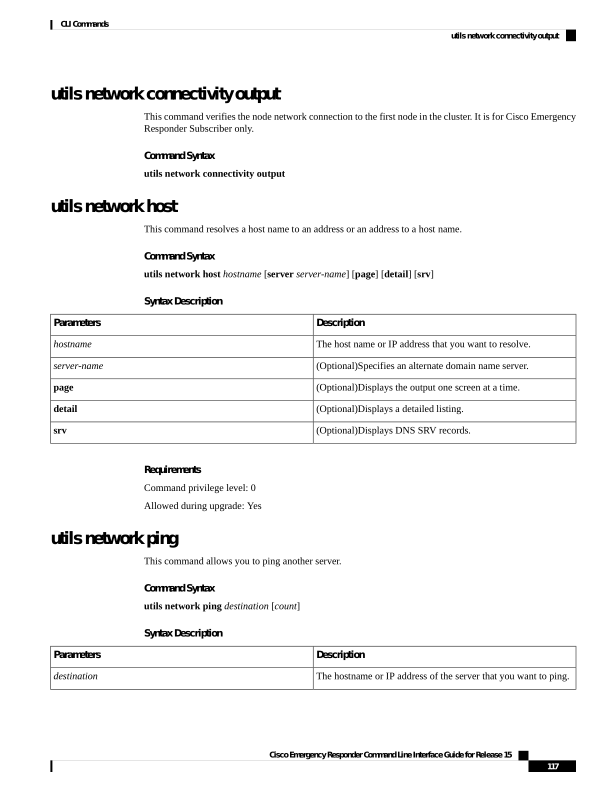
Page 130
Description
Parameters
(Option)Specifies the number of times to ping the external server.
The default count equals 4.
count
Requirements
Command privilege level: 0
Allowed during upgrade: Yes
utils network traceroute
This command traces IP packets that are sent to a remote destination.
Command Syntax
utils network traceroute destination
Syntax Description
Description
Parameters
The hostname or IP address of the server to which you want to
send a trace.
destination
Requirements
Command privilege level: 0
Allowed during upgrade: Yes
utils ntp
This command displays the NTP status or configuration.
Command Syntax
utils ntp {status | config}
Requirements
Command privilege level: 0
Allowed during upgrade: Yes
utils ntp restart
This command restarts the NTP service.
Cisco Emergency Responder Command Line Interface Guide for Release 15
118
CLI Commands
utils network traceroute
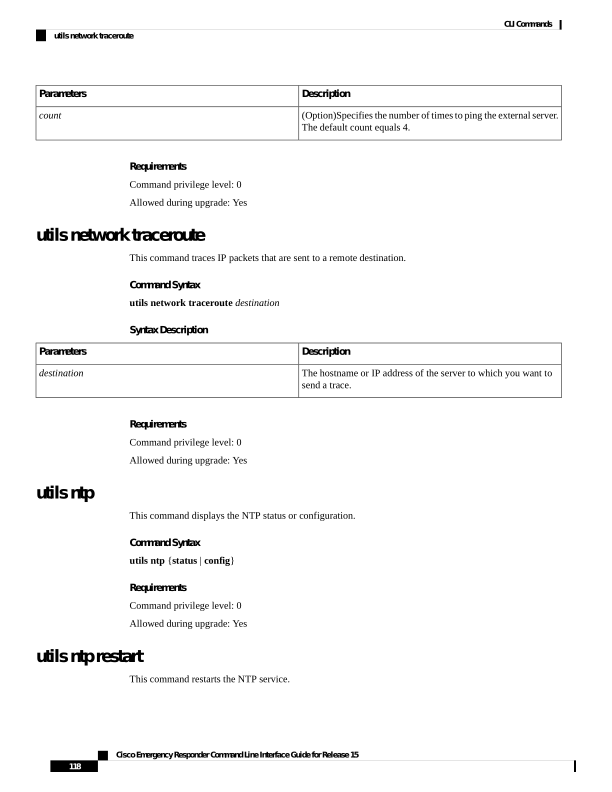
Page 131
Command Syntax
utils ntp restart
Parameters
None
Requirements
Level privilege: 0
Command privilege: 0
Allowed during upgrade: Yes
utils ntp server add
The command adds up to 5 specified NTP servers.
Usage Guidelines
norestart results in the NTP service not being restarted after adding the servers.
If the norestart option is used, an explicit restart of the NTP service is required for the changes to take effect.
Note
Command Syntax
utils ntp server add s1 [s2 s3 s4 s5] [norestart]
Usage Guidelines
Note the following:
• Mandatory parameter: at least one NTP server to add.
• Optional parameters: up to four more ntp servers and the norestart option.
Example
Adding servers with incorrect command line parameters
admin:utils ntp server add s1 s2 s3 s4 s5 s6 s7 s8
Incorrect number of parameters entered for add
usage: utils ntp server add s1 [s2 s3 s4 s5] [norestart]
admin:
Example 2
Adding using norestart without specifying a server
admin:utils ntp server add norestart
At least one NTP server must be specified for add operation.
usage: utils ntp server add s1 [s2 s3 s4 s5] [norestart]
Cisco Emergency Responder Command Line Interface Guide for Release 15
119
CLI Commands
utils ntp server add

Page 132
Example 3
Adding servers without norestart
admin:utils ntp server add clock1.cisco.com clock2.cisco.com
clock1.cisco.com :
added successfully.
clock2.cisco.com :
added successfully.
Restarting NTP on the server.
Example 4
Adding servers that are already added, without norestart
admin:utils ntp server add clock1.cisco.com clock2.cisco.com
clock1.cisco.com : [The host has already been added as an NTP server.]
clock2.cisco.com : [The host has already been added as an NTP server.]
admin:
Example 5
Adding server to self without norestart
admin:utils ntp server add bglr-ccm26
bglr-ccm26 : [This server cannot be added as an NTP server.]
admin:
Example 6
Adding inaccessible server without norestart
admin:utils ntp server add clock3.cisco.com
clock3.cisco.com : [ Inaccessible NTP server. Not added. ]
admin:
Example 7
Adding servers with norestart
admin:utils ntp server add ntp01-syd.cisco.com ntp02-syd.cisco.com clock.cisco.com
norestart
ntp01-syd.cisco.com:
added successfully.
ntp02-syd.cisco.com:
added successfully.
clock.cisco.com:
added successfully.
The NTP service must be restarted for the changes to take effect.
Example 8
Adding servers when 5 are already configured
admin:utils ntp server add clock3.cisco.com
The maximum permissible limit of 5 NTP servers is already configured
Requirements
Command privilege level: 0
Cisco Emergency Responder Command Line Interface Guide for Release 15
120
CLI Commands
utils ntp server add
Page 133
Allowed during upgrade: Yes
utils ntp server delete
The command deletes any configured NTP server or all of them.
Usage Guidelines
After the user enters their choice, they are prompted if they would like to restart the NTP service.
Answering No results in the NTP service not being restarted after deleting the servers.
If the user chooses not to restart the NTP service, an explicit restart of the NTP service is required for the
changes to take effect.
Note
Command Syntax
utils ntp server delete
Example 1
Deleting servers with incorrect command line parameters
admin:utils ntp server delete clock1.cisco.com clock2.cisco.com
Incorrect number of optional parameters entered for delete
usage: utils ntp server delete
admin:
Example 2
Deleting single server with ntp restart
admin:utils ntp server delete
1: clock1.cisco.com
2: clock2.cisco.com
3: ntp01-syd.cisco.com
4: ntp02-syd.cisco.com
5: clock.cisco.com
a: all
q: quit
Choice: 1
Restart NTP (y/n): y
clock1.cisco.com is deleted from the list of configured NTP servers.
Continue (y/n)?y
clock1.cisco.com:
deleted successfully.
Restarting NTP on the server.
admin:
Example 3
Deleting all servers without ntp restart
admin:utils ntp server delete
1: clock1.cisco.com
2: clock2.cisco.com
3: ntp01-syd.cisco.com
Cisco Emergency Responder Command Line Interface Guide for Release 15
121
CLI Commands
utils ntp server delete

Page 134
4: ntp02-syd.cisco.com
5: clock.cisco.com
a: all
q: quit
Choice: a
Restart NTP (y/n): n
This results in all the configured NTP servers being deleted.
Continue (y/n)?y
clock1.cisco.com:
deleted successfully.
clock2.cisco.com:
deleted successfully.
ntp01-syd.cisco.com:
deleted successfully.
ntp02-syd.cisco.com:
deleted successfully.
clock.cisco.com:
deleted successfully.
The NTP service must be restarted for the changes to take effect.
admin:
Example 4
Deleting all servers when no servers are configured
admin:utils ntp server delete
There are no NTP servers configured to delete.
Requirements
Command privilege level: 0
Allowed during upgrade: Yes
utils ntp server list
The command lists the configured NTP servers.
Command Syntax
utils ntp server list
Example 1
Listing servers with incorrect command line parameters
admin:utils ntp server list all
Incorrect optional parameter entered for list
usage: utils ntp server list
admin:
Example 2
Listing servers
admin:utils ntp server list
clock1.cisco.com
clock2.cisco.com
ntp01-syd.cisco.com
ntp02-syd.cisco.com
clock.cisco.com
admin:
Cisco Emergency Responder Command Line Interface Guide for Release 15
122
CLI Commands
utils ntp server list
Page 135
Example 3
Listing servers when no servers are configured
admin:utils ntp server list
There are no NTP servers configured.
Requirements
Command privilege level: 1
Allowed during upgrade: Yes
utils ntp start
This command starts the NTP service, if it is not already running.
You cannot stop the NTP service from the CLI. Use this command when the utils ntp status command returns
stopped.
Note
Command Syntax
utils ntp start
Requirements
Level privilege: 0
Command privilege: 0
Allowed during upgrade: Yes
utils os kerneldump
This command configures kerneldump to provide a kernel crash dumping mechanism. The kernel captures
the dump to the local disk, in case of a kernel crash.
The netdump commands have been removed from release 8.6(1) and have been replaced with the kerneldump
commands.
Note
Command Syntax
utils os kerneldump {enable|disable}
Useage Guidelines
If a kernel crash occurs, the capture kernel dumps the core on the local disk of the server. The primary kernel
reserves 128MB of physical memory that the capture kernel uses to boot. The kerneldump uses the kexec
command to boot into a capture kernel whenever the kernel crashes.
Cisco Emergency Responder Command Line Interface Guide for Release 15
123
CLI Commands
utils ntp start

Page 136
Requirements
Command privilege level: 1
Allowed during upgrade: Yes
Example
admin: utils os kerneldump enable
WARNING****
Enabling kerneldump requires system reboot
Would you like to boot the machine (y/n):y
kerneldump enable operation succeeded
System going for a reboot
utils os kerneldump ssh
This command enables, disables, or displays the status of an external SSH server.
Command Syntax
utils os kerneldump ssh {enable|disable|status}
Syntax Description
Description
Parameters
Configures an external SSH server as a kerneldump server to
kernel dumps.
enable
Removes support of the external SSH server that is configured to
collect kernel dumps.
disable
Indicates whether an external SSH server is configured or not, to
collect kernel dumps.
status
Useage Guidelines
If external SSH server has the kerneldump service enabled and a kernel crash occurs, the capture kernel dumps
the core on the external server that is configured to collect the dump.Enabling and disabling kerneldump
require a system reboot for the changes to come into effect.
Command Mode
Administrator (admin:)
Requirements
Command privilege level: 1
Allowed during upgrade: Yes
Cisco Emergency Responder Command Line Interface Guide for Release 15
124
CLI Commands
utils os kerneldump ssh
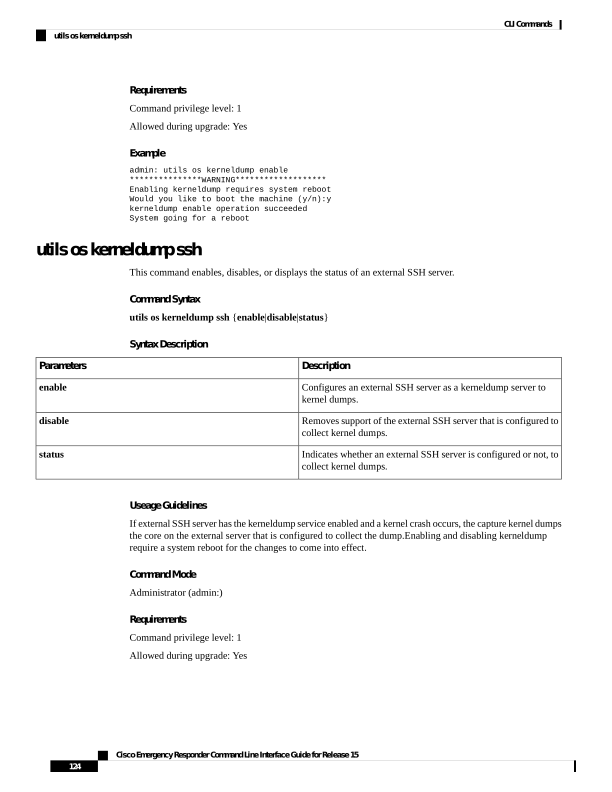
Page 137
Example
admin: utils os kerneldump ssh disable 10.77.31.60
Disabling kerneldump requires system reboot
Would you like to continue (y/n): y
kerneldump disable operation succeeded
System going for a reboot
utils os secure
This command is used to specify the level of security provided by selinux.
Command Syntax
utils os secure {enforce |permissive|status}
Useage Guidelines
The selinux does not handle rate limiting. Rate limiting is handled by ipprefs and ip tables.
Command Mode
Administrator (admin:)
Requirements
Command privilege level: 1
Allowed during upgrade: No
utils remote_account
This command allows you to enable, disable, create, and check the status of a remote account.
Command Syntax
Result
Command
This command allows you to check the status of a
remote account.
utils remote_account status
This command allows you to enable a remote account.
utils remote_account enable
This command allows you to disable a remote account.
utils remote_account disable
This command creates a remote account.
utils remote_account create username life
Syntax Description
Description
Parameters
The name of the remote account. The username can contain only
lowercase characters and must be more than six-characters long.
username
Cisco Emergency Responder Command Line Interface Guide for Release 15
125
CLI Commands
utils os secure
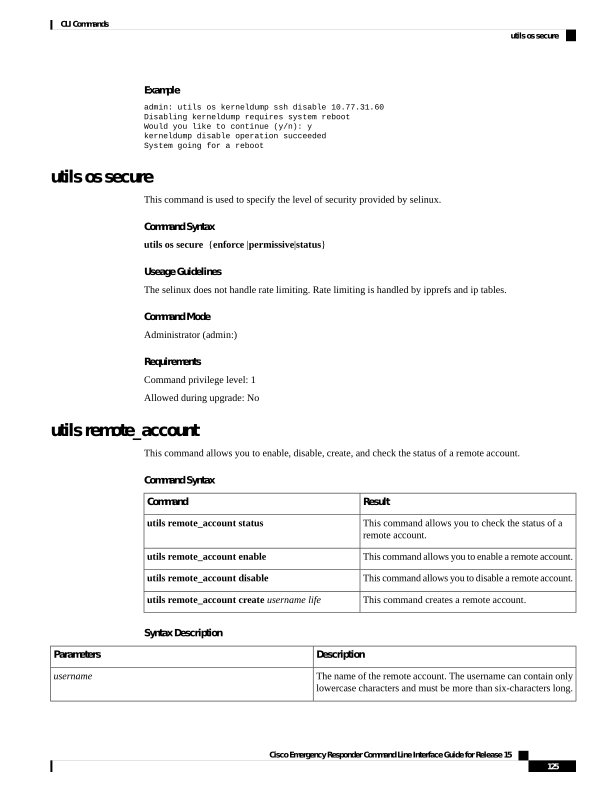
Page 138
Description
Parameters
The life of the account in days. After the specified number of day,
the account expires.
life
Usage Guidelines
A remote account generates a pass phrase that allows Cisco Systems support personnel to get access to the
system for the specified life of the account. You can have only one remote account that is enabled at a time.
Requirements
Command privilege level: 1
Allowed during upgrade: Yes
Example
utils remote_account status
utils reset_application_ui_administrator_name
This command resets the application user interface administrator name.
Command Syntax
utils reset_application_ui_administrator_name
Command Mode
Administrator (admin:)
Requirements
Command privilege level: 0
Allowed during upgrade: Yes
utils reset_application_ui_administrator_password
This command resets the application user interface administrator password.
Command Syntax
utils reset_application_ui_administrator_password
Command Mode
Administrator (admin:)
Requirements
Command privilege level: 0
Allowed during upgrade: Yes
Cisco Emergency Responder Command Line Interface Guide for Release 15
126
CLI Commands
utils reset_application_ui_administrator_name
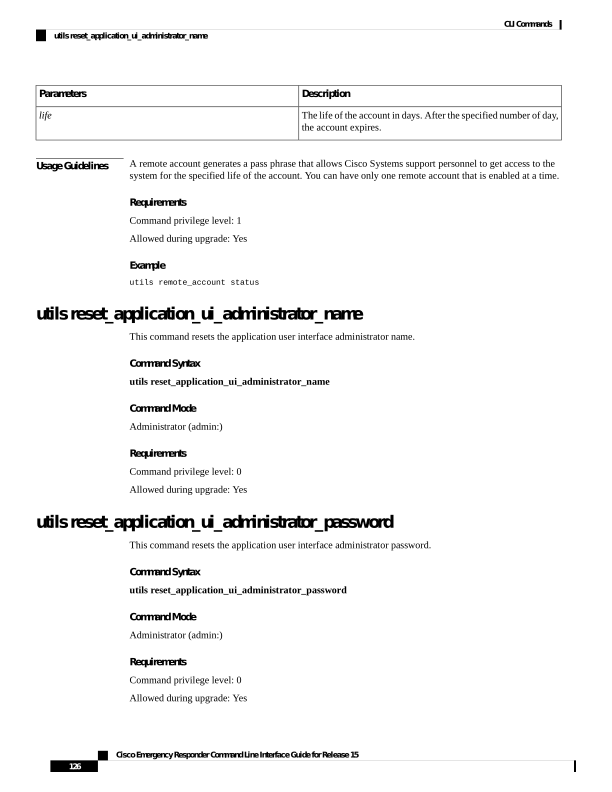
Page 139
utils service
This command stops, starts, or restarts a service.
Command Syntax
utils service{start| stop| restart | auto-restart {enable | disable | show} } service-name
Syntax Description
Description
Parameters
The name of the service that you want to stop or start:
• System NTP
• System SSH
• Cisco IDS
• Cisco Tomcat
• Cisco Database Layer Monitor
• CiscoEmergencyResponder
• Cisco Phone Tracking Engine
• Cisco DB Replicator
• CER Provider
• Cisco CDP
• Cisco CDP Agent
• Cisco Certificate Expiry Monitor
• Cisco DRF Local
• Cisco DRF Master
• Cisco Tomcat
• Host Resources Agent
• MIB2 Agent
• SNMP Master Agent
• System Application Agent
service-name
Causes a service to automatically restart.
auto-restart
Enables auto-restart
enable
Disables auto-restart.
disable
Shows the auto-restart status.
show
Cisco Emergency Responder Command Line Interface Guide for Release 15
127
CLI Commands
utils service
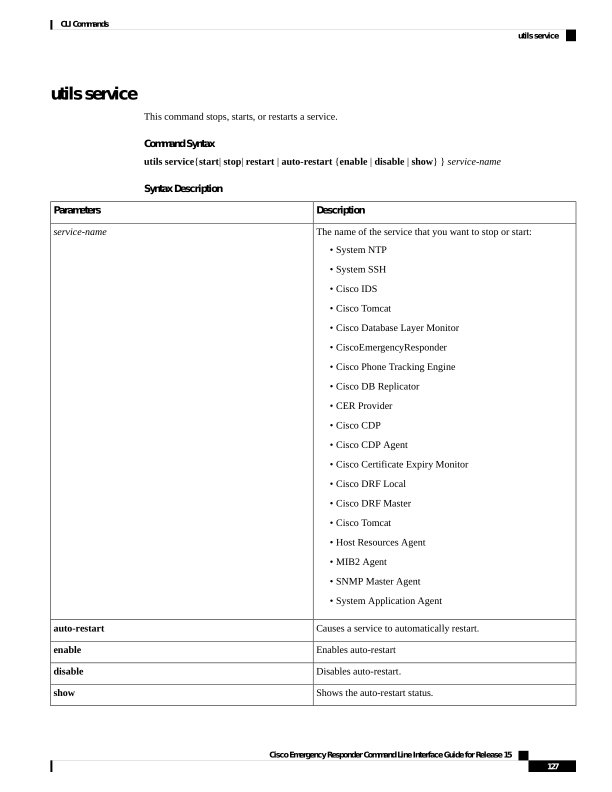
Page 140
Requirements
Command privilege level: 1
Allowed during upgrade: No
utils service list
This command retrieves a list of all services and their status.
Command Syntax
utils service list [page]
Syntax Description
Description
Parameters
(Option)Displays the output one page at a time.
page
Requirements
Command privilege level: 0
Allowed during upgrade: Yes
utils snmp
This command manages SNMP on the server.
Command Syntax
This interactive command gets the SNMP data using
the specified version for the specified MIB OID.
utils snmp get version community ip-address object
[file]
This command affects the SNMP agents on the server.
utils snmphardware-agents [status | restart]
utils snmptest
This interactive commands walks through the SNMP
MIB.
utils snmpwalk version community ip-address object
[file]
Syntax Description
Description
Parameters
Displays the value of the specified SNMP object.
get
Displays the status of the hardware agents on the server.
hardware-agents status
Stops all SNMP agents provided by the hardware vendor.
hardware-agents
Cisco Emergency Responder Command Line Interface Guide for Release 15
128
CLI Commands
utils service list
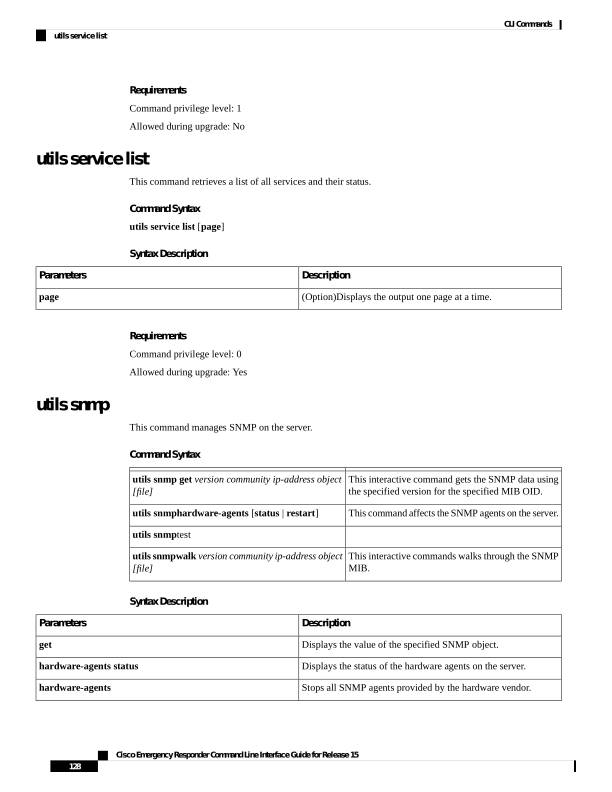
Page 141
Description
Parameters
Restarts the hardware agents on the server.
hardware-agents restart
Tests the SNMP host by sending sample alarms to local syslog
and remote syslog.
test
Walks the SNMP MIB, starting with the specified SNMP object.
walk
Specifies the SNMP version. Possible values are 1 or 2c.
version
Specifies the SNMP community string.
community
Specifies the IP address of the server. Enter 127.0.0.1 to specify
the local host. You can enter the IP address of another node in
the cluster to run the command on that node.
ip-address
Specifies the SNMP Object ID (OID) to get.
object
Specifies a file in which to save the command output.
file
Requirements
Command privilege level: 1
Allowed during upgrade: Yes
utils snmp config 1/2c community-string
This interactive command adds, deletes, lists or updates a community string.
Command Syntax
utils snmp config 1/2c community-string {add|delete |list|update}
Syntax Description
Description
Parameters
Adds a new community string.
add
Deletes a community string.
delete
Lists all community strings.
list
Updates a community string.
update
Useage Guidelines
The system prompts you for the parameters.
The SNMP Master Agent service is restarted for configuration changes to take effect. Do not abort command
after execution until restart is complete. If the command is aborted during service restart, verify service status
Cisco Emergency Responder Command Line Interface Guide for Release 15
129
CLI Commands
utils snmp config 1/2c community-string
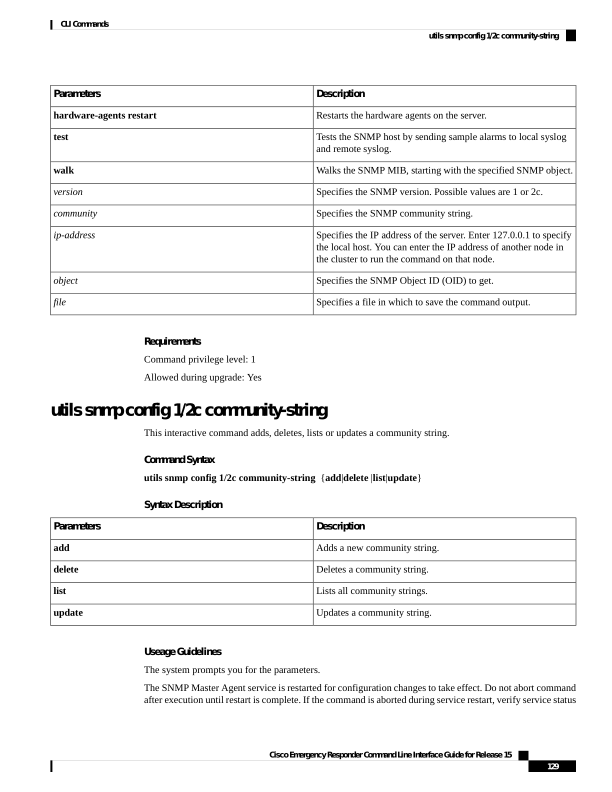
Page 142
of SNMP Master Agent by using utils service list. If service is down, start it by using utils service start
SNMP Master Agent .
Command Mode
Administrator (admin:)
Requirements
Command privilege level: 0
Allowed during upgrade: Yes
utils snmp config 3 user
This interactive command affects v3 user configuration.
Command Syntax
utils snmp config 3 user {add|delete|list|update}
Syntax Description
Description
Parameters
Adds a new v3 user with the v3 authentication and privacy
passwords.
add
Deletes the configuration information for an existing v3 user.
delete
Lists the v3 users currently configured.
list
Updates configuration information for an existing v3 user.
update
Useage Guidelines
The system prompts you for the parameters.
Command Mode
Administrator (admin:)
Requirements
Command privilege level:1
Allowed during upgrade: Yes
utils snmp config mib2
This command affects the Mib2 configuration information.
Cisco Emergency Responder Command Line Interface Guide for Release 15
130
CLI Commands
utils snmp config 3 user
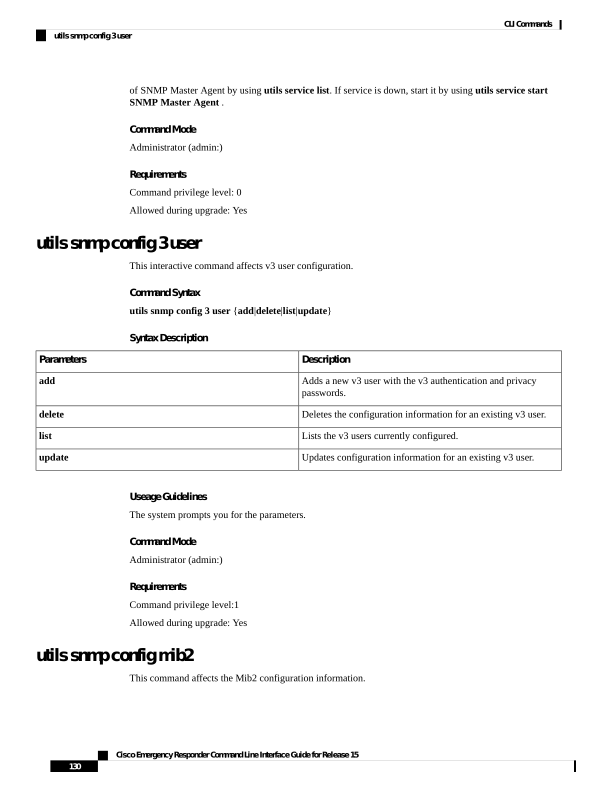
Page 143
Command Syntax
utils snmp config mib2 {add|delete|list|update}
Syntax Description
Description
Parameters
Adds the Mib2 configuration information.
add
Deletes the Mib2 configuration information.
delete
Lists the Mib2 configuration information.
list
Updates the Mib2 configuration information.
update
Useage Guidelines
The system prompts you for the parameters.
Command Mode
Administrator (admin:)
Requirements
Command privilege level: 1
Allowed during upgrade: Yes
utils snmp walk 3
This command is used to walk the SNMP MIB starting with the specified OID.
Command Syntax
utils snmp walk 3
[system prompts you for the parameters]
Example
If you run snmp walk on a leaf in the MIB you basically get what you would
get with 'utils snmp get ...' command. Here is the sample walk
output we are getting for the OID 1.3.6
iso.3.6.1.2.1.1.1.0 = STRING: "Hardware:7825H, 1 Intel(R) Pentium(R) 4 CPU
3.40GHz, 2048 MB Memory: Software:UCOS 2.0.1.0-62"
iso.3.6.1.2.1.1.2.0 = OID: iso.3.6.1.4.1.9.1.583
iso.3.6.1.2.1.1.3.0 = Timeticks: (15878339) 1 day, 20:06:23.39
iso.3.6.1.2.1.1.4.0 = ""
iso.3.6.1.2.1.1.5.0 = STRING: "bldr-ccm34.cisco.com"
iso.3.6.1.2.1.1.6.0 = ""
iso.3.6.1.2.1.1.7.0 = INTEGER: 72
iso.3.6.1.2.1.2.1.0 = INTEGER: 3
iso.3.6.1.2.1.2.2.1.1.1 = INTEGER: 1
iso.3.6.1.2.1.2.2.1.1.2 = INTEGER: 2
Cisco Emergency Responder Command Line Interface Guide for Release 15
131
CLI Commands
utils snmp walk 3
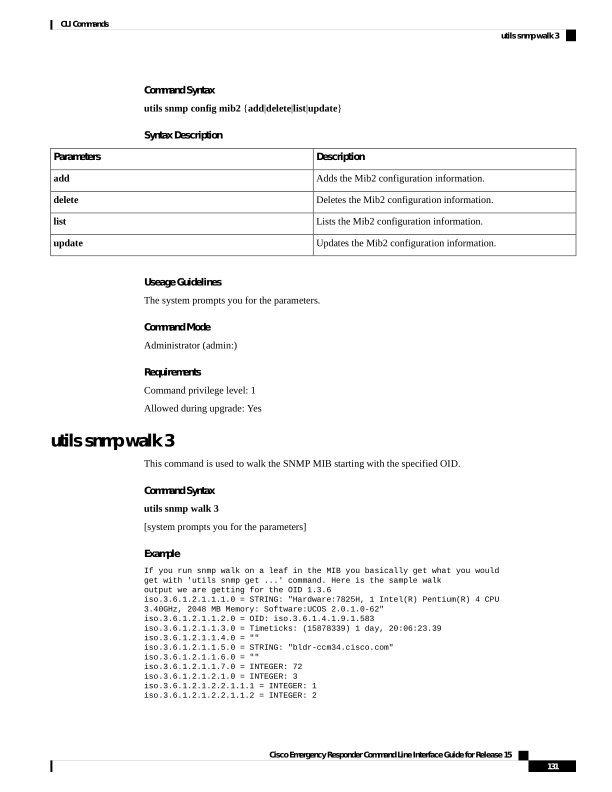
Page 144
iso.3.6.1.2.1.2.2.1.1.3 = INTEGER: 3
iso.3.6.1.2.1.2.2.1.2.1 = STRING: "lo"
iso.3.6.1.2.1.2.2.1.2.2 = STRING: "eth0"
iso.3.6.1.2.1.2.2.1.2.3 = STRING: "eth1"
iso.3.6.1.2.1.2.2.1.3.1 = INTEGER: 24
iso.3.6.1.2.1.2.2.1.3.2 = INTEGER: 6
iso.3.6.1.2.1.2.2.1.3.3 = INTEGER: 6
iso.3.6.1.2.1.2.2.1.4.1 = INTEGER: 16436
iso.3.6.1.2.1.2.2.1.4.2 = INTEGER: 1500
iso.3.6.1.2.1.2.2.1.4.3 = INTEGER: 1500
iso.3.6.1.2.1.2.2.1.5.1 = Gauge32: 0
iso.3.6.1.2.1.2.2.1.5.2 = Gauge32: 100000000
iso.3.6.1.2.1.2.2.1.5.3 = Gauge32: 10000000
iso.3.6.1.2.1.2.2.1.6.1 = Hex-STRING: 00 00 00 00 00 00
iso.3.6.1.2.1.2.2.1.6.2 = Hex-STRING: 00 16 35 5C 61 D0
iso.3.6.1.2.1.2.2.1.6.3 = Hex-STRING: 00 16 35 5C 61 CF
iso.3.6.1.2.1.2.2.1.7.1 = INTEGER: 1
.....
If you provide an IP address of a remote host the command is executed on that remote host. You have to
provide the IP address, not the domain name.
Requirements
Command privilege level: 1
Allowed during upgrade: No
utils snmp get 3
This command gets the SNMP data for the specified MIB OID.
Command Syntax
utils snmp get 3
[system prompts you for the parameters]
Usage Guidelines
If you use this command on a specific OID (leaf) in the MIB, you will get the value of the MIB. The SNMP
get output of system uptime iso.3.6.1.2.1.25.1.1.0 = Timeticks: (19836825) 2 days, 7:06:08.25
If you provide an IP address of a remote host, the command is executed on that remote host. You have to
provide the IP address not the domain name.
Requirements
Command privilege level: 1
Allowed during upgrade: No
utils system
This command restarts the system on the same partition, restarts the system on the inactive partition, or shuts
down the system.
Cisco Emergency Responder Command Line Interface Guide for Release 15
132
CLI Commands
utils snmp get 3
Page 145
Command Syntax
utils system {restart | shutdown | switch-version}
Syntax Description
Description
Parameters
Restarts the system.
restart
Shuts down the system.
shutdown
Switches to the product release installed on the inactive partition.
switch-version
Usage Guidelines
The utils system shutdown command has a 5-minute timeout. If the system does not shut down within 5
minutes, the command gives you the option of doing a forced shutdown.
Requirements
Command privilege level: 1
Allowed during upgrade: No
utils system boot
This commands redirects where the system boot output gets sent.
Command Syntax
utils system boot {console| serial| status}
Syntax Description
Description
Parameters
Redirects the system boot output to the console.
console
Redirects the system boot output to the COM1 (serial port 1).
serial
Displays the where the serial boot output currently gets sent.
status
Requirements
Level privilege: 1
Command privilege: 1
Allowed during upgrade: Yes
Cisco Emergency Responder Command Line Interface Guide for Release 15
133
CLI Commands
utils system boot
Page 146
utils system upgrade
This command allows you to install upgrades and Cisco Option Package (COP) files from both local and
remote directories.
Command Syntax
utils system upgrade {initiate | cancel | status}
Syntax Description
Description
Parameters
Cancels the active upgrade.
cancel
Starts a new upgrade wizard or assumes control of an existing
upgrade wizard. The wizard prompts you for the location of the
upgrade file.
initiate
Displays the status of an upgrade.
status
Usage Guidelines
To upgrade the system, follow these steps:
1.
Use the utils system upgrade list command to display a list of the .iso upgrade files that are available on
the local disk or remote server from which you plan to upgrade.
2.
Use the utils system upgrade get command to get the upgrade file that you want to use.
3.
Use the utils system upgrade start command to start upgrading from the upgrade file that you received.
utils sso
This command provides information about SAML SSO authentication.
utils sso {enable | disable | status}
Syntax Description
Description
Parameters
Enables SAML SSO based authentication
enable
Disables SAML SSO based authentication.
disable
Provides the status of SAML SSO.
status
Command Modes
Administrator (admin:)
Requirements
Command privilege level: 1
Allowed during upgrade: No
Cisco Emergency Responder Command Line Interface Guide for Release 15
134
CLI Commands
utils system upgrade
Page 147
Applies to: Cisco Emergency Responder
Example
Admin: utils sso enable
*** W A R N I N G ***
SSO cannot be enabled using CLI command
To enable SAML SSO in the Cisco Emergency Responder server group, please
access ER Administration Page->System->SAML Single Sign On
utils sso recovery-url
This command enables or disables recovery URL for SAML SSO based authentication.
utils sso recovery-url {enable | disable}
Syntax Description
Description
Parameters
Enables recovery URL for SAML SSO based authentication.
enable
Disables recovery URL for SAML SSO based authentication.
disable
Command Modes
Administrator (admin:)
Requirements
Command privilege level: 1
Allowed during upgrade: Yes
Applies to: Cisco Emergency Responder
utils vmtools status
This command shows the version of the currently running VMware Tools.
Command Syntax
utils vmtools status
Requirements
Command privilege level: 0
Allowed during upgrade: Yes
utils vmtools upgrade
This command updates the currently installed VMware Tools to the latest version required by the ESXi host
for that VM.
Cisco Emergency Responder Command Line Interface Guide for Release 15
135
CLI Commands
utils sso recovery-url
Page 148
Command Syntax
utils vmtools upgrade
Cisco Emergency Responder Command Line Interface Guide for Release 15
136
CLI Commands
utils vmtools upgrade