Document Metadata
Format: PDF 1.7
Title: Configure Single Number Reach for CallManager
Producer: iText® Core 7.2.5 (AGPL version), pdfHTML 4.0.5 (AGPL version) ©2000-2023 iText Group NV
Creation Date: D:20250227114553-06'00'
Mod Date: D:20250227113023-08'00'
Page 1
Configure Single Number Reach for CallManager
Contents
Introduction
Prerequisites
Requirements
Components Used
Background Information
Configure
User Configuration
Remote Destination Profile Configuration
Remote Destination Configuration
Verify
Troubleshoot
Introduction
This document describes the inputs and modifications commonly used when configuring Cisco Unified
Mobility Application known as Mobile Connect.
Prerequisites
Requirements
Cisco recommends that you have knowledge of these topics:
Remote destination Phone cannot be a phone registered to the same cluster. It could be a phone in a
different cluster or a PSTN phone across the trunk/gateway .
•
Remote destination phone can be reachable from the cluster of the desk phone .
•
Components Used
The information in this document is based on these software versions:
Cisco Unified Call Manager (CUCM) 11.0.1.21900-11
•
The information in this document was created from the devices in a specific lab environment. All of the
devices used in this document started with a cleared (default) configuration. If your network is live, ensure
that you understand the potential impact of any command.
Background Information
Cisco Unified Mobility application known as Mobile Connect, commonly called Single Number Reach
(SNR), provides Cisco Unified Communications users with the ability to be reached via a single enterprise
Page 2
phone number that rings on both their IP desk phone and their cellular phone (Remote Destination),
simultaneously. Mobile Connect users can pick up an incoming call on either of their desk or cellular phones
and at any point and can move the in-progress call from one of these phones to the other without
interruption.
Configure
When you work with CUCM, the performed tasks are related to these activities:
User Configuration
•
Remote Destination Profile Configuration
•
Remote Destination Configuration
•
User Configuration
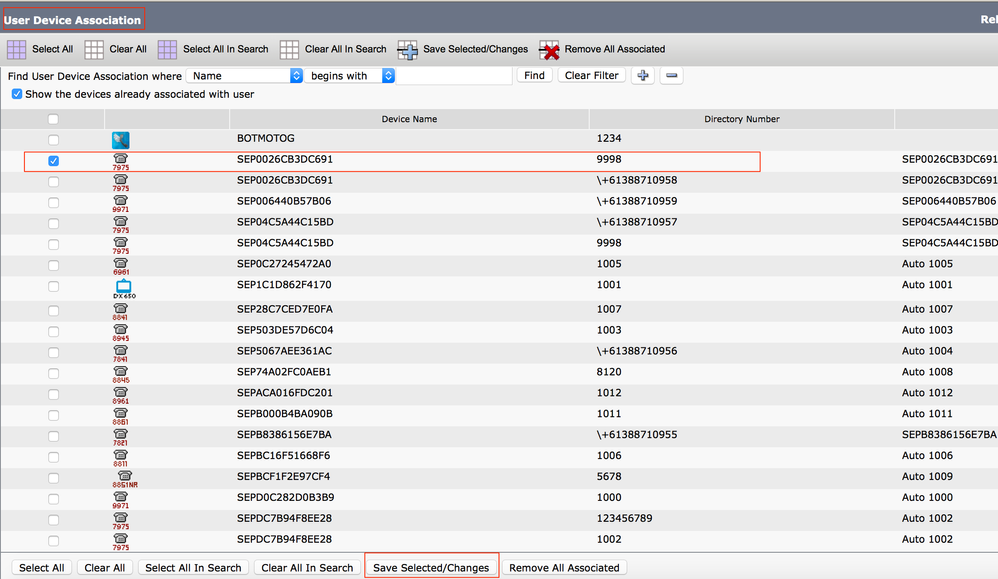
You are directed to a User Device Association page, where you can select the device which needs to be
associated as the deskphone of the user, then click Save Selected/Changes, as shown in the image:

Page 3
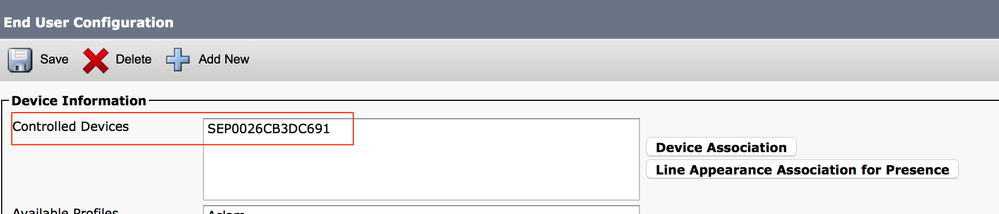
Once done, as shown in the image, you must see the device name in the section controlled devices.
Choose the Primary extension for the device, as shown in this image:
Check the Enable Mobility check box. You can also modify the Maximum Wait Time for Desk Pickup and
Remote Destination Limit, if required. Moreover, the default values can be seen in the image:
Remote Destination Profile Configuration
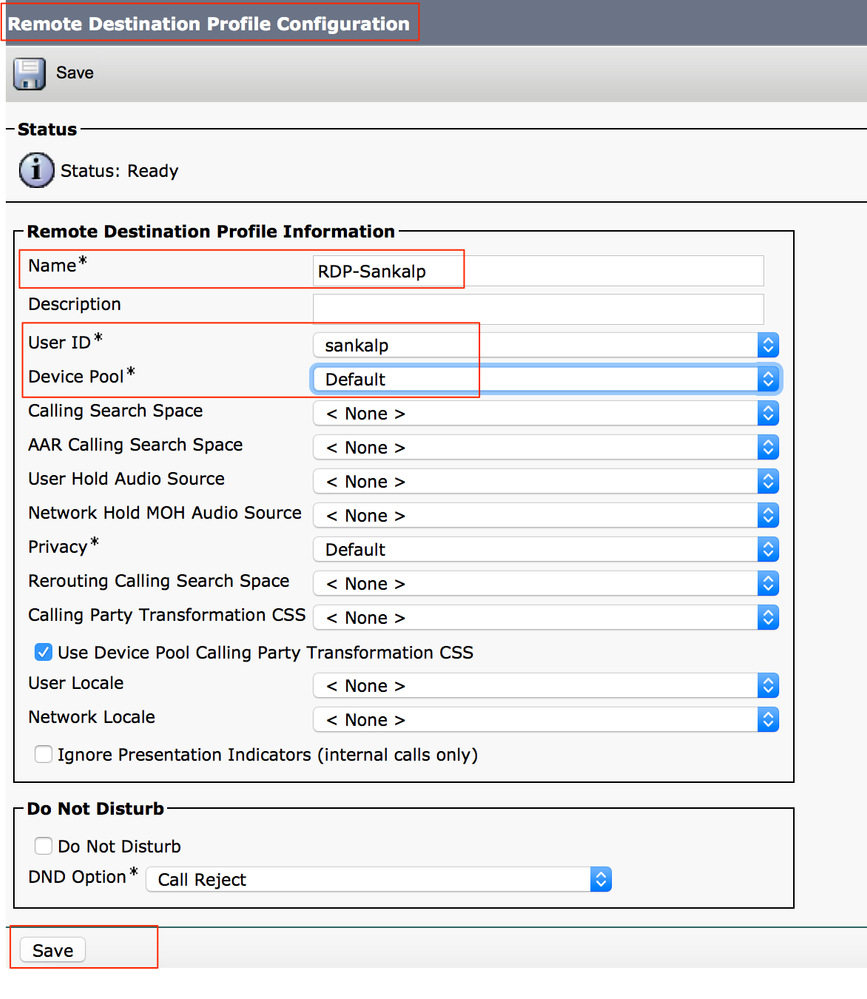
Create a Remote Destination Profile (RDP) for the end user .
In order to create a new RDP profile, navigate to Device > Device Settings > Remote Destination Profile >
Add new.


Page 4
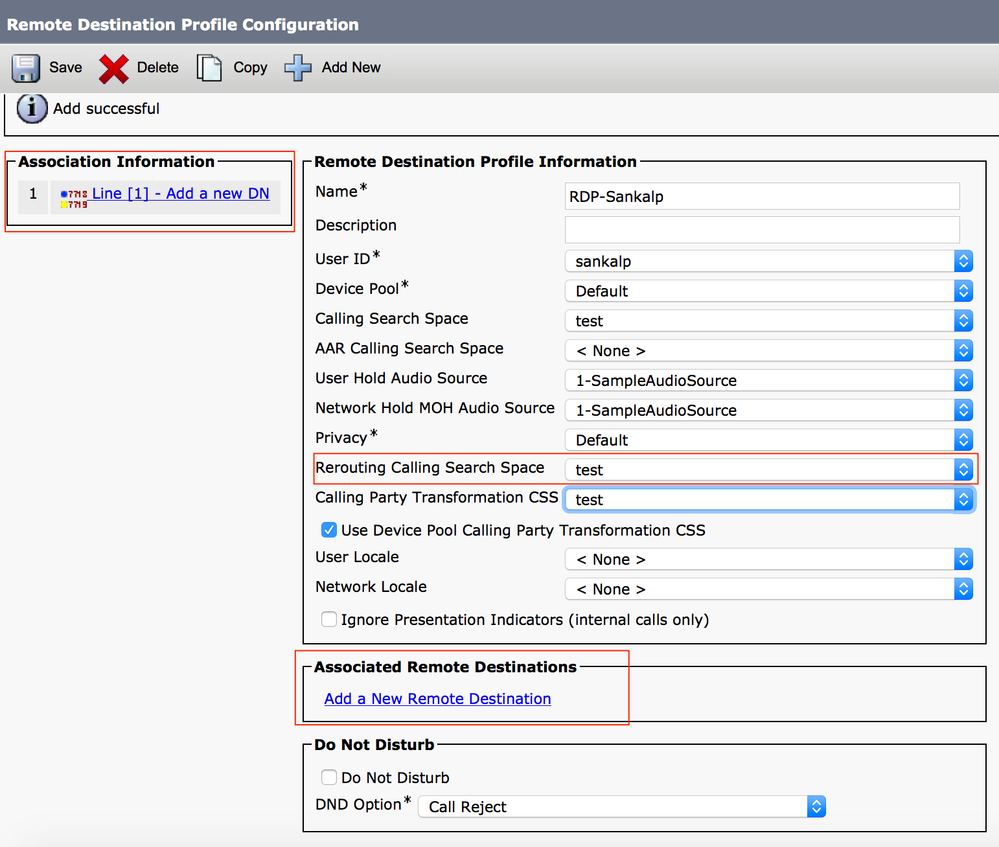
Click Save. Now, you can see an option to add a new Directory Number (DN).
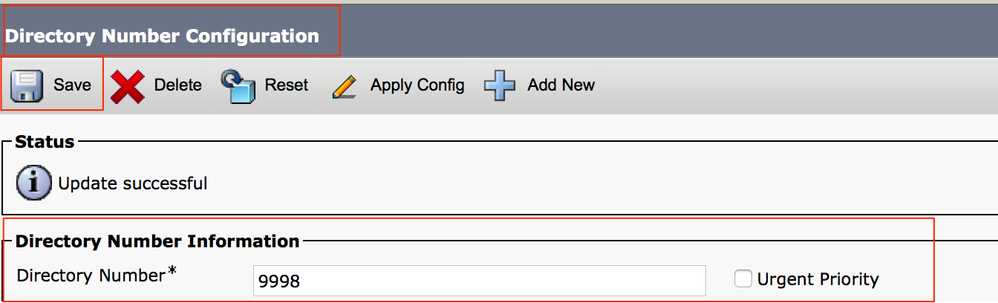
Click Add a new DN to navigate to a directory number configuration where you need to specify the
directory number of the desk phone with which you need to associate the RDP. Click Save.
Page 5
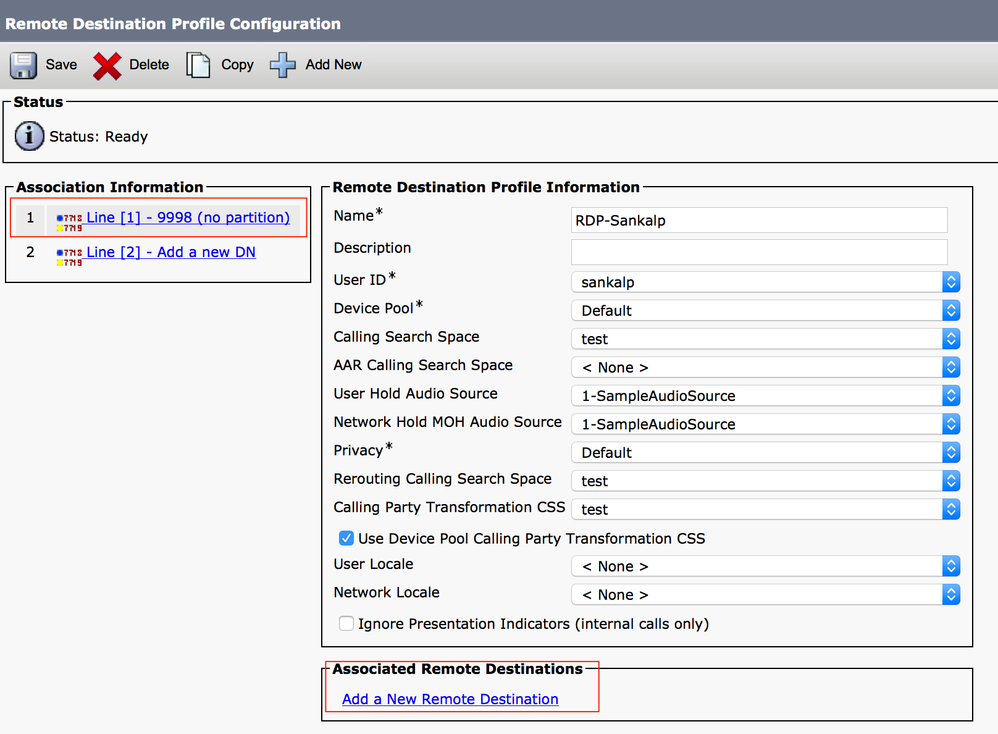
It is also important to know that the CUCM attempts to reach the remote destination through the Rerouting
calling search Space.
After you save the directory number, specify the correct CSS against Rerouting calling search space.
Click Add a New Remote Destination, as shown in the image:
Page 6
Remote Destination Configuration
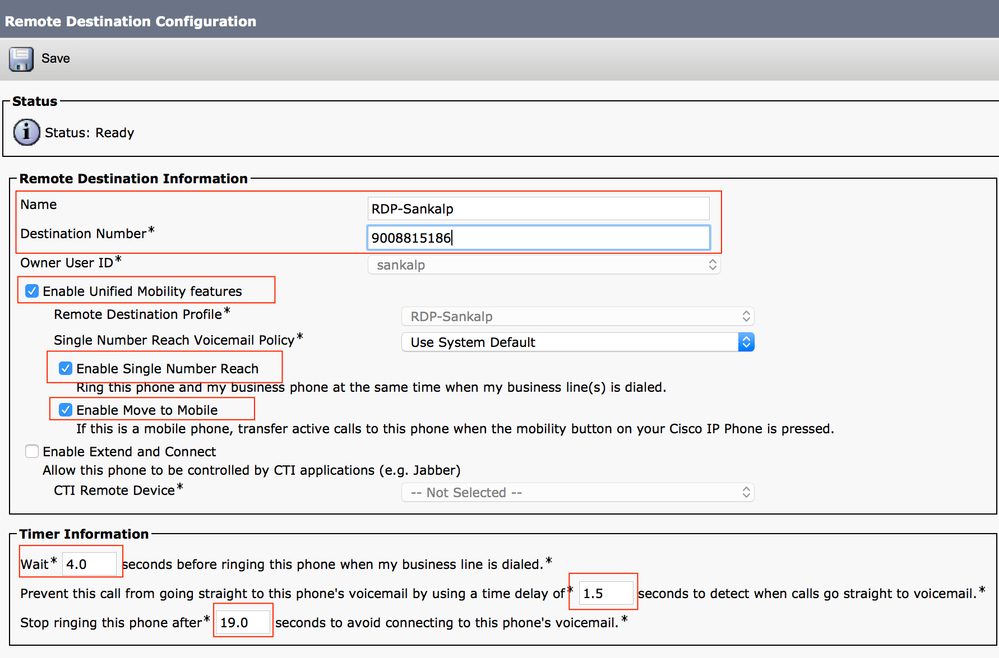
Specify the Destination number, as this is the number for your remote destination .
Ensure that the check box, Enable Unified Mobility features, Enable Single Number Reach, Enable
Move to Mobile, is checked.
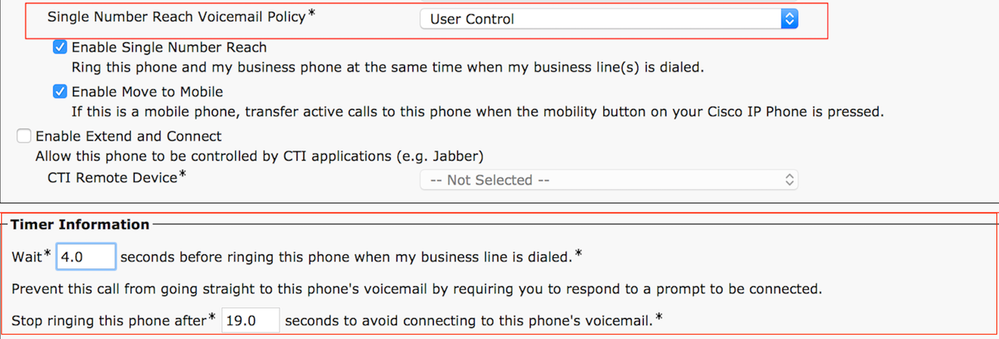
Single Number Reach Voicemail Policy provides two options:
Timer Control (default)
1.
User Control
Under the Timer Information section, specify the amount of delay before the Remote Destination
can ring.
In case the Remote Destination is required to ring immediately, you can set the Wait* as zero.
It is also important to calibrate the time in which the service provider of the remote destination sends
the call to the voice-mail of the remote destination. The Stop ringing this phone after value can be
set to lesser than that to ensure that the call does not go to the voicemail of the cell phone. This time
value is specified against Stop ringing this phone after.
In the previous call manager version, these parameters had different names:
2.
Delay before ringing timer
•
Page 7
Answer too soon timer
•
Answer too late timer
•
If the SNR voicemail policy is configured for User Control, the timer information changes, as shown in the
image:
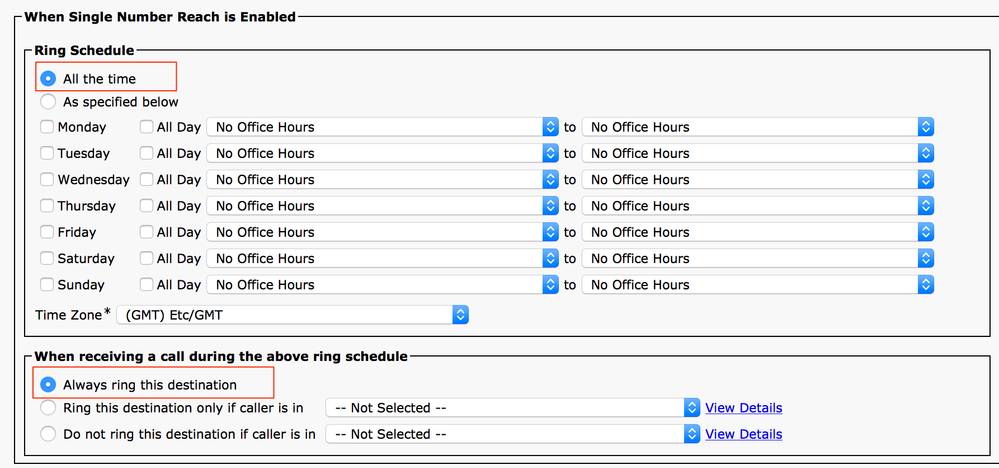
In case the SNR configuration needs to be restricted based on time and day, these options are modified as
required. If no restriction needs to be applied, the Ring Schedule can be set to All the time and When
receiving a call during the ring schedule can be set to Always ring this destination.
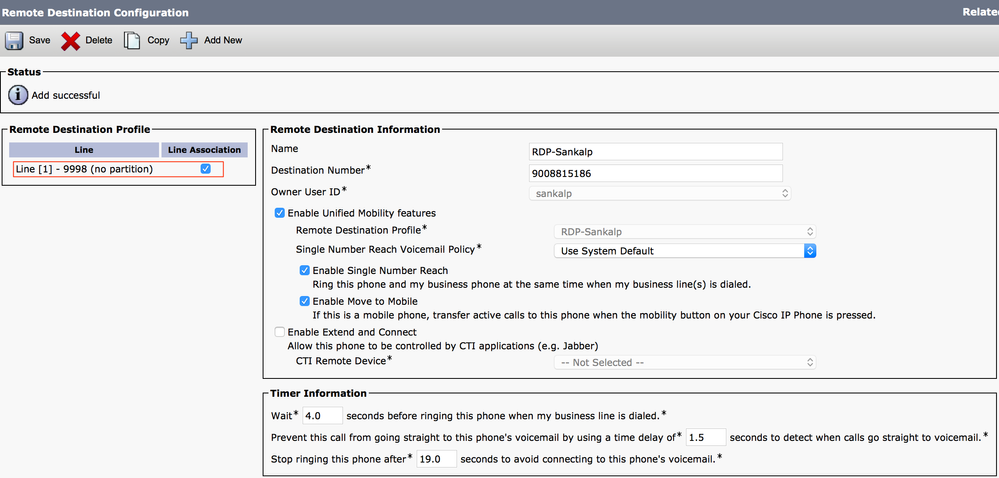
After you complete the configuration of remote destination, click Save.
Page 8
Check the checkbox, which is next to the line, and click Save.
Verify
Use this section in order to confirm that your configuration works properly.
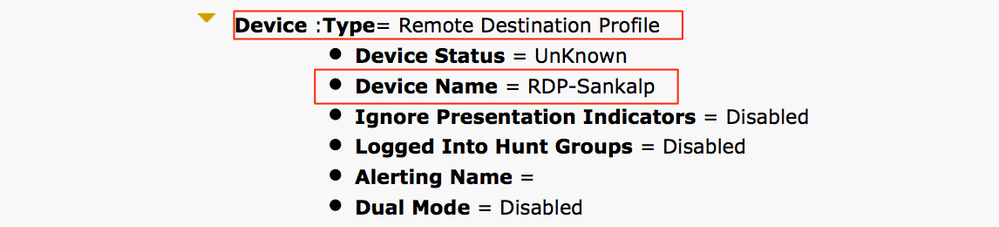
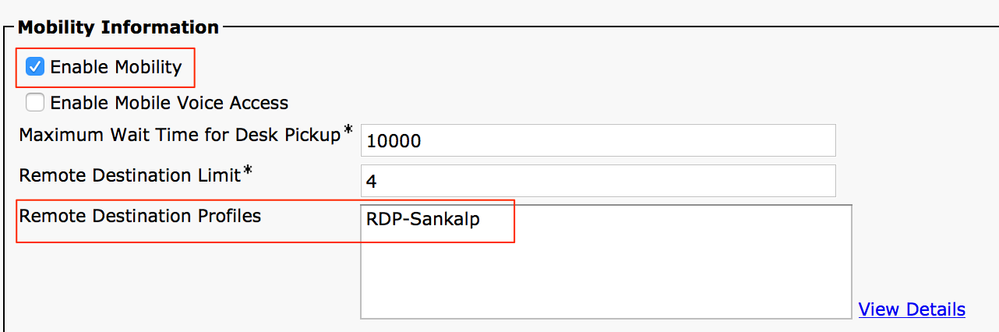
Verify the name of the Remote Destination Profile, which is reflected on the End user page.
Page 9
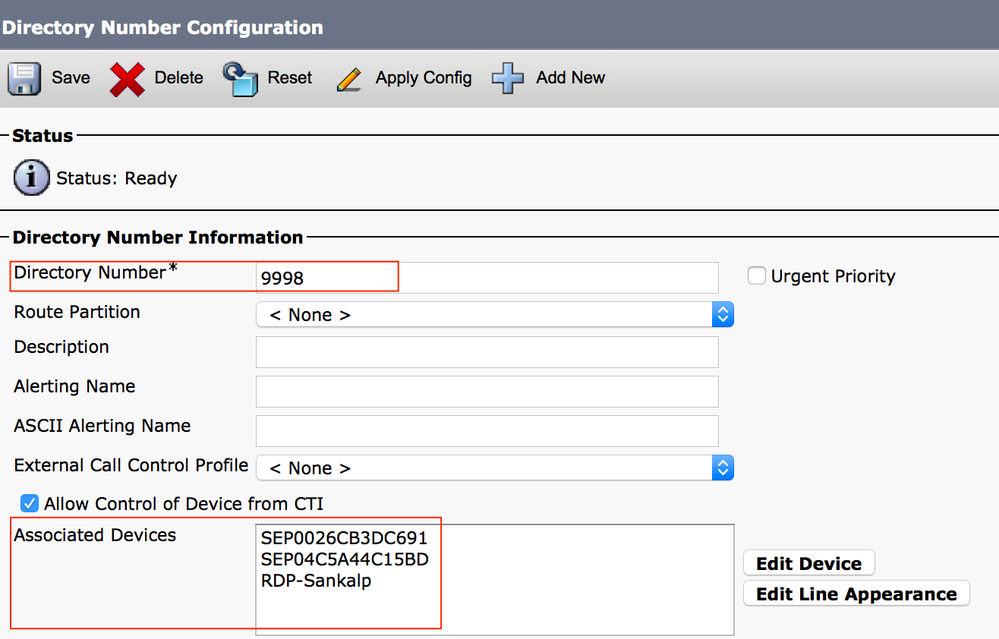
On the directory number page, you must see the name of the Remote Destination Profile in the section
Associated Devices.
Perform a test through Dialed Number Analysis to check whether the call manager directs the call to the
remote destination based on configuration or not.
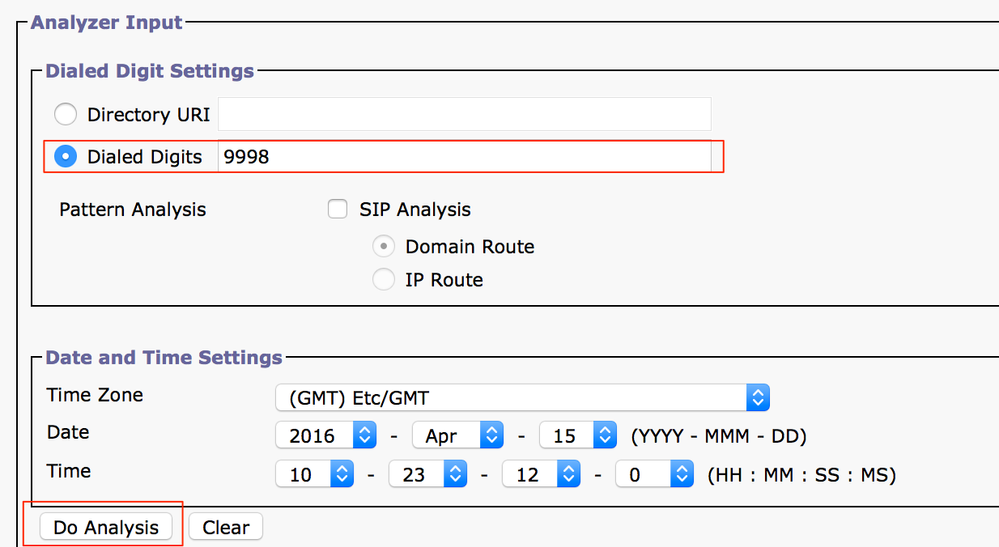
In order to perform a dialed number analysis, navigate to Cisco Unified Serviceability > Tools > Dialed
Number Analyzer > Analysis > Phones > Find > Choose the calling phone.
Specify the Directory number of the desk phone and click Do Analysis.
Page 10
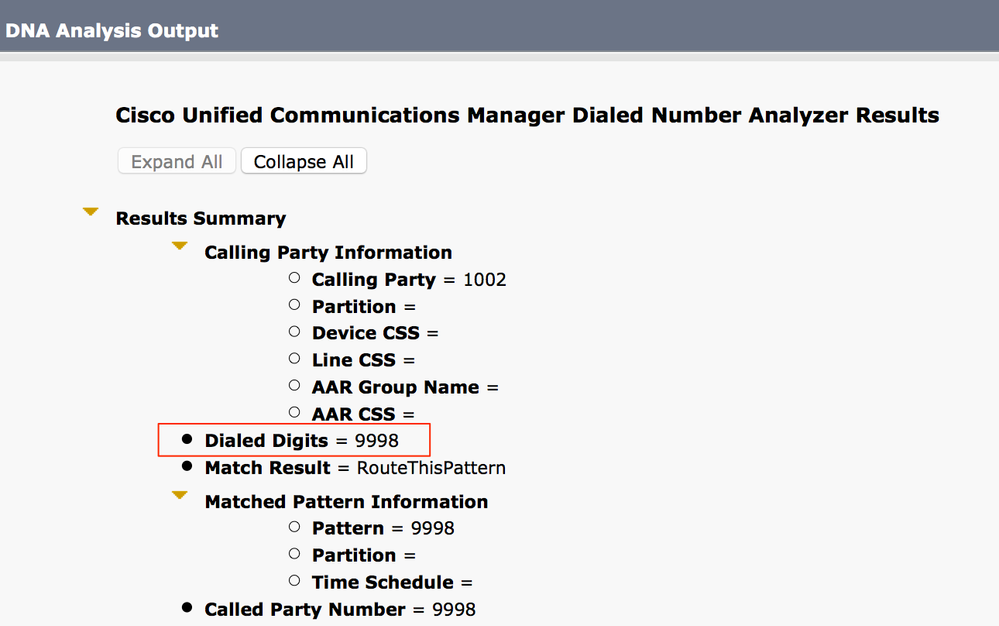
On the Analysis output, the call is extended to the RDP along with the desk phone, which confirms the
eventual effects of SNR configuration.
Page 11
Troubleshoot
There is currently no specific information available to troubleshoot this configuration.